background image

Bischoff & Bischoff GmbH | 16.10.2017

EN

11

10

RL-SMART

 | Lightweight rollator

Lightweight rollator | 

RL-SMART

• 

Repeat the process for the other side. Make sure that both handles 
are at the same height.

4.5. Brake application and  


 adjustment

Service brake

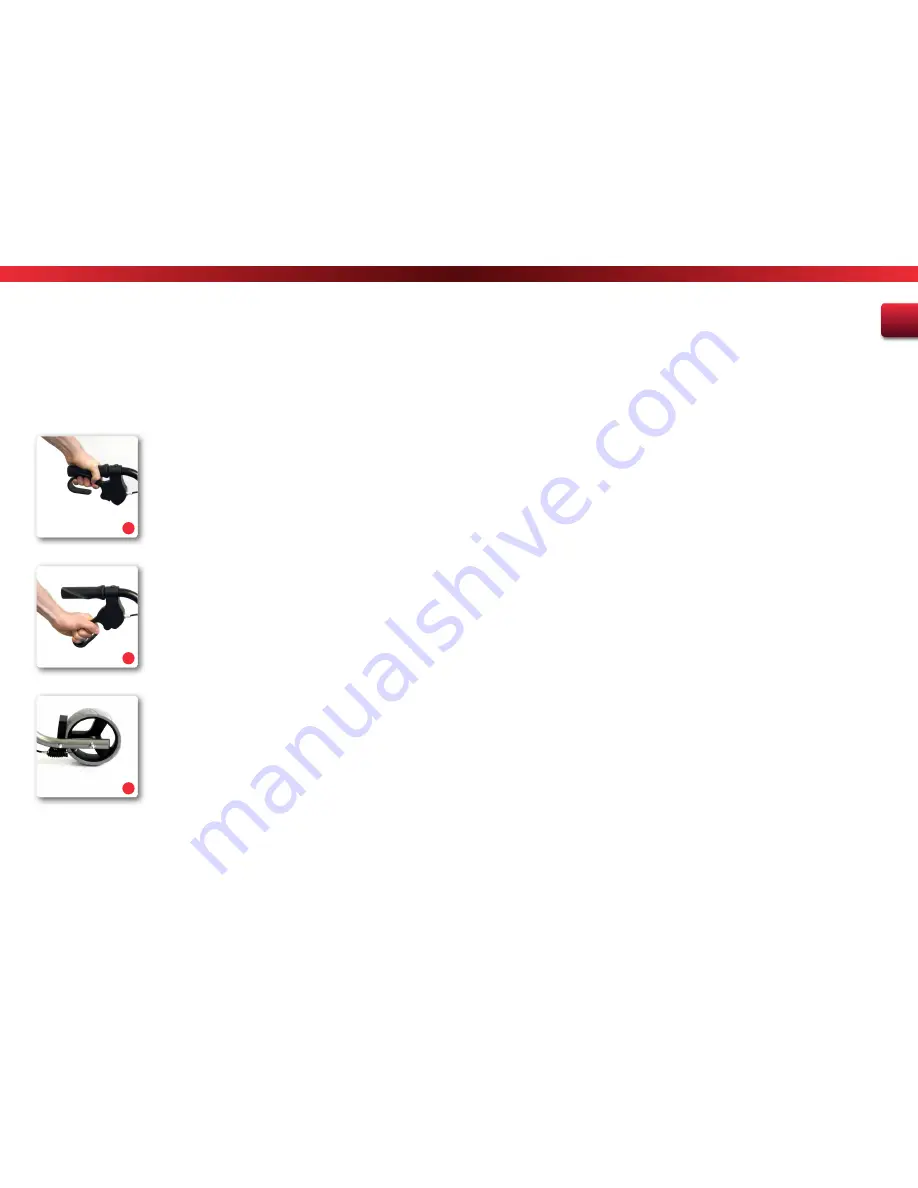
The service brake is operated by both hand brake levers on the
handles by pulling upwards (Fig. 7). Service and parking brakes
affect the running wheels.

Parking brake

• 

To lock, push both brake levers downwards (Fig. 8).

• 

To release, pull both brake levers back to the central position.

Brake adjustment

The brake is set properly, if the brake pins do not touch the wheel and 
the locking brake can be activated easily.

• 

To adjust the brake to make it harder, unscrew the knurled-screw 
(Fig.8) on the braking mechanism and lock it with the other nut.

• 

With the adjusting of the Bowden cable (M6), loosen the locknut 
first.

• 

Next the threaded sleeve is adjusted until the correct adjustment is 
found. To prevent the setting from changing, the threaded sleeve 
(M6) must be locked with the nut (M6).

• 

To adjust the brake to make it softer, follow the above procedure in 
reverse.

4.6. Wheels and tyres

Your rollator is fitted with puncture resistant PU wheels with
sizes 190 x 43 mm at the front and 170 x 43 mm at the back.

7

8

9

5. Use

Walking

Make your first attempts to walk with the rollator on a flat, firm surface. 
Familiarise yourself with the function of the brakes. Let someone 
accompany you during this initial period.  

For an anatomically correct gait, the push handles must be set at 
proper height (see sec. 4.4).

• 

Place yourself in the rollator so that your ankles are at the height of 
the rear wheels. 

• 

Stand with good posture. 

• 

Grasp the push handles with both hands and your arms bent at a 
slight angle

.

When walking with the rollator try to stay as close as possible with 
the body to the push handles. This increases the stability and safety 
against tipping over; in addition, avoid a crooked back. Try to generally 
walk in the rollator and not behind it. Take small steps and do not push 
the rollator too far ahead. 

You can determine the change of direction and speed by pushing 
the rollator. Always use the brakes to slow down your movement. The 
rollator could otherwise turn with the unbraked wheel and the braked 
wheel, and could fall over. 

Go around obstacles whenever possible. Try to use ramps or take lifts. If 
this is not possible, the rollator must be carried over the obstacle. Find 
a second person to help you do this, if possible

.

Summary of Contents for RL-smart

Page 1: ...Enjoy mobility Bedienungsanleitung Enjoy mobility Instruction manual RL SMART ...

Page 2: ...1 Brake Inspection 13 7 2 2 Checking the tyres 14 8 Maintenance tips for retailers 14 9 Storage shipping 15 10 Re use 15 11 Repairs 15 12 Disposal 16 13 Warranty certificate 17 1 Introduction Dear Customer Congratulations on your decision to purchase this rollator It is a German product that will improve your everyday life and bring you much enjoyment Before you take your first steps with the roll...

Page 3: ...ows a place to rest during longer distances The rollator must be used on level and solid ground only The product must not be used as a climbing aid or means of transport for heavy loads 2 3 Purpose The rollator is intended to support mobility of persons with an impaired ability to walk in accordance with the above mentioned indications 2 4 Declaration of Conformity B B as manufacturer of the produ...

Page 4: ...se contact our customer service Tel 49 700 6000 7070 We are only able to issue a guarantee if the product is used in accordance with the specified conditions and for the specified purpose 3 2 Type plate and Serial number The type plate Fig 1 and serial number are located on the bottom of the frame Manufacturer s logo Manufacturer s information Caution Follow instructions for use CE mark Important ...

Page 5: ... sure that the frame is laid out correctly and that it clicks into place 4 2 Folding up Apply the parking brakes Hold the rollator firmly with one hand on the handle With the other hand pull the strap on the seat upwards Fig 4 You need to push past the resistance of the locking mechanism 4 3 Installing the functional bag The B B Rollator is unfolded Apply the parking brakes Position yourself with ...

Page 6: ...or is fitted with puncture resistant PU wheels with sizes 190 x 43 mm at the front and 170 x 43 mm at the back 7 8 9 5 Use Walking Make your first attempts to walk with the rollator on a flat firm surface Familiarise yourself with the function of the brakes Let someone accompany you during this initial period For an anatomically correct gait the push handles must be set at proper height see sec 4 ...

Page 7: ...enance tips for users 7 1 Cleaning and disinfection The frame and the paneling of the wheelchair can be cleaned with a moist cloth You can use a mild detergent for more stubborn dirt The wheels can be cleaned with a wet synthetic fiber brush do not use a wire brush Push handles arm pads and seat pads can be washed off Use a mild detergent Use a disinfectant listed by VAH for disinfection 7 2 Rolla...

Page 8: ... in accordance to the service plan and must be in good condition 9 Storage shipping In the event that the rollator will be stored or shipped it is advised to keep the original packaging to store in it for this purpose so that it is on hand if necessary Then your rollator can be optimally protected against environmental influences during storage or transport 10 Re use The rollator is suitable for r...

Page 9: ...ulations of your local jurisdiction 13 Warranty certificate Guarantees refer to all faults of the product that are attributed to material of manufacturing faults In the event of complaints the complete filled in warranty certificate shall be submitted Warning Non observance of the instruction manual improper maintenance and in particular any technical changes and supplements added fittings without...

Page 10: ... authorized retailer Specialist retailer Date and stamp Please note our general business terms and conditions The serial number is located on the side frame Tip In spite of careful research and editing incorrect information may have crept into our operating manuals The current version of each of the operating manuals can be found in the download area of our website www bischoff bischoff com ...

Page 11: ...Bischoff Bischoff GmbH Becker Göring Straße 13 D 76307 Karlsbad www bischoff bischoff com ...

Reviews: