background image

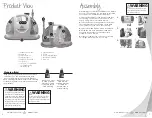
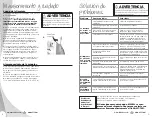
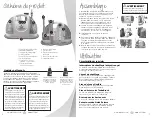
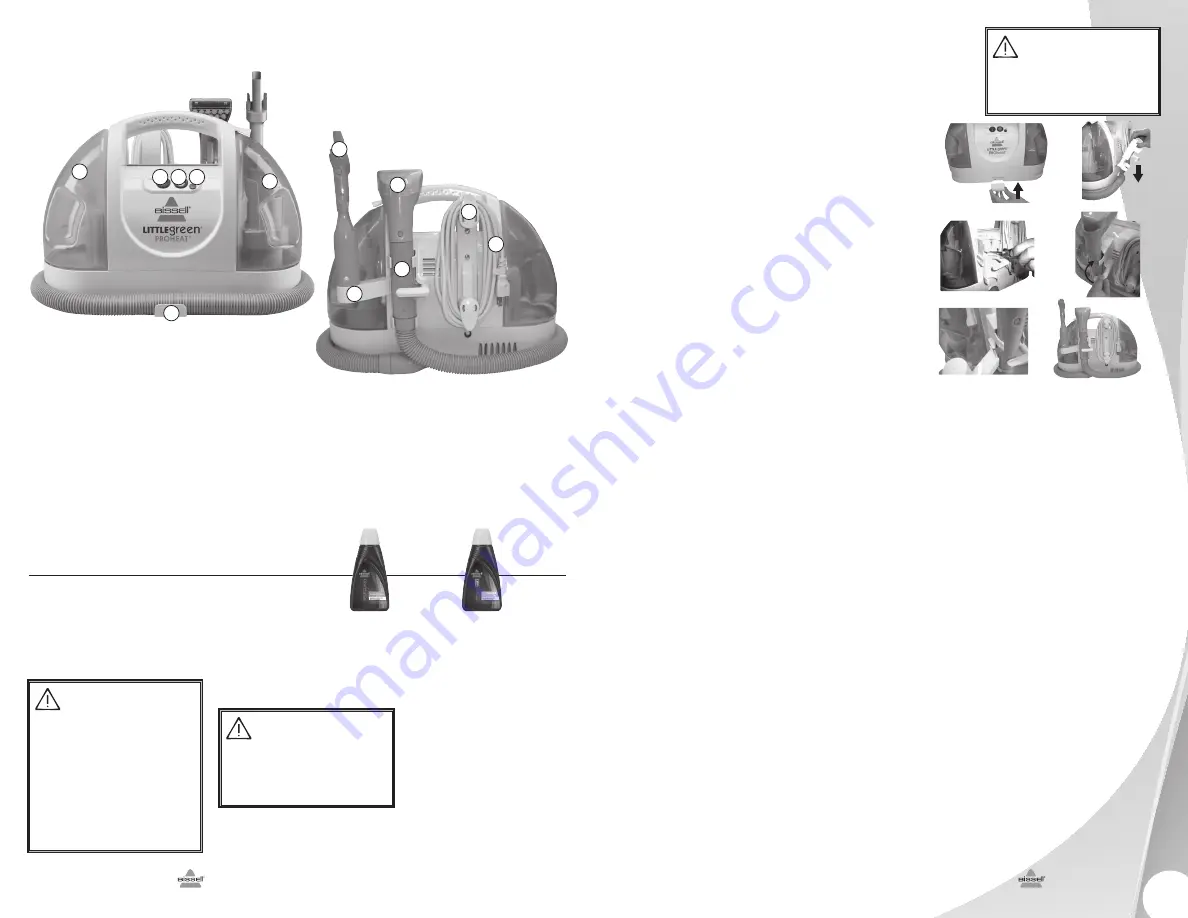
1  Clean Water/Solution Tank

2  Power Switch

3  Built-In Heater Switch

4  Heat Indicator Light

5  Dirty Water/Collection Tank

6  Flex Hose Clip

7   2-in-1 Crevice Tool* or TurboBrush® 

Tool* or Deep Reach Tool*  

*Select Models only

8  Tough Stain Brush Tool

9  Tool Clip

10  Flex Hose with Spray Trigger

11  Quick Release™ Cord Wrap

12  Power Cord

WARNING

To reduce the risk of fire and electric shock 

due to internal component damage, use 

only BISSELL cleaning fluids intended for use 

with the deep cleaner. 

www.BISSELL.com   

   800.237.7691

5

Cleaning fluid 

Keep plenty of genuine BISSELL 2X Formula  

on hand so you can clean whenever it fits  

your schedule. Always use genuine BISSELL 

deep cleaning formulas. Non-BISSELL cleaning 

solutions may harm the machine and will void 

the warranty.

WARNING

Use only BISSELL 2X compact formulas in 

your cleaner. Use of cleaning formulas which 

contain lemon or pine oil may damage this 

appliance and void the warranty. Chemical 

spot cleaners or solvent-based soil removers 

also should not be used. These products may 

react with the plastic materials used in your 

cleaner, causing cracking or pitting.

www.BISSELL.com   

   800.237.7691

4

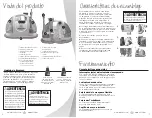
Product View

1

2 3 4

5

6

7

8

11

12

10

9

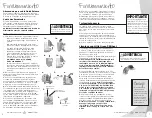
Assembling your Little Green PROheat is a simple 

process. The only thing you will need to assemble 

your cleaner is a Phillips-head screwdriver.

1. 

Slide the back plate of the flex hose clip into 

the opening on the front of the unit. You will 

hear a “snap” when it is locked in place.

2. 

Take the flex hose storage bracket and slide 

the lower plate into the opening on the back  

of unit. Make sure the screw holes line up.

3. 

Insert screw and tighten with a screwdriver.

4. 

Wrap the flex hose around unit and place 

hose grip into bracket. Turn bracket latch  

clockwise to lock in place.

5. 

Slide tool clip into slit on flex hose (located  

on storage bracket) place tool on clip.

Assembly

WARNING

Do not plug in your portable deep cleaner 

until you are familiar with all instructions 

and operating procedures.

1.

3.

2.

5.

4.

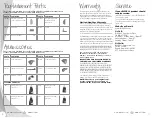
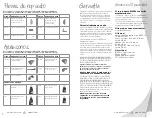
BISSELL 2X Spot 

& Stain Portable 

Machine Formula 

for Carpet Spot & 

Stain Cleaning

BISSELL 2X Pet 

Stain & Odor 

Portable Machine 

Formula for 

Carpet Spot & 

Stain Cleaning

Summary of Contents for LITTLE GREEN PROHEAT

Page 1: ...LITTLE GREEN PROHEAT USER GUIDE 1425 SERIES ...

Page 2: ...t carry the appliance while in use READ ALL INSTRUCTIONS BEFORE USING YOUR PORTABLE DEEP CLEANER Whenusinganelectricalappliance basicprecautionsshouldbeobserved includingthefollowing This model is for household use only Commercial use of this unit voids the manufacturer s warranty SAVE THESE INSTRUCTIONS FOR FUTURE USE www BISSELL com 800 237 7691 3 WARNING Improperconnectionoftheequipment groundi...

Page 3: ...movers alsoshouldnotbeused Theseproductsmay reactwiththeplasticmaterialsusedinyour cleaner causingcrackingorpitting www BISSELL com 800 237 7691 4 Product View 1 2 3 4 5 6 7 8 11 12 10 9 Assembling your Little Green PROheat is a simple process The only thing you will need to assemble your cleaner is a Phillips head screwdriver 1 Slide the back plate of the flex hose clip into the opening on the fr...

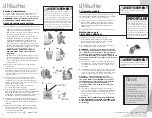
Page 4: ...ns page 2 5 Press power switch to ON position Press the red heater switch to ON Within 30 seconds the heat indicator light will illuminate indicating the heater has reached the proper temperature 6 Begin by pressing the spray trigger for 5 10 seconds to allow the non heated water to travel through the heater 7 Press and hold spray trigger spray will start in a few seconds Raise the tool slightly t...

Page 5: ...n will remove the dirt and cleaning solution Continue until no more dirt can be removed NOTE If using the TurboBrush Tool move the switch to the SUCTION position This activates the suction to remove the dirt and cleaning solution Move the switch back to the BRUSH position for additional brushing action 5 As a final step use drying strokes by not pressing the spray trigger to remove as much liquid ...

Page 6: ...OSE ARE LIMITED TO THE ONE YEAR DURATION FROM THE DATE OF PURCHASE AS DESCRIBED ABOVE Some states do not allow limitations on how long an implied warranty last so the above limitation may not apply to you NOTE Please keep your original sales receipt It provides proof of date of purchase in the event of a warranty claim If your BISSELL product should require service Contact BISSELL Consumer Care to...

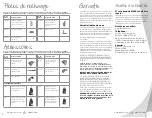
Page 7: ...on page 11 for details Call BISSELL Consumer Care 1 800 237 7691 Monday Friday 8 am 10 pm ET Saturday 9 am 8 pm ET Sunday 10am 7pm ET Write BISSELL Homecare Inc PO Box 3606 Grand Rapids MI 49501 ATTN Consumer Care BISSELL Consumer Care Register your product today BISSELL Rewards Points Automatically earn points for discounts and free shipping on future purchases Faster Service Supplying your infor...

Page 8: ... como cigarrillos fósforos o cenizas calientes Mantenga el electrodoméstico sobre una superficie nivelada No transporte el electrodoméstico mientras esté en uso LEA TODAS LAS INSTRUCCIONES ANTES DE UTILIZAR SU LIMPIADORA PROFUNDA PORTÁTIL Cuandoutiliceelectrodomésticos deberespetarlasmedidasdeprecauciónbásicas loqueincluyelassiguientes Este modelo es solo para uso doméstico GUARDE ESTAS INSTRUCCIO...

Page 9: ...nillador Phillips 1 Deslice la placa posterior del sujetador de la manguera flexible en la abertura de la parte delantera de la unidad Escuchará un chasquido cuando esté segura en su lugar 2 Sostenga la abrazadera de almacenamiento de la manguera flexible y deslice la placa inferior en la abertura de la parte posterior de la unidad Asegúrese de que los orificios para los tornillos estén alineados ...

Page 10: ... eficacia de la limpieza mejorará si aplica tratamientos previos en las áreas muy mancha das o muy sucias Siga estas instrucciones para hacerlo 1 Sostenga la herramienta de limpieza inmedia tamente sobre la superficie de la alfombra o la tapicería que va a limpiar Presione el gatillo para liberar un chorro de solución de limpieza directa mente en el área sucia 2 Espere entre 3 a 5 minutos antes de...

Page 11: ...a delamisma Problema Causas posibles Soluciones La cantidad de rociado es reducida o no hay rociado La boquilla del rociador está obstruida Limpie la boquilla del rociador El tanque de agua limpia solución está vacío Revise rellene el tanque El accesorio del tanque de agua limpia solución está obstruido Limpie el accesorio al fondo del tanque de agua limpia solución La bomba necesita cebarse Levan...

Page 12: ...PRA COMO SE DETALLÓ ANTERIORMENTE Algunos estados no permiten limitaciones sobre el tiempo de duración de una garantía implícita de modo que la limitación anterior puede no aplicarse en su caso NOTA Conserve el recibo de venta original Es el comprobante de la fecha de compra en caso de una reclamación de garantía Si su producto BISSELL necesita mantenimiento Visite BISSEL com o póngase en contacto...

Page 13: ... página 11 Atención al Consumidor de BISSELL Registre su producto hoy Puntos de recompensa BISSELL Obtenga automáticamente puntos para descuentos y entrega a domicilio gratis en compras futuras Servicio más rápido Si envía la información ahora ahorrará tiempo por si necesita ponerse en contacto con nosotros con preguntas relacionadas con el producto Recordatorios y alertas del centro de servicio d...

Page 14: ... produit de débouchage etc N aspirez jamais d objets brûlants ou fumants par exemple une ciga rette une allumette ou des cendres chaudes Entreposez l appareil sur une sur face plane Évitez de soulever l appareil lorsqu il est en marche AVANT D UTILISER VOTRE APPAREIL DE NETTOYAGE EN PROFONDEUR PORTABLE VEUILLEZ LIRE TOUTES LES INSTRUCTIONS Lorsquevousutilisezunappareilélectrique vousdevezsuivre en...

Page 15: ...me 1 Glissez la plaque arrière de la pince du tuyau flexible dans l ouverture sur le devant de l appareil Vous devez entendre un déclic une fois qu elle est verrouillée à sa place 2 Prenez le support de rangement du tuyau flexible et glissez la plaque inférieure dans l ouverture située à l arrière de l appareil Vérifiez que les trous de vis sont alignés 3 Introduisez la vis et vissez la avec un to...

Page 16: ...iron 2 5 cm de la surface salie Appuyez sur la détente de pulvérisation pour mettre de la solution de nettoyage sur la surface salie 2 À l aide de la brosse de l accessoire frottez délicatement l endroit à nettoyer REMARQUE Lorsque vous utilisez l accessoire de nettoyage en profondeur modèles sélection nés gardez le en contact avec la moquette au moment de la pulvérisation Si vous utilisez la bros...

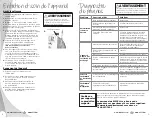
Page 17: ...vec nous au 1 800 237 7691 Veuillez ne pas rapporter ce produit au magasin Après le nettoyage 1 Mettez l interrupteur d alimentation à la posi tion d ARRÊT 2 Débranchez le cordon d alimentation de la prise de courant Remarque S il reste un certain volume de for mule Little Green et d eau dans le réservoir d eau propre de solution il est acceptable de l y laisser pour le prochain nettoyage 3 Videz ...

Page 18: ...es implicites de sorte que les limitations indiquées ci dessus peuvent ne pas s appliquer à vous REMARQUE Veuillez conserver votre reçu de vente original Il servira de preuve de la date d achat si vous devez faire une récl mation au titre de la garantie Si votre produit BISSELL doit être réparé Communiquez avec le service à la clientèle de BISSELL pour connaître l emplacement du centre de service ...

Page 19: ...ice à la clientèle de BISSELL 1 800 237 7691 Lundi au vendredi de 8 h à 22 h HNE Samedi de 9 h à 20 h HNE Dimanche de 10 h à 19 h HNE Écrivez à BISSELL Homecare Inc PO Box 3606 Grand Rapids MI 49501 À l attention de Service à la clientèle Service à la clientèle de BISSELL Enregistrez votre produit aujourd hui Des points de récompense BISSELL Obtenez automatiquement des points qui vous permettront ...

Reviews: