Magicians SOCD Cleaner V2
Section 10: Firmware
INSTALLATION MANUAL & USER GUIDE
REV B
PAGE 19
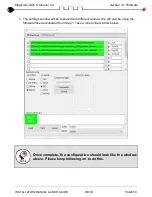
Notice the first four rows that are checked and highlighted in green. This is where you input
the files you downloaded from the product page. To choose a BIN file to input, click the three
dots icon to the right. It will open File Explorer so that you can navigate to where those files
are. If you did not move its location, it will likely still be in your downloads folder.
The files should be chosen in the following order to make it easier to follow along:
1.
bootloader.bin
2.
partition-table.bin
3.
ota_data_initial.bin
4.
f_antagonist-v2.bin
Once you have chosen all of the BIN files, you now need to type in the address to write the
BIN files to. Below shows the same order as before but with the addresses:
1.
0x0
2.
0x8000
3.
0xd000
4.
0x10000
Be sure that each row has the box checked next to it.
It is extremely important to have the addresses correct. Please
triple check to make sure it matches exactly as shown and not
out of order.
8.
Under the menu called SpiFlashConfig, make sure the settings are set exactly how the
example configuration was shown earlier. That means:
•
SPI SPEED = 80MHz
•
SPI MODE = DIO
•
DoNotChgBin = CHECKED
9.
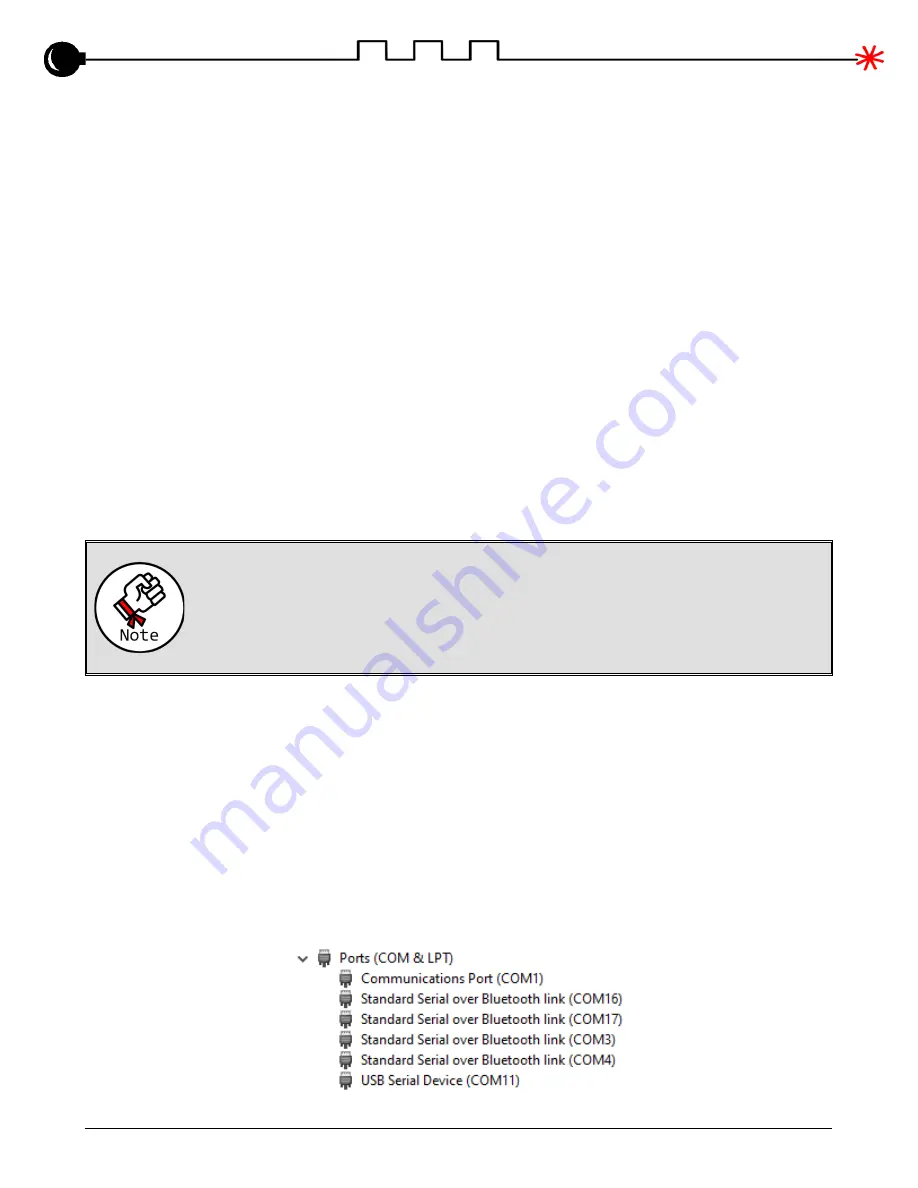
Next plug in the Magicians SOCD Cleaner V2 to the PC via a USB cable. Once
plugged in, Windows should be detecting and installing drivers for it. Once complete,
navigate to your Device Manager to see which COM port was created. Below, it is
shown as COM11.


