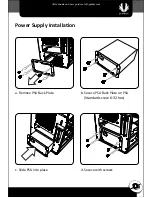
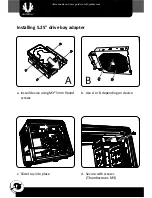
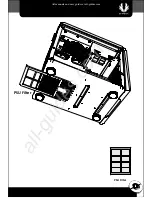
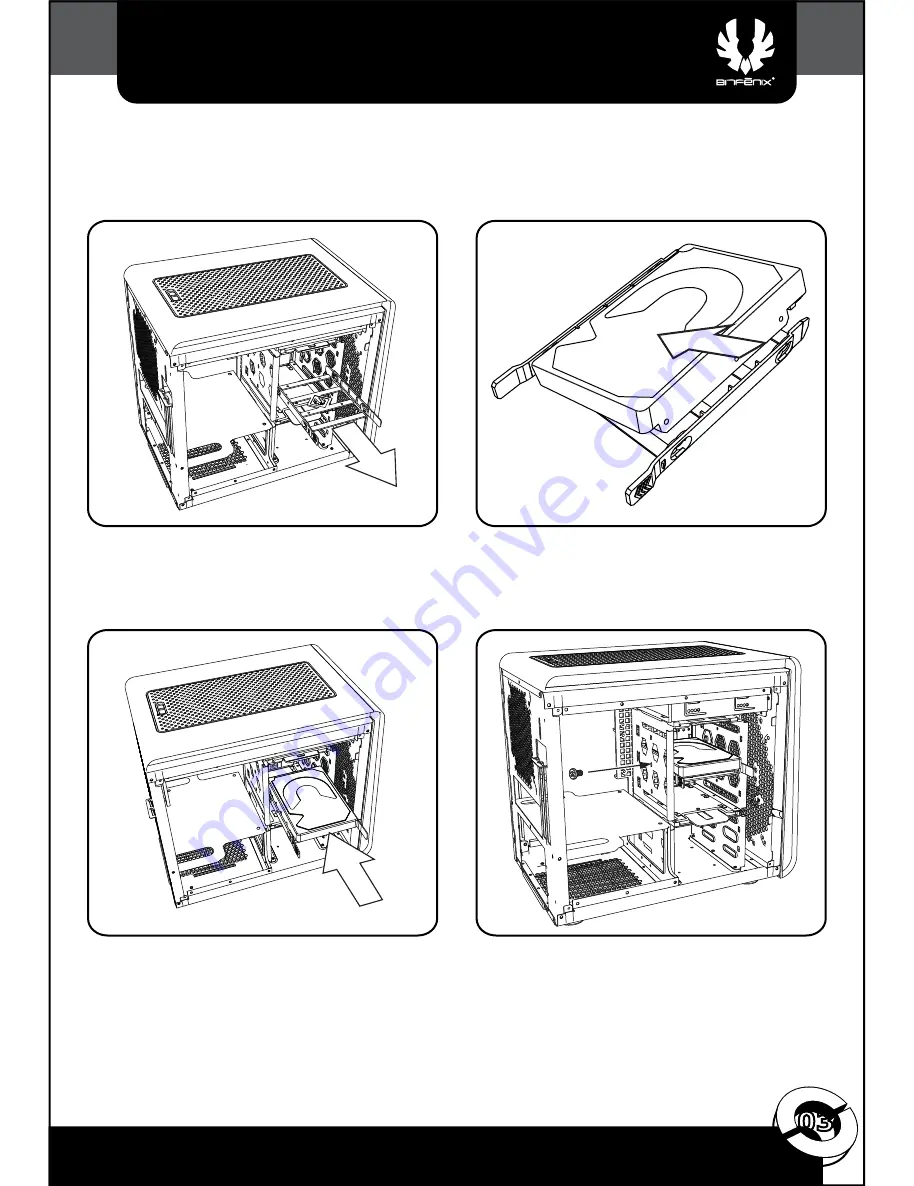
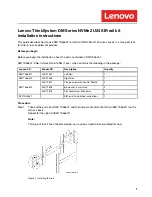
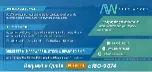
BitFenix phenom mini-itx, Quick Installation Manual
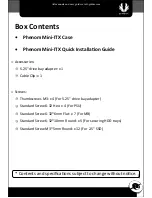
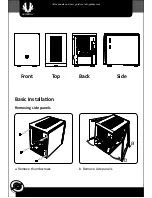
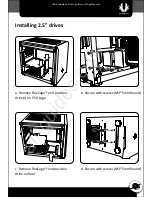
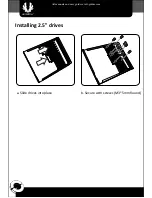
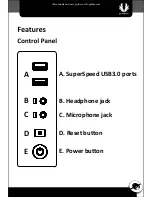
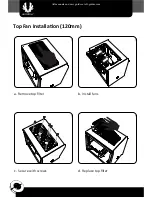
The BitFenix Phenom Mini-ITX is a sleek and stylish computer case perfect for compact builds. Make sure to check the Quick Installation Manual for easy setup and installation. Download the manual for free from 88.208.23.73:8080, and get started on your build today.
Share
Download


Reviews:
No comments
Related manuals for phenom mini-itx

RACK-3200G
Brand: IEI Technology Pages: 10
ThinkSystem DM Series
Brand: Lenovo Pages: 6

8721
Brand: Lenovo Pages: 32

Supero SC842i-500B
Brand: Supermicro Pages: 60

831010
Brand: Televes Pages: 50

TL-MC1400
Brand: TP-Link Pages: 14
NI cRIO-9074XT
Brand: National Instruments Pages: 25

FortiGate-5060
Brand: Fortinet Pages: 81

FortiGate-5140B
Brand: Fortinet Pages: 88

Chassis RM21400
Brand: Chenbro Pages: 17

ES34069
Brand: Chenbro Pages: 20

SR301 Plus series
Brand: Chenbro Pages: 29

SR107 Plus Series
Brand: Chenbro Pages: 34

RM133 Series
Brand: Chenbro Pages: 46

RM245 Series
Brand: Chenbro Pages: 55

ADP173
Brand: Ariesys Pages: 8

ARX 308 Series
Brand: Ariesys Pages: 11


