Rev. 1.01
- 10 -
SRP-275III
2. Connecting the cables
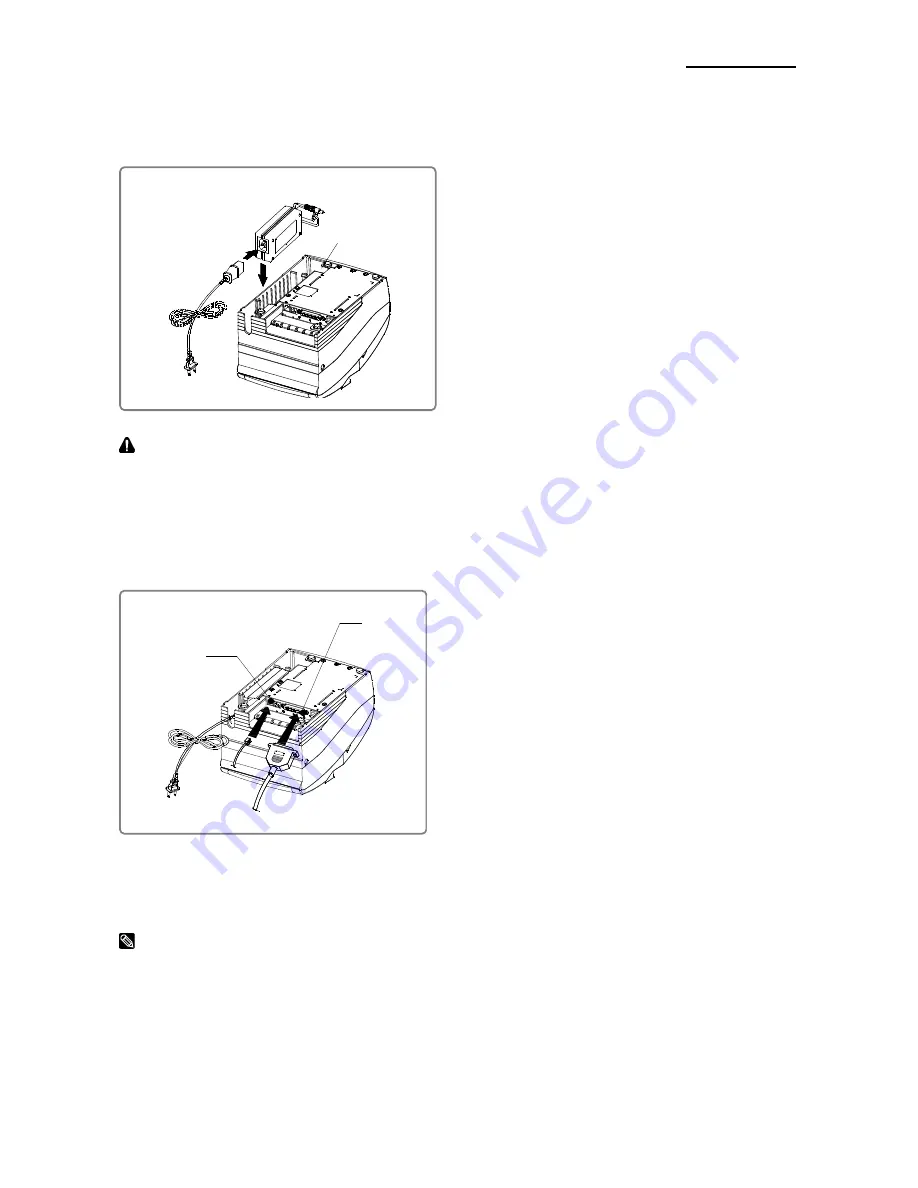
2-1 Connecting the AC Adaptor
CAUTION
Before connecting the printer to the power supply, make sure that the voltage and power
specifications match the printer’s requirements. Using an incorrect power supply can
cause serious damage to the printer.
2-2 Connecting the Interface cable and Drawer kick-out cable
NOTES
Connect the printer to the host ECR (host computer) though an interface cable matching
the specification of the printer and the host ECR (host computer). Be sure to use a drawer
that matches the printer’s specification.
Depending on the interface your system uses, either connect the serial, parallel, USB or
Ethernet communication cable to the appropriate connector on the back of the printer.
Cables are provided by your dealer or system installer.
• Connect the AC adapter according to
the following procedure.
1) Make sure the printer is turned off.
2) Before inserting the AC adaptor, connect
the power cord.
3) Insert the AC adaptor as shown.
4) Plug the AC adapter cable into the
printer’s power connector.
5) Plug the power cord into the outlet, and
turn on the power.
AC adaptor
Power connector
Power cord
Drawer kick-
out connector
Interface
connector
Serial/ Parallel/ USB/ Ethernet
Interface cable
Drawer kick-out
cable
• Connect the cables according to the
following procedure.
1) Turn off printer and the host ECR
(host computer).
2) Plug the interface cable into the interface
connector on the printer then fasten the
screw on both sides of the connector.
3) Plug the drawer kick-out cable into the
drawer kick-out connector on the printer.
(When removing the drawer kick-out cable,
press on the connector’s clip while pulling
out.)


