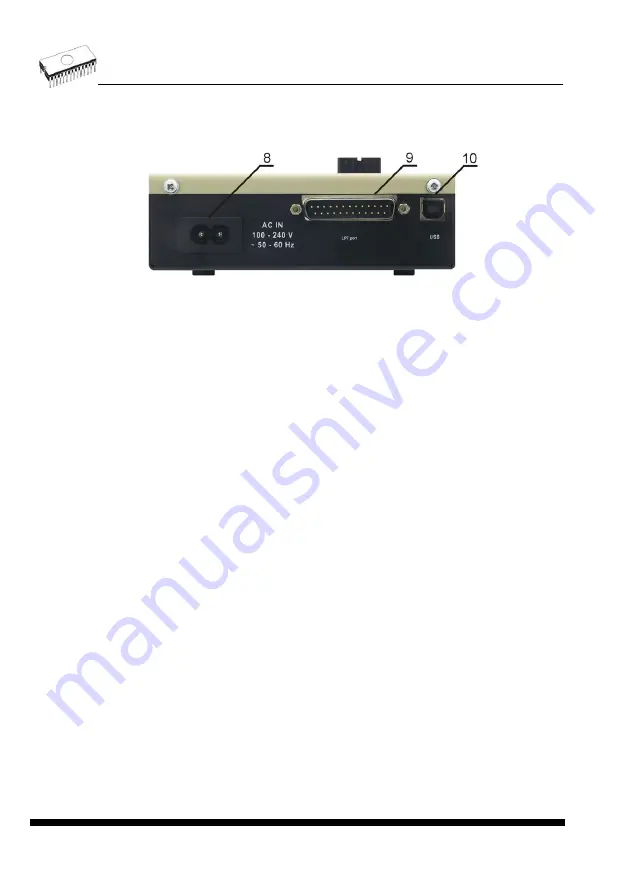
8)
Power supply connector
9)
LPT connector for PC
↔
866B communication cable
10) USB connector for PC
↔
866B communication cable
Connecting 866B to the PC
Using USB port
In this case, order of connecting USB cable and power supply to programmer is irrelevant.
Using LPT port
Switch off PC and programmer. Insert the communication cable included with your 866B
programmer package to a free printer port on your PC. If your computer is equipped with only
one printer port, substitute the programmer cable for the printer cable. Connect the opposite
cable end to the programmer. Screw on both connectors to counter-connectors. This is very
important. It may be uncomfortable to switch between printer cable and programmer cable,
though it is not recommended to operate the 866B programmer through a mechanical printer
switch. Use of an electronic printer switch is impossible. But you can install a second multi-I/O
in your computer, thus obtaining a supplementary printer port, says LPT2. So your printer
may remain on LPT1 while the programmer on LPT2.
Switch on the PC.
Connect the mains connector of the power supply to a mains plug, and then connect the mini-
DIN connector to the programmer's connector labeled "15VDC". At this time all 'work result'
LEDs (and 'POWER' LED) light up successive and then switch off. Once the POWER LED
lights with low brightness then the 866B programmer is ready to run.
Next run the control program for 866B.
Caution!
If you don't want to switch off your PC when connecting the 866B, proceed as
follows
:
•
When connecting the programmer to the PC: FIRST insert the communications cable
and THEN the power-supply connector.
•
When disconnecting the programmer from the PC: FIRST disconnect the power-supply
connector and THEN the communication cable.
From 866B's point of view the connecting and disconnecting sequence is irrelevant.
Protection circuits on all programmer inputs keep it safe.
But think of your PC please
.
32
Summary of Contents for 844USB
Page 7: ...Introduction 7 ...
Page 12: ...Quick Start 12 ...
Page 15: ...Detailed description 15 ...
Page 16: ...859 16 ...
Page 28: ...866B 28 ...
Page 41: ...844USB 41 ...
Page 50: ...848A 50 ...
Page 56: ...Setup 56 ...
Page 67: ...Pg4uw 67 ...
Page 117: ...Pg4uwMC 117 ...
Page 127: ...Common notes 127 ...
Page 134: ...Troubleshooting and warranty 134 ...


