8
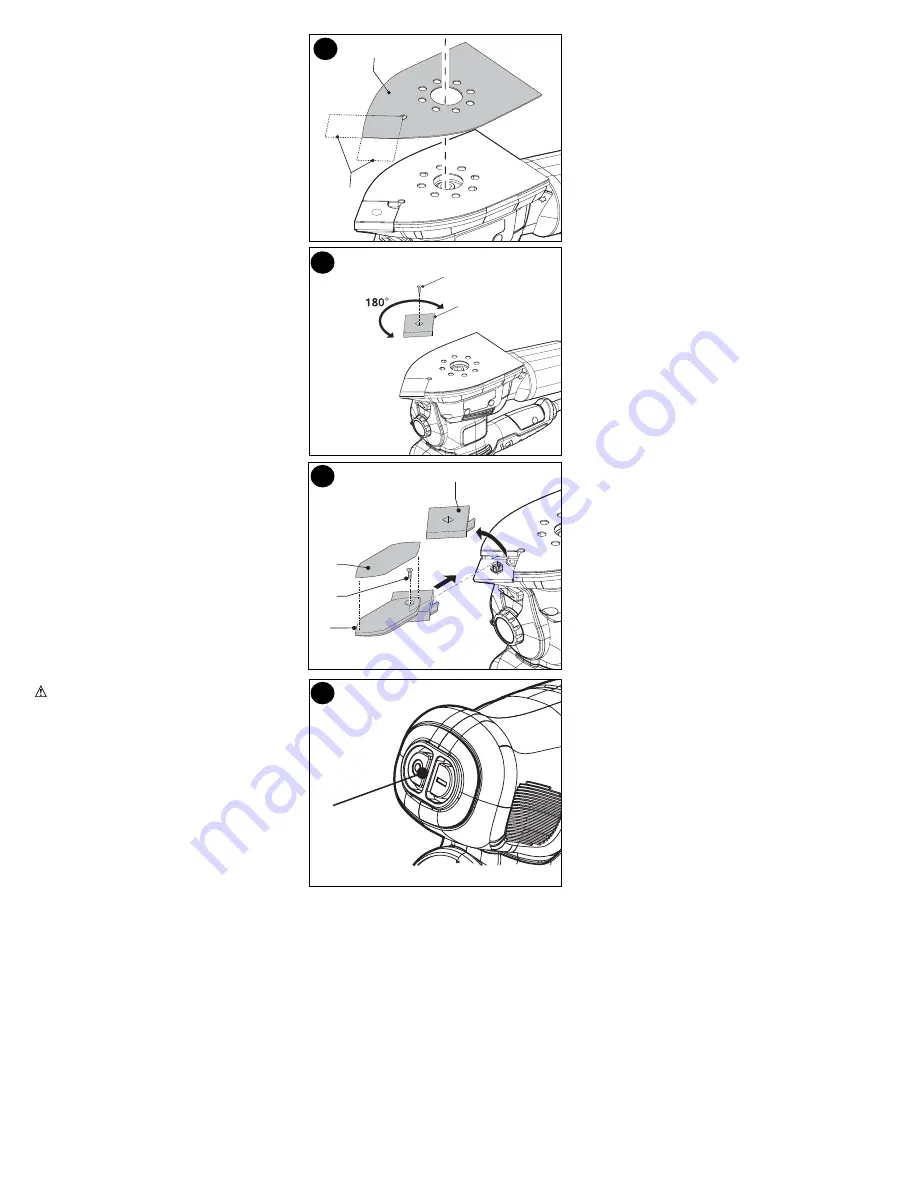
Fitting sanding sheets - Figure G
• Detach the two diamond-shaped tips (12)
from the sanding sheet (13).
• Hold the tool with the sanding base facing
upwards.
• Place the sanding sheet (13) onto the
sanding base, making sure that the holes in
the sheet line up with the holes in the base.
The diamond-shaped tip (12) can be reversed
and replaced when worn.
• When the front part of the tip is worn,
detach it from the sheet, reverse it and
press it onto the sanding base again.
• When the whole tip (12) is worn, remove it
from the sanding base and fit a new tip (12).
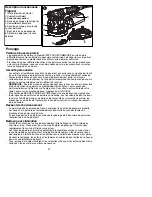
Tip of the sanding base - Figure H
When the sanding tip (14) is worn, it can be
reversed as shown in figure H.
• The tip (14) can be removed and reversed.
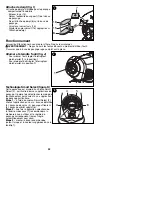
Finger attachment - Figure I
The finger attachment is used for fine detail
sanding.
• Remove the screw (15).
• Remove the sanding holder tip (7) from the
sanding base.
• Fit the finger attachment (8) onto the
sanding base.
• Fit and tighten the screw (15).
• Fit the appropriate sanding sheet (16) onto
the finger attachment.
Operation
Let the tool work at its own pace. Do not
overload.
Warning:
Do not cover the ventilation slots
when using the tool. Make sure that the
sanding base is flat on the workpiece.
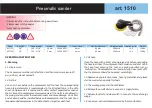
Switching on and off - Figure J
• To switch the tool on, set the on/off switch
(1) to position I.
• To switch the tool off, set the on/off switch to
position O.
13
12
14
15
15
7
8
16
G
H
I
J
1


