background image

6

5

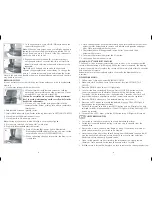
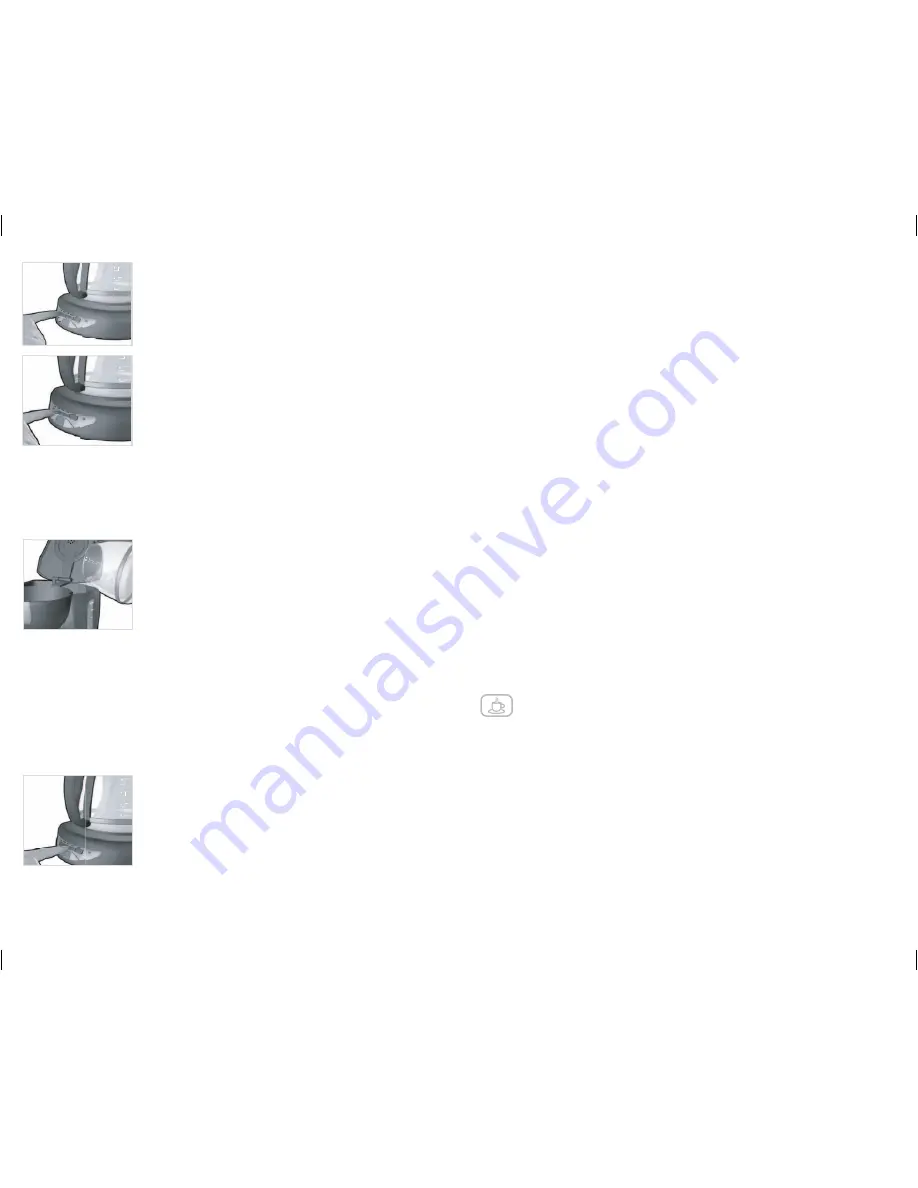
3. To change the time: Press HOUR (HR) button until the 

correct time appears 

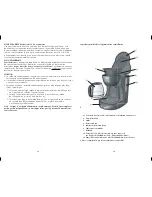
(E)

.

Note:

 When the time passes noon, a small light appears in 

the top left corner of the digital display under the P.M. to 

let you know you are in P.M. time. If the P.M. indicator is 

not lit, the time is set to A.M. 

4. Repeat with the MIN button 

(F)

. (If minute setting is 

not changed within 5 seconds, the clock will revert to 

default time and selection of hour and minute must be 

repeated.)

Tip:

 Hold each button down to make the hours and 

minutes change rapidly after a short delay. To change the 

time in 1 minute increments, press and release the button. 

Note: If the unit is unplugged or power is interrupted even momentarily, the time 

may need to be reset.

BREWING COFFEE

It is not necessary to set the clock to brew coffee unless you wish to use delayed 

brewing.
1. Open water reservoir/brew basket cover.

2. Fill water reservoir with desired amount of cold tap 

water using water markings on side of reservoir. Do not 

exceed the 12-cup maximum level 

(G)

.

Caution: Be careful not to exceed the 12-cup maximum 

level, to avoid water running out the overflow hole in the 

back of the coffeemaker.

3.  Place an 8-12 cup basket style paper filter into the 

removable filter basket, making sure filter is centered in 

filter basket. 

4. Add desired amount of ground coffee.
5. Insert filter basket into brew basket following directions in GETTING STARTED.
6. Close brew basket/ water reservoir cover.
7. Place brew-thru lid on empty carafe. 

Note:

 Coffee may overflow if brew-thru lid is not properly aligned.

8. Place empty carafe on the “Keep Hot” carafe plate.
9. Plug cord into standard electrical outlet.

10. Press I/O button 

(H)

; power light is illuminated. 

Brewing begins 

OR

, to delay brewing, you may set the 

auto function (see for DELAYED BREWING).

11. When coffee stops flowing into carafe, the brew cycle 

is complete. 

F

E

12. Once coffee grounds have cooled carefully open reservoir/brew basket cover 

and using filter basket handle, remove and discard used grounds and paper 

filter. Close reservoir/brew basket cover.

13. The coffeemaker will keep brewed coffee hot for 2 hours and then 

automatically turn off.

14. To turn off the coffeemaker press the I/O button. 
15. Unplug appliance when not in use.

SNEAK-A-CUP

®

 INTERRUPT FEATURE

The Sneak-A-Cup

®

 interrupt feature allows you to pour a cup of coffee from the 

carafe while the coffee is still brewing. When the carafe is removed, the brewing 

process is paused. Simply replace the carafe on the carafe plate within 30 seconds 

and brewing will resume.

Note:

 If the carafe is not replaced within 30 seconds the brew basket may 

overflow.

DELAYED BREWING

1. Follow steps 1 through 9 under BREWING COFFEE.
2. Make sure clock has been set to correct time of day (see SETTING THE 

CLOCK).

3. Press the PROG button; the AUTO light blinks. 
4. To select the time for delayed brewing: Press HOUR (HR) button until the 

correct time appears on the display. Repeat with the MIN button within  

5 seconds. (If minute setting is not changed within 5 seconds, the clock will 

revert to default time and selection of hour and minute must be repeated.)

5. Press the PROG button again. The delayed brewing time is set.
6. Press the AUTO button to activate the delayed brewing. The AUTO light is 

displayed on the digital display screen. 

7. To check the preset auto time, press PROG button and it will display the time 

selected for delay brewing to begin. (The AUTO light will blink until the AUTO 

button is pressed.)

8. To cancel the AUTO brew, press the I/O button twice. All lights will turn off.

COFFEE BREWING TIPS

•  Stir coffee in carafe before serving to evenly distribute the flavor.
•  Coffee that is poured during brewing cycle may vary in strength from the 

finished brew.

•  Not sure how much coffee to use? Begin by using 1 level scoop of medium 

grind coffee for each cup of coffee to be brewed.

•  Never reuse coffee filters; they absorb flavors from the brewed coffee and will 

give the newly brewed coffee a stale flavor. They may also tear and allow 

grinds to drip into the newly brewed coffee.

•  Open coffee grounds are best stored in the refrigerator in a tightly sealed 

container. Once opened, coffee should be used within 1 month.

•  If filled carafe is left on the hot plate, be sure to remove the coffee grounds from 

G

H

Summary of Contents for DCM100BC

Page 1: ...c com IMPORTANT IMPORTANT WASH CARAFE BEFORE FIRST USE LAVER LA CARAFE AVANT LA PREMIÈRE UTILISATION Accessories Parts USA Canada Accessoires Pièces É U Canada 1 800 738 0245 Register your product online at www prodprotect com applica for a chance to WIN 100 000 For US residents only Inscrivez votre produit en ligne à l adresse www prodprotect com applica et courez la chance de GAGNER 100 000 Aux ...

Page 2: ... 120V Models Only This appliance has a polarized plug one blade is wider than the other To reduce the risk of electric shock this plug is intended to fit into a polarized outlet only one way If the plug does not fit fully into the outlet reverse the plug If it still does not fit contact a qualified electrician Do not attempt to modify the plug in any way TAMPER RESISTANT SCREW Warning This applian...

Page 3: ...carafe Place empty carafe on the Keep Hot carafe plate Pull power cord out from power cord holder in back of coffeemaker and plug into standard electrical outlet Brew water through appliance following the BREWING COFFEE instructions without adding coffee grounds This removes any dust or residue that may remain in the system during the manufacturing process Discard the water from the carafe and pap...

Page 4: ...reservoir brew basket cover 13 The coffeemaker will keep brewed coffee hot for 2 hours and then automatically turn off 14 To turn off the coffeemaker press the I O button 15 Unplug appliance when not in use SNEAK A CUP INTERRUPT FEATURE The Sneak A Cup interrupt feature allows you to pour a cup of coffee from the carafe while the coffee is still brewing When the carafe is removed the brewing proce...

Page 5: ...vaporate from the carafe while on the Keep Hot carafe plate or heat the carafe when empty Discard the carafe if damaged in any manner A chip or crack could result in breakage Never use abrasive scouring pads or cleansers they will scratch and weaken the glass Do not place the carafe on or near a hot gas or electric burner in a heated oven or in a microwave Avoid rough handling and sharp blows MINE...

Page 6: ...l faut toujours respecter certaines règles de sécurité fondamentales afin de minimiser les risques d incendie de secousses électriques ou de blessures notamment les suivantes Lire toutes les directives Ne pas toucher aux surfaces chaudes utiliser les poignées et les boutons Afin d éviter les risques d incendie de choc électrique ou de blessures ne pas immerger le cordon la fiche ou la base de l ap...

Page 7: ... cordons d alimentation amovibles ou de rallonge plus longs et il faut s en servir avec prudence c Lorsqu on utilise un cordon d alimentation amovible ou de rallonge plus long il faut s assurer que 1 la tension nominale du cordon d alimentation amovible ou de rallonge soit au moins égale à celle de l appareil et que 2 lorsque l appareil est de type mis à la terre il faut utiliser un cordon de rall...

Page 8: ... de courant standard 2 L horloge numérique clignote et indique 12 00 D Nota L horloge doit être réglée pour que la fonction d infusion différée puisse être utilisée 3 Pour régler l heure appuyer sur le bouton de réglage des heures HR jusqu à ce que l heure exacte soit affichée E Nota Le témoin PM situé dans le coin supérieur droit de l écran numérique s allume lorsque l horloge passe à l heure de ...

Page 9: ... programmée appuyer sur le bouton de programme PROG et celle ci apparaîtra Le témoin AUTO clignotera jusqu à ce que le bouton AUTO soit enfoncé 8 Pour annuler l infusion automatique appuyer sur le bouton de marche arrêt I O deux fois Tous les témoins lumineux s éteignent CONSEILS RELATIFS À L INFUSION DU CAFÉ Brasser le café dans la carafe avant de le servir pour mélanger les arômes de façon homog...

Page 10: ...a cafetière doit être nettoyée La fréquence de rinçage des résidus déposés dépend de l utilisation et de la dureté de l eau Le nettoyage génère plus de vapeur que l infusion du café et de petits jets de vapeur peuvent être émis Un nettoyage est recommandé tous les 60 cycles d infusion 1 Verser du vinaigre blanc dans le réservoir d eau jusqu à la marque de 7 tasses de l indicateur du niveau d eau A...

Page 11: ...essite un nettoyage la mouture du café est inadéquate Vérifier si l appareil est branché dans une prise de courant fonctionnelle et si vous avez bien appuyé sur le bouton de mise en marche arrêt I O Vérifier si le réservoir d eau a été rempli au delà de la ligne de remplissage MAX Vérifier si la carafe a été placée correctement sur le réchaud et si elle est bien centrée sous le support du panier d...

Page 12: ... province to province BESOIN D AIDE Pour communiquer avec les services d entretien ou de réparation ou pour adresser toute question relative au produit composer le numéro sans frais approprié indiqué sur la page couverture Ne pas retourner le produit où il a été acheté Ne pas poster le produit au fabricant ni le porter dans un centre de service On peut également consulter le site web indiqué sur l...

Page 13: ...aintenance instructions See below WARNING To reduce the risk of fire or electric shock do not remove the cover of the coffeemaker There are no user serviceable parts inside Repair should be done by authorized service personnel only El símbolo de un rayo L éclair représente une tension dangereuse Le point d exclamation indique qu il s agit d importantes consignes d entretien Voir plus bas AVERTISSE...

Reviews: