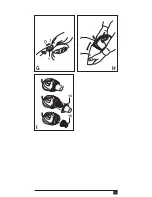
5
Fitting the accessories (fig. A & D)
The appliance is supplied with the
following accessories:
– a crevice tool (6) for confined spaces
– a hard brush (7) for upholstery
To fit an accessory, proceed as follows:
◆
Take the accessories from the
appliance.
◆
Insert the appropriate accessory into
the front of the appliance.
Additional accessories (fig. D, E & F)
– an extension hose (10) and a hose
connector (11)
– a brush (12) for carpets and upholstery
– an extended crevice tool (13) for the
most difficult to reach areas.
When not in use, the appliance and the
accessories can be stored in the storage
bag (14).
To fit an accessory, proceed as follows:
◆
Fit the hose connector onto the nose
of the appliance.
◆
Attach one end of the hose to the
connector.
◆
Attach the appropriate accessory to
the other end of the hose.
Use
Connecting to the vehicle’s power
supply (fig. B)
◆
Make sure that the appliance is
switched off.
◆
Remove the cigarette lighter from
the socket.
◆
Plug the connector (4) into the
cigarette lighter socket.
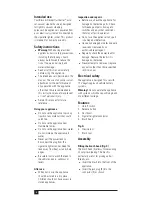
Operating the appliance (fig. G)
◆
To switch on, slide the on/off switch
(1) forward.
◆
To switch off, slide the on/off switch
back.
The appliance can be used for periods of
up to 30 minutes without noticeably
affecting the power of a normally
charged car battery in good condition.
Warning!
Extended use will drain the
battery power.
Do not run the vehicle’s engine while
cleaning. This can shorten the life of the
appliance.
Cleaning and maintenance
Warning!
Regularly clean the filters.
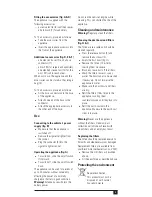
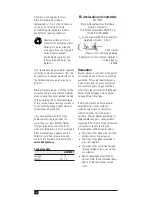
Cleaning the dust bowl and filters
(fig. H & I)
The filters are re-usable and should be
cleaned regularly.
◆
Press the release button (2) and
remove the dust bowl (3).
◆
Empty the dust bowl (fig. H).
◆
Remove the filters (15 & 16) by
twisting them clockwise.
◆
Brush any loose dust off the filters.
◆
Wash the filters in warm, soapy
water. The bowl can also be washed
if necessary. Do not immerse the
appliance in water.
◆
Make sure the dust bowl and filters
are dry.
◆
Refit the filters (15 & 16) onto the
appliance, twisting them
counterclockwise until they lock into
place.
◆
Refit the dust bowl onto the
appliance. Make sure the dust bowl
clicks into place.
Warning!
Never use the appliance
without the filters. Optimum dust
collection will only be achieved with
clean filters and an empty dust bowl.
Replacing the filters
The filters should be replaced every 6 to
9 months and whenever worn or damaged.
Replacement filters are available from
your Black & Decker dealer (cat. no. VF40).
◆
Remove the old filters as described
above.
◆
Fit the new filters as described above.
Protecting the environment
Separate collection.
This product must not be
disposed of with normal
household waste.


