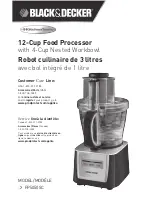
background image

7

ENGLISH

Note:

 Remove workbowl from appliance before removing blade to prevent food from 

leaking through the center opening of the workbowl.
10.  Carefully remove chopping blade and empty workbowl.  
11.  Unplug appliance when not in use.

HOW TO CHOP IN THE SMALL WORKBOWL

The small workbowl is perfect for small chopping and blending. 
1.  With the large bowl in place ( see steps 1 and 2 under HOW TO CHOP IN THE LARGE 

WORKBOWL) without the large cutting blade, insert the small bowl onto the center 

post fitting the 3 tabs on the outside of the bowl into the notches on the large bowl 

that will hold the small bowl firmly in place.

2. Holding the small cutting blade by the white plastic top and keeping  

fingers away from the cutting blades, firmly press the blades over 

the center post until the lower blade rests on the bottom of the 

bowl. (The notches on the center post should match the openings 

on the blade handle.) 

(D)

.

HELPFUL TIPS FOR CHOPPING AND BLENDING

•  The processor works very quickly.  
•  Watch carefully to avoid over-processing foods.
•  The 0/P (stop/pulse) button offers the best control and results.
•  For best results, process foods that are about the same size.
•  Do not overload the bowl.
•  Never walk away from the processor while it is on.
•  Use hot but never boiling liquids.
•  Do not process more than 3 cups liquid in the large workbowl at one time.
•  To process meat, use no more than 2 cups of ¾-inch cubes and process using  

0/(P) in 5-second intervals. 

•  The large workbowl has a capacity of 18 oz for liquid and  8  cups for dry foods;  

the small workbowl can process up to 3 cups..

•  Use a funnel inserted into the feed chute when adding ingredients such as, oil,  

flour and sugar.

USING THE DOUGH BLADE

This blade makes preparing dough efficient and time saving.
1. This blade does not extend to the outside rim of the workbowl so it cannot 

incorporate flour when very small amounts of flour are being processed.

Note:

 Use the metal blade for pastry and mixtures that contain less 2 cups of flour.

2.  Push dough blade down onto center post into workbowl as far as it will go. 

Note

 (this side up) on blade attachment.

3.  Insert all the dry ingredients into the workbowl. 
4.  Place cover on workbowl. Add multi-functional food chute and food pusher. Process 

to blend using the LOW or HIGH button.

5.  With appliance running, add ingredients through the small food chute
6.  When finished, press the 0/(P) button and allow blades to stop revolving before 

removing cover.  Twist cover to remove.

7.  To unlock workbowl, turn it clockwise and lift off base.

Note:

 Remove workbowl from appliance before removing blade to prevent food from 

leaking through the center opening of the workbowl.
8. Carefully remove chopping blade and empty workbowl.  
9. Unplug appliance when not in use.

D

Summary of Contents for FP5050SC

Page 1: ... 231 9786 Accessories Parts USA 1 800 738 0245 For online customer service and to register your product go to www prodprotect com applica Service line à la clientèle Canada 1 800 231 9786 Accessoires Pièces Canada 1 800 738 0245 Pour accéder au service à la clientèle en ligne ou pour inscrire votre produit en ligne rendez vous à www prodprotect com applica ...

Page 2: ...earest authorized service facility for examination repair or electrical or mechanical adjustment The use of attachments including canning jars not recommended by the manufacturer may cause fire electric shock or injury Do not use outdoors Do not let cord hang over edge of table or counter Keep hands and utensils away from moving blades or discs while processing food to reduce the risk of severe in...

Page 3: ...e risk of fire or electric shock do not attempt to remove the outer cover There are no user serviceable parts inside Repair should be done only by authorized service personnel ELECTRICAL CORD a A short power supply cord or detachable power supply cord is to be provided to reduce the risk resulting from becoming entangled in or tripping over a longer cord b Longer detachable power supply cords or e...

Page 4: ...versible slicing shredding disc Part FP5050 05 9 Center post 10 Dough blade Part FP5050 06 11 Large stainless steel chopping blade 12 cup workbowl Part FP5050 07 12 Small stainless steel chopping blade 4 cup workbowl Part FP5050 08 13 Skid resistant feet Part FP5050 09 14 Control panel Note indicates consumer replaceable removable parts Product may vary slightly from what is illustrated ...

Page 5: ...ert the workbowl and place center post into opening in bottom of workbowl and press down until it rests flat against the bottom of the workbowl Turn the tabs clockwise until tabs snap into place LOCKING THE WORKBOWL IN POSITION 1 Attach center post to workbowl as directed above Place the workbowl on the base of the food processor with handle turned to the left of the locking mechanism over the unl...

Page 6: ...ng batters and doughs HOW TO CHOP IN THE LARGE WORKBOWL The chopping blade is used to coarsely or finely chop mince mix and puree foods to a smooth consistency Use the workbowl to chop fresh and cooked fruits and vegetables cooked and raw meats fish and poultry to make sauces dressings and salsas to make pastry cookie and cracker crumbs 1 Lock workbowl with post with interlocking safety latch in p...

Page 7: ...ids Do not process more than 3 cups liquid in the large workbowl at one time To process meat use no more than 2 cups of inch cubes and process using 0 P in 5 second intervals The large workbowl has a capacity of 18 oz for liquid and 8 cups for dry foods the small workbowl can process up to 3 cups Use a funnel inserted into the feed chute when adding ingredients such as oil flour and sugar USING TH...

Page 8: ...feed chute or food pusher to guide food through processor Note Heavy pressure on the pusher does not speed the work use the pusher only as a guide Let the processor do the work 7 When finished press the O P button and allow disc to stop revolving before removing cover Twist cover to remove 8 Carefully remove slicing shredding disc unlock workbowl by turning it clockwise and lift off base 9 Empty w...

Page 9: ... dry thoroughly Stubborn spots can be removed by rubbing with a damp cloth and a mild nonabrasive cleaner Do not immerse base in liquid All removable parts can be washed by hand or in dishwasher Hand washing of plastic parts parts will help to maintain the food processor s appearance If washing by hand fill workbowl with hot soapy water and rapidly raise and lower cutting blades and discs up and d...

Page 10: ...of sale Check our on line service site at www prodprotect com applica or call our toll free number 1 800 231 9786 for general warranty service If you need parts or accessories please call 1 800 738 0245 What does your warranty not cover Damage from commercial use Damage from misuse abuse or neglect Products that have been modified in any way Products used or serviced outside the country of purchas...

Page 11: ... examen une réparation ou un réglage rapporter l appareil à un centre de service autorisé L utilisation d accessoires y compris les bocaux à conserve non recommandés par le fabricant peut occasionner un incendie des chocs électriques ou des blessures Ne pas utiliser l appareil à l extérieur Ne pas laisser pendre le cordon sur le bord d une table ou d un comptoir Garder mains et ustensiles éloignés...

Page 12: ...rrable empêchant l enlèvement du couvercle extérieur Pour réduire les risques d incendie ou de secousses électriques ne pas tenter de retirer le couvercle extérieur L utilisateur ne peut pas remplacer les pièces de l appareil En confier la réparation seulement au personnel des centres de service autorisés CORDON a Le cordon d alimentation de l appareil est court ou amovible afin de minimiser les r...

Page 13: ...iments pièce nº FP5050 04 8 Disque éminceur déchiqueteur pièce nº FP5050 05 9 Axe d entraînement 10 Lame pétrisseuse pièce nº FP5050 06 11 Grande lame à hacher en acier inoxydable pour le bol de 3 litres 12 tasses pièce nº FP5050 07 12 Petite lame à hacher en acier inoxydable pour le bol de 3 litres 12 tasses pièce nº FP5050 08 13 Pieds antidérapants pièce nº FP5050 09 14 Panneau de commande Remar...

Page 14: ...es inférieures soient dégagées Retirer l axe d entraînement 3 Pour replacer l axe d entraînement dans sa position originale mettre le bol à l envers Placer l axe d entraînement dans l ouverture au fond du bol puis appuyer jusqu à ce qu il soit placé directement contre le fond du bol Tourner les languettes vers la droite jusqu à ce qu elles s enclenchent VERROUILLAGE DU BOL 1 Fixer l axe d entraîne...

Page 15: ...ise pour hacher émincer et mélanger les aliments Il est possible de choisir la taille des morceaux d aliments de grossiers à fins FONCTIONS BAS OU HAUT Lorsque ces fonctions sont sélectionnées le robot culinaire fonctionne continuellement jusqu à ce que le bouton 0 P soit actionné Ces vitesses servent à hacher et à mélanger des aliments à préparer des vinaigrettes et des sauces ainsi que de la pât...

Page 16: ...me par le dessus en plastique blanc et en gardant les doigts à l écart des lames appuyer fermement les lames par dessus l axe d entraînement jusqu à ce que la lame inférieure soit tout au fond du bol Les rainures sur l axe d entraînement doivent correspondre aux ouvertures sur le manche de la lame D TRUCS UTILES POUR HACHER ET MÉLANGER DES ALIMENTS L appareil hache et mélange très rapidement Faire...

Page 17: ...errouiller le grand bol en place voir l illustration A 2 Insérer la tige du disque sur l axe d entraînement du bol 3 Placer soigneusement le disque éminceur déchiqueteur sur la tige en mettant vers le haut le côté convenant à la tâche à accomplir Placer le disque avec la lame à déchiqueter ou à trancher juste à la gauche de l entonnoir pour laisser le disque faire un tour complet avant de le faire...

Page 18: ...s étapes 6 à 10 pour trancher et déchiqueter des aliments dans le grand bol TRUCS UTILES POUR LE TRANCHAGE ET LE DÉCHIQUETAGE Avant de trancher des fruits et des légumes ronds avec le robot culinaire enlever une tranche mince au bas de l aliment afin de le rendre plus stable Placer les aliments dans la trémie côté coupé vers le bas Avant de traiter les aliments toujours en retirer les graines le n...

Page 19: ...au chaude savonneuse puis abaisser et relever rapidement les lames inférieures et les disques sur la tige centrale Pour laver les pièces amovibles au lave vaisselle les placer dans le panier supérieur seulement et non dans le panier à ustensiles ni près de celui ci Des taches peuvent se former sur les parois de l appareil Le cas échéant faire une pâte composée de 30 ml 2 c à table de bicarbonate d...

Page 20: ...achat Visiter notre site web au www prodprotect com applica ou composer sans frais le 1 800 231 9786 pour obtenir des renseignements généraux relatifs à la garantie On peut également communiquer avec le service des pièces et des accessoires au 1 800 738 0245 Qu est ce que la garantie ne couvre pas Des dommages dus à une utilisation commerciale Des dommages causés par une mauvaise utilisation ou de...

Reviews: