


9
ENGLISH
(Original instructions)
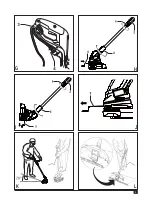
Trimming
Gently swing the trimmer from side to side.
When cutting long grass, work in stages from the top. Take
small cuts.
Keep the tool away from hard objects and delicate plants.
Cutting line will wear faster and require more feeding if the
cutting is done along pavements or other abrasive
surfaces or heavier weeds are being cut.
If the tool starts running slowly, reduce the load.
Edging
Optimum cutting results are achieved on edges deeper than
50 mm.
Do not use the tool to create edges. To create edges,
use an edging spade.
To make a closer cut, slightly tilt the tool.
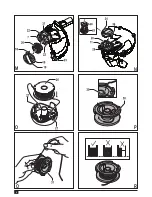
Replacement spools of cutting line are available from your
Black & Decker dealer (cat. no. A6481).
Unplug the tool.
Keep the tabs (18) depressed and remove the spool cover
(19) from the housing (7).
Remove the empty spool (20) from the housing.
Remove any dirt and grass from the spool cover and
housing.
Take the new spool and push it onto the boss in the
housing. Rotate the spool slightly until it is seated.
Unclip the end of one of the cutting lines and guide the
line into the eyelets(21). The line should protrude approx.
11 cm from the spool cover.
Align the tabs (18) on the spool cover with the cut outs
(22) in the housing.
Push the cover onto the housing until it snaps securely
into place.
Warning! If the cutting lines protrude beyond the trimming
blade (23), cut them off so that they just reach the blade.
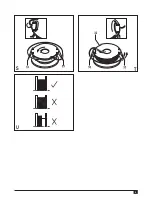
(GL5530-XE only)
Replacement spools of cutting line are available from your
Black & Decker dealer (cat. no. A6441). Complete cassettes
containing a spool of cutting line are also available (cat. no.
A6442).
Unplug the tool.
Keep the tabs (24) depressed and remove the spool cover
Remove the empty spool (26) from the spool cover.
Remove any dirt and grass from the spool cover and
housing.
Take the new spool and push it onto the boss in the spool
cover. Rotate the spool slightly until it is seated.
Unclip the end of one of the cutting lines and guide the
protrude approx. 11 cm from the spool cover.
Unclip the end of the other cutting line and guide the line
into the other eyelet. The line should protrude approx. 11
cm from the spool cover.
Align the tabs (24) on the spool cover with the cut outs
Push the cover onto the housing until it snaps securely
into place.
Warning! If the cutting lines protrude beyond the trimming
blade (10), cut them off so that they just reach the blade.
Troubleshooting
If your tool seems not to operate properly, follow the
instructions below. If this does not solve the problem, please
contact your local Black & Decker repair agent.
Warning! Before proceeding, unplug the tool.
Hints for optimum use
General
In order to achieve optimum cutting results, only cut dry
grass.
Appliance runs slowly
Check that the spool housing can rotate freely. Carefully
clean it if necessary.
Check that the cutting line does not protrude more than
11 cm from the spool housing. If it does, cut it off so that it
just reaches the line trimming blade.
Automatic line feed does not work
Keep the tabs depressed and remove the spool cover
from the housing.
Pull the cutting line until it protrudes 11 cm from the
install a new spool of cutting line as instructed above.
Align the tabs on the spool cover with the cut outs in the
housing.
Push the cover onto the housing until it snaps securely
into place.
If the cutting line protrudes beyond the trimming blade, cut
it off so that it just reaches the blade.
If the automatic line feed still does not work or the
spool is jammed, try the following suggestions:
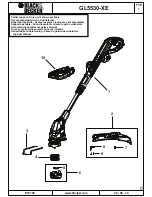
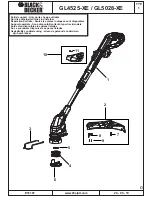
Summary of Contents for GL4525-XE
Page 1: ...GL4525 XE GL5028 XE GL5530 XE Australia New Zealand www blackanddecker com au ...
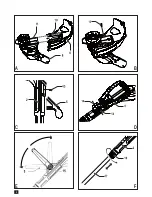
Page 2: ...2 C E B A D F 5 2 ...
Page 3: ...3 G H I K J L ...
Page 4: ...4 M N O Q P R ...
Page 5: ...5 T S U ...
Page 13: ......


