9
ENGLISH
Additional safety instructions for batteries and chargers
Batteries
Never attempt to open for any reason.
Do not expose the battery to water.
Do not expose the battery to heat.
Do not store in locations where the temperature may
exceed 40°C.
Charge only at ambient temperatures between 10°C
and 40°C.
Charge only using the charger provided with the
appliance/tool. Using the wrong charger could result in
an electric shock or overheating of the battery.
When disposing of batteries, follow the instructions
given in the section “Protecting the environment”.
Do not damage/deform the battery pack either by
puncture or impact, as this may create a risk of injury
and fire.
Do not charge damaged batteries.
Under extreme conditions, battery leakage may occur.
When you notice liquid on the batteries carefully wipe
the liquid off using a cloth. Avoid skin contact.
In case of skin or eye contact, follow the instructions
below.
Warning!
The battery fluid may cause personal injury or
damage to property. In case of skin contact, immediately
rinse with water. If redness, pain or irritation occurs seek
medical attention. In case of eye contact, rinse immediately
with clean water and seek medical attention.
Chargers
Your charger has been designed for a specific voltage.
Always check that the mains voltage corresponds to the
voltage on the rating plate.
Warning!
Never attempt to replace the charger unit with a
regular mains plug.
Use your Black & Decker charger only to charge the
battery in the appliance/tool with which it was supplied.
Other batteries could burst, causing personal injury and
damage.
Never attempt to charge non-rechargeable batteries.
If the supply cord is damaged, it must be replaced by the
manufacturer or an authorised Black & Decker Service
Centre in order to avoid a hazard.
Do not expose the charger to water.
Do not open the charger.
Do not probe the charger.
The appliance/tool/battery must be placed in a well
ventilated area when charging.
Features
1. Safety key
2. Bail bar
3. Handle bar
4. Adjustable height handle
5. Grass bag
6. Removable battery
7. Cutting height indicator
8. Battery lever
9. Battery clasp
10. Cutting height adjustment release
11. Handle storage knobs
Assembly
Warning!
Before assembly, make sure that the appliance is
switched off and the safety key is removed.
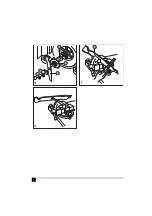
Unpacking (fig. A - C)
Raise the handle into place and secure by tightening the
two handle storage knobs (11). Make sure that you do
not to pinch the power cord.
Warning!
Pinch point - to avoid being pinched, keep fingers
away from the area between the handles when raising or
lowering the handle section.
Carefully cut down the sides of the box on the opposite
end of the handle and fold the flap down as shown.
With the carton side cut open, remove the cardboard
filler, charger, accessory bag and grass bag and push
the mower out of the opened carton.
Warning!
Sharp moving blade. Keep body parts away from
the blade.
Handle adjustment (fig. D)
Your mower has a variable height handle adjustment
feature. To adjust the handle position to suit your height
preference, use the following procedure:
Remove both of the hex nuts and washers (12) on the
middle part of the handle using a 13 mm wrench (a 1/2
inch wrench would be equivalent).
Remove the carriage bolts (13).
Slide the upper handle into one of the 3 adjustment
positions, aligning the holes in the upper and lower
handles.
Insert the carriage bolts (13) with the hex nuts and
washers (12), and tighten.
Assembling the grass bag (fig. E & F)
Slide the grass bag (5) onto the frame (14).
Assemble the top clips of the grass bag to the frame.
Assemble the two side clips to the frame, followed by
the bottom clip.


