background image

6

5

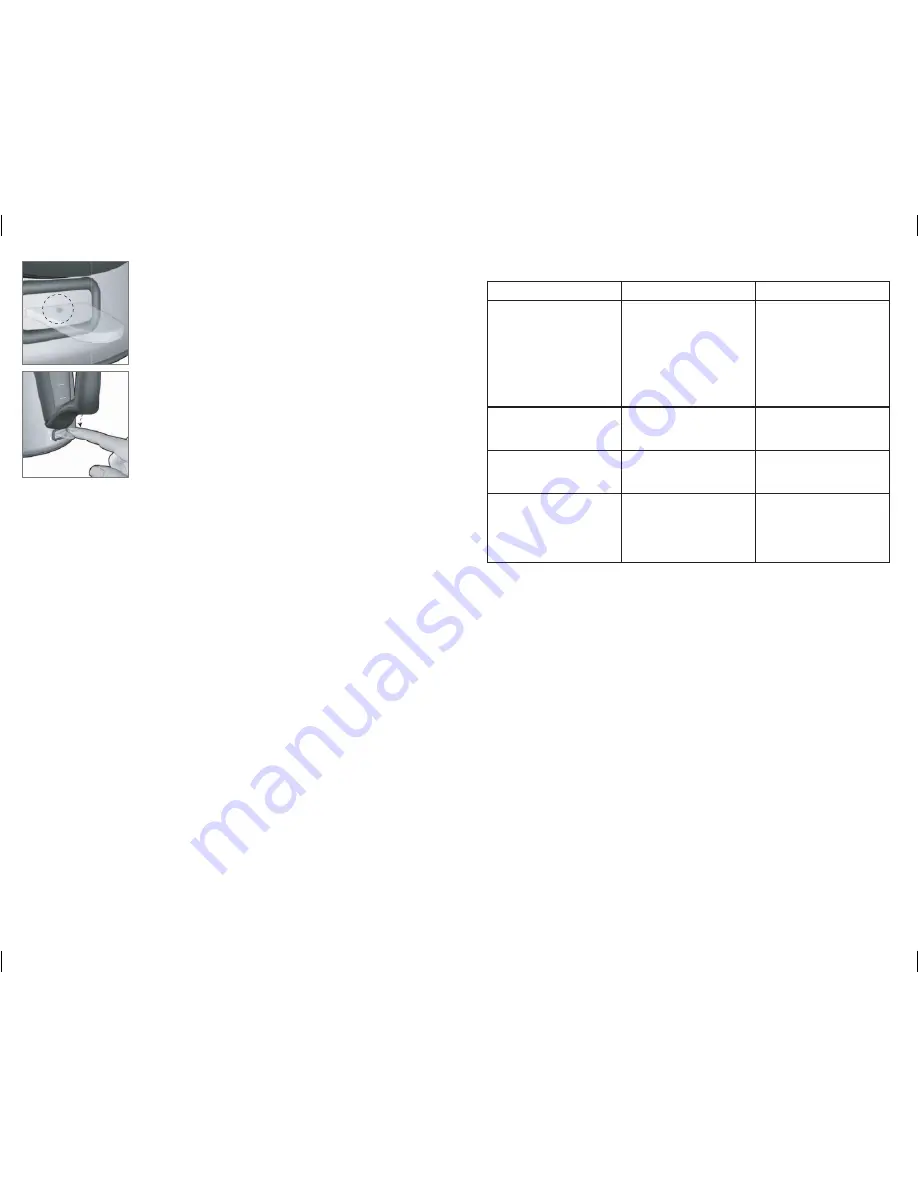
6.  Plug the kettle into a standard electrical outlet.  The  

  power light at the base of the kettle under the handle  

  comes on 

(F)

.

7.  Press the I/O (On/Off) switch button to the I position  

  (there will be a click) and the water begins to heat 

(G)

.

8.  When water boils the kettle will automatically shut off  

  and the indicator light will go out. Do not try to hold the  

  switch in the ‘On’ position once the water has boiled.

9.  To re-boil water, it is necessary to wait several minutes  

  for water to cool.

10. To reuse the kettle, allow it to cool down.  Before  

  pressing the I/O (On/Off) switch check that there is  

  enough water in the kettle.  Simply press the I/O (On/ 

  Off) switch to the I position or pour off any unused  

  water and refill.

Warning:  Kettle filled with boiling water is hot.  Use only 

the stay cool handle to pick it up. When taking kettle to the 

table, carry kettle with caution to avoid spillage. Set it on a trivet or hot pad to 

protect the table surface or tablecloth.

11.  Hold kettle level when pouring, especially when filled to maximum.  Do not  


pour too fast.

Note:

 Make sure lid is closed before pouring hot water from the kettle.

12.  To remove kettle from power base simply lift up.  
13.  Empty and unplug the kettle when not in use.

HELPFUL tIPS

•  Always use fresh, cold water for each boiling process.
•  Do not store water in the kettle. This helps to prevent build up of mineral 

deposits.

•  For your safety, make sure cover of kettle is closed securely before pressing the 

I/O (ON/OFF) switch.

•  Always unplug the kettle before filling.
•  Never use less than the minimum amount of water (3 ½ cups). Note the MIN 

line on the kettle.

•  Never use more than the maximum amount of water (7 cups). Note the MAX 

line on the kettle.

•  The power supply is connected only to the power base.  This allows for easy 

movement of the kettle to the table. (Remember to use a trivet or hot pad under 

the hot kettle.)

•  Do not try to hold the switch ‘On’ (I) when water has boiled.
•  Use your kettle to boil water for beverages, soups, cereal, noodles, rice and 

pasta.

tRoUBLESHootING

PRoBLEM

PoSSIBLE CAUSE

SoLUtIoN

Kettle is not heating.

Kettle is not plugged in.

Kettle is not properly 

placed on power base.

Check to be sure 

appliance is plugged 

into a working outlet, 

the I/O (On/Off) button 

has been engaged and 

the kettle is securely 

placed on the power 

base.

Kettle has boiled dry

Kettle was accidentally 

turned on without water.

Unplug kettle and allow 

to fully cool down 

before refilling.

Kettle heats but does 

not boil or works 

intermittently.

Appliance may need 

descaling

Follow directions for 

descaling the kettle.

The ‘On’ (I) button will 

not stay on.

The kettle is too hot.

Allow the kettle to cool 

down at least 5 to 10 

minutes.  Make sure 

there is enough water in 

the kettle.

BUILt-IN SCALE PRotECtIoN

Lime scale forms over time when water is heated. Though harmless, it may be 

bothersome.  The concealed heating element in the kettle is designed to help 

reduce scale buildup.  The kettle has a scale filter at the bottom of the pour spout 

to prevent particles from pouring into your beverage.  

F

1.7L
MAX

1.5L

1.0L

0.7L
MIN

G

Summary of Contents for JKC920

Page 1: ...uilloire électrique de 1 7 l en acier inoxydable Models Modelos Modèles JKC920 JKC920C USA Canada 1 800 231 9786 Mexico 01 800 714 2503 www prodprotect com applica Register your product online at www prodprotect com applica for a chance to WIN 100 000 For US residents only Registre su producto por Internet en Web www prodprotect com applica y tendrá la oportunidad de GANAR 100 000 Solamente para r...

Page 2: ...PLUG This appliance has a polarized plug one blade is wider than the other To reduce the risk of electric shock this plug is intended to fit into a polarized outlet only one way If the plug does not fit fully into the outlet reverse the plug If it still does not fit contact a qualified electrician Do not attempt to modify the plug in any way TAMPER RESISTANT SCREW Warning This appliance is equippe...

Page 3: ... the kettle FILLING THE KETTLE Press latch and lift cover of kettle C Fill with desired amount of cold tap water from 3 to 7 cups Be sure water does not come above the bottom of the pour spout to prevent boiling water from spilling onto the counter Note Do not operate the kettle without water Do not overfill the kettle keep water level below the pour spout Do not open the cover while water is heat...

Page 4: ...urely before pressing the I O ON OFF switch Always unplug the kettle before filling Never use less than the minimum amount of water 3 cups Note the MIN line on the kettle Never use more than the maximum amount of water 7 cups Note the MAX line on the kettle The power supply is connected only to the power base This allows for easy movement of the kettle to the table Remember to use a trivet or hot ...

Page 5: ...sumerja el cable los enchufes ni la base en agua ni otro líquido Los electrodomésticos requieren una estricta supervisión cuando son utilizados por niños o cerca de ellos Desenchufe el electrodoméstico de la toma de corriente cuando no esté en funcionamiento y antes de limpiarlo Déjelo enfriar antes de colocar o retirar piezas y antes de limpiarlo No opere ningún electrodoméstico que tenga el cabl...

Page 6: ...s o de extensión más largos que es posible utilizar si se emplea el cuidado debido c Si se utiliza un cable desmontable o de extensión 1 El voltaje eléctrico del cable desmontable o del cable de extensión debe ser como mínimo igual al del voltaje del aparato 2 Si el aparato es del tipo que va connectado a tierra el cable de extensión deberá ser un cable de tres alambres connnectado a tierra 3 El c...

Page 7: ...de modo que el elemento de la parte inferior quede encajado y sujeto sobre la base E 5 Oriente el hervidor de modo que la boquilla apunte en dirección opuesta a las paredes los gabinetes y a usted 6 Conecte el hervidor a una toma de corriente estándar La luz que está en la base del hervidor debajo del mango se enciende F 7 Presione el interruptor de encendido y apagado de modo que quede en la posi...

Page 8: ...o puede resultar molesto El elemento calefactor oculto en el hervidor está diseñado para ayudar a reducir la acumulación de sarro El hervidor cuenta con un filtro de sarro en la parte inferior de la boquilla para servir que evita que se cuelen partículas dentro del líquido que se va a consumir Cuidado y limpieza Este aparato no contiene piezas reparables por el consumidor Toda reparación se debe l...

Page 9: ...pour lesquelles il a été conçu Des brûlures peuvent de produire si le couvercle de la carafe est retiré pendant les cycles d infusion 16 15 FICHE MISE À LA TERRE Par mesure de sécurité le produit comporte une fiche mise à la terre qui n entre que dans une prise à trois trous Il ne faut pas neutraliser ce dispositif de sécurité La mauvaise connexion du conducteur de terre présente des risques de se...

Page 10: ...ne prise de courant standard Amener le liquide à pleine ébullition puis vider la bouilloire Remplir la bouilloire avec au moins 1 42 l 6 tasses d eau froide du robinet Amener l eau à pleine ébullition puis vider la bouilloire Recommencer La bouilloire est maintenant prête à utiliser Remarque La bouilloire ne fonctionne que si l interrupteur marche arrêt O I est en position de marche I La bouilloir...

Page 11: ...ue le couvercle de la bouilloire est bien fermé avant d appuyer sur l interrupteur marche arrêt O I Toujours débrancher la bouilloire avant de la remplir Ne jamais utiliser une quantité d eau inférieure à la quantité minimale requise 830 ml 3 tasses Noter que le niveau d eau minimal MIN est indiqué par une ligne sur la bouilloire 1 7L MAX 1 5L 1 0L 0 7L MIN G F E Ne jamais dépasser la quantité max...

Page 12: ... JAMAIS IMMERGER LA BOUILLOIRE DANS L EAU OU D AUTRES LIQUIDES et ne pas la mettre au lave vaisselle Essuyer l extérieur de la bouilloire et la base à l aide d un linge ou d une éponge humide et sécher L élément chauffant dissimulé au fond de la bouilloire peut se décolorer ce qui ne diminuera pas son rendement Ne pas utiliser de savons ou de produits abrasifs ni de tampons à récurer Au fil du tem...

Page 13: ...do you get service Save your receipt as proof of date of sale Check our on line service site at www prodprotect com applica or call our toll free number 1 800 231 9786 for general warranty service If you need parts or accessories please call 1 800 738 0245 What does your warranty not cover Damage from commercial use Damage from misuse abuse or neglect Products that have been modified in any way Pr...

Page 14: ...podría no aplicar a usted Qué relación tiene la ley estatal con esta garantía Esta garantía le otorga derechos legales específicos y el consumidor podría tener otros derechos que varían de una región a otra BESOIN D AIDE Pour communiquer avec les services d entretien ou de réparation ou pour adresser toute question relative au produit composer le numéro sans frais approprié indiqué sur la page cou...

Page 15: ...Chine Imprimé en République populaire de Chine is a trademark of The Black Decker Corporation Towson Maryland USA Marca registrada de The Black Decker Corporation Towson Maryland E U Marque de commerce déposée de la société The Black Decker Corporation Towson Maryland É U R12008 3 12 35E S F 1500 W 120 V 60 Hz CAT NO EHB500 TYPE 1 160 W 120 V AC ONLY 60Hz Printed on recycled paper Impreso en papel...

Reviews: