


6
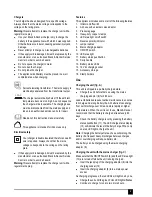
Note:
The mains charging should not be connected for more
than 60 hours.
When charging is complete remove the charging
adaptor (8) form the mains power socket.
Remove the charging jack plug from the charging
socket (14) and store in a safe place.
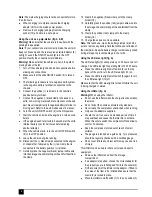
Using the unit as a jump-starter (fig. A & B)
Warning!
Make sure that the vehicle is in neutral with the
parking brake applied.
Note:
If your connections are incorrectly made, the unit will
beep continuously and the red reverse polarity indicator (6)
will light, even if the ON/OFF switch (9) is in the OFF
position. Rectify the connections immediately.
Warning!
Make sure that the cables are not in the path of
moving belts or the fan.
1. Turn off the vehicles ignition and all accessories before
making any connections.
2. Make sure that the units ON/OFF switch (9) is turned
OFF.
3. The following procedure is for a negative earth system
ie the negative battery terminal is connected to the
chassis.
4. Connect the positive (+) red clamp to the vehicle's
positive battery terminal.
5. Connect the negative (-) black clamp to chassis or a
solid, non-moving, metal vehicle component or chassis
part. Never clamp directly to negative battery terminal or
moving part. Refer to the automobile owner’s manual.
6. Turn the unit’s ON/OFF switch (9) to the ON position.
7. Start the vehicle and crank the engine in 3 to 6 second
bursts.
If the engine doesn’t start within 6 seconds let the units
internal battery cool for 3 minutes before making
another attempt.
8. When the vehicle starts, turn the unit’s OFF/ON switch
(9) to the OFF position.
9. Leave the vehicle’s engine running.
10. Disconnect the (-) black clamp connected to the engine
or chassis first, followed by the (+) red clamp that is
connected to the battery positive (+) terminal.
11. Carefully press the negative (black) jumper cable wire
into the storage channel starting at the end furthest from
the clamp.
12. Clamp the negative (black) clamp onto the clamp
holder (16).
13. Carefully press the positive (red) jumper cable wire into
the storage channel starting at the end furthest from the
clamp.
14. Clamp the positive (red) clamp onto the clamp
holder (16).
15. Charge the unit as soon as possible.
Note:
After each use, clean the battery clamps (4) and be
sure to remove any battery fluid that will cause corrosion of
the clamps (4). Keep the battery charger cords loosely coiled
during storage to prevent damage to the cords.
Using the LED area light (fig. A)
The LED area light (10) will operate up to 50 hours on a full
charge. The LED area light's operating life is 100,000 hours.
Press the LED area light on/off switch (5) on the top
panel of the unit to turn the LED area light (10) on.
Press the LED area light on/off switch (5) again to turn
the LED area light (10) off.
Make sure that the LED area light is turned off while the unit
is being charged or stored.
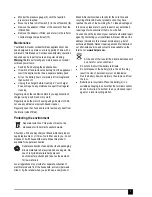
Using the inflator (fig. A)
Warning!
When using the inflator:
Do not use the inflator when the charger is connected to
the mains.
Do not direct the nozzle at animals or bystanders.
Never leave the compressor unattended when running.
Only use the adaptors supplied.
Should the unit run over an extended period of time it
may overheat and cause the thermal trip to activate.
When this occurs switch the compressor off and allow to
cool for 30 minutes.
Keep the compressor stored out of reach of small
children.
The gauge is intended as a guide only. Tyre pressures
should be regularly checked with a certified gauge.
Do not over inflate any object as this may cause a risk
of injury.
This inflator can be used to inflate car tyres and sports
equipment.
Remove the inflator hose from the storage
compartment.
If an adaptor is required, choose the correct adaptor for
the product you are inflating and fit it into the nozzle (2).
Fit the nozzle (2) of the inflator or the adaptor, if fitted, to
the valve of the item to be inflated. Make sure that the
nozzle (2) is locked in place.
Move the inflator on/off switch (1) to the on position (
I
).
Summary of Contents for Jump starter
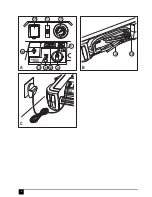
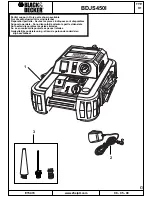
Page 1: ...3 4 5 10 11 12 13 14 6 15 1 2 7 8 9 UK Ireland Australia New Zealand ...
Page 2: ...2 1 3 9 10 4 16 13 11 15 6 14 ...
Page 10: ...10 ...
Page 11: ...11 ...