background image

Tip for Multiple Toasting Cycles:

For best results, when making consecutive batches of toast, allow a short cool down period 

between toasting cycles.

BAKING

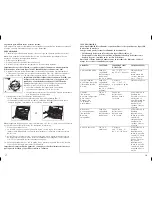
1.  Consult the Baking Guide (page 7) for the type of food you want to cook.

Note: 

For best results, when baking or cooking, always preheat the oven for 8 minutes at 

the desired temperature setting.
2.  Open oven door.
3.  Insert the slide rack/broil rack into the oven.
4.  Turn the temperature selector to the desired temperature setting.

Important: You must set the timer or select Stay On for the oven to function.

5.  Set the timer to desired number of minutes including preheat time, or to Stay On.

Important:  When using the TIMER function, always turn the 

dial past 20 and then turn back or forward to desired setting. 
Tip:

 To set the timer to the Stay On setting, if you want to 

control cooking time or need to cook your food longer than  

60 minutes, turn the timer counterclockwise 

(D)

.

•  The On indicator light comes on and stays on during cooking 

cycle. 

•  The heating elements cycle on and off to maintain the 

temperature.

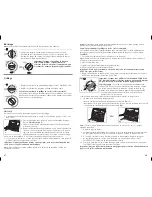
6. You can cook your food two ways:
 

• In the bake pan placed on the slide rack 

(Ea)

, OR 


• Directly on the slide rack using the bake pan as a drip tray underneath the slide rack,  


  inserted in the rack support rails 

(Eb)

.

Note: 

Be sure the top edge of the food or container is at least 1½” (3.81 cm) away from 

the upper heating elements.

5

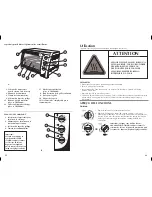
TOASTING

It is not necessary to preheat the oven for toasting.
1.  Make sure temperature selector is set to the 

Toast On/Bake Off 

position.

2.  Open oven door. Insert the slide rack/broil rack into the 

bottom  

rack-slot


(C)

.

3.  Place the toast directly on the slide rack and close the door.
4.  Set the toast shade selector as desired. For best results, select the 

medium setting for your first cycle, then adjust lighter or darker  

to suit your taste. The On indicator light comes on and stays on 

during the toasting cycle. When toasting is done, the signal bell 

sounds, the oven automatically shuts off and the On indicator 

light goes off.

5.  Open oven door and using oven mitt or pot holder, slide out rack to remove toast.

Important: Always use an oven mitt or pot holder to remove food from the oven, as the 

door and the slide rack will be hot.
Note:

 You must turn off the toast shade selector if you want to discontinue toasting. 

Tip:

 When making more toast immediately after one toasting cycle, set the toast shade 

selector to a slightly lighter setting.

1.  Turn temperature selector to Toast On/Bake Off position.
2.  Turn toast shade selector to desired browning level.

Tip for Multiple Toasting Cycles:

For best results, when making consecutive batches of toast, allow a 

short cool down period between toasting cycles.

To Toast

D

C

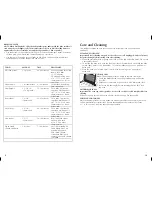
1.  Turn temperature selector to Broil.
2.  Set the timer to desired broiling time or select Stay On, if you want 

to control cooking time or need to cook your food longer than  

60 minutes.

Important: When using the TIMER function, always turn the dial past 

20 and then turn back or forward to desired setting.

OR

To Broil

Note:

 When broiling, preheat oven for 5 minutes.

  7.  Close oven door.
  8.  The first time you bake an item in this oven, cook according to recipe or package  

    instructions and check at minimum time to see if it is done.
  9.  Once cooking cycle is finished, the signal bell sounds. Turn the temperature selector  

    to the 

Toast On/Bake Off 

position. The On indicator light goes off.

 10.  Open oven door and using oven mitt or pot holder, slide out rack to remove food.

Important: Always use an oven mitt or pot holder to remove food from the oven, as the 

door and the slide rack will be hot.
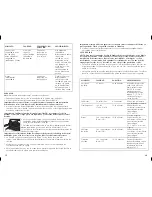
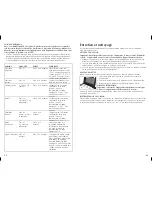
BAKING GUIDE
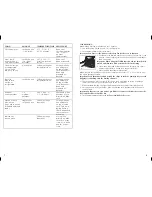
NOTE: When baking foods, use the upper or lower rack position.
You can cook your food two ways:

• 

In the bake pan placed on the slide rack, or

• 

Directly on the slide rack using the bake pan as a drip tray underneath the slide rack, 

inserted in the rack support rails.

Ea

Eb

OR

6

Summary of Contents for Toast-R-Oven TRO700B

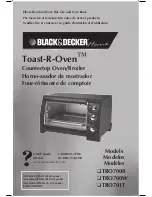
Page 1: ...ires Pièces É U Canada 1 800 738 0245 Please Read and Save this Use and Care Book Por favor lea este instructivo antes de usar el producto Veuillez lire et conserver ce guide d entretien et d utilisation Toast R Oven Countertop Oven Broiler Horno asador de mostrador Four rôtissoire de comptoir Models Modelos Modèles TRO700B TRO700W TRO701T ...

Page 2: ...sing containers constructed of other than metal or glass Do not store any material other than manufacturer s recommended accessories in this oven when not in use IMPORTANT SAFEGUARDS SAVE THESE INSTRUCTIONS GROUNDED PLUG As a safety feature this product is equipped with a grounded plug which will only fit into a three prong outlet Do not attempt to defeat this safety feature Improper connection of...

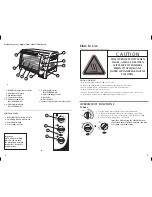
Page 3: ... 2 60 minute bake timer 3 On indicator light 4 Toast shade selector 5 Slide out crumb tray Part TRO700 02 6 Slide rack Broil rack Part TRO700 01 7 Bake pan drip tray Part TRO700 04 8 Slide rack support rails 9 Rack slot 10 Door handle Consumer replaceable removables parts CONTROL PANEL 1 Bake Broil temperature selector 2 60 minute timer with Stay On 3 On indicator light 4 Toast shade selector 1 Tu...

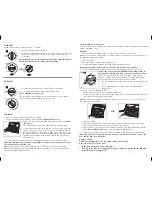
Page 4: ...dicator light comes on and stays on during the toasting cycle When toasting is done the signal bell sounds the oven automatically shuts off and the On indicator light goes off 5 Open oven door and using oven mitt or pot holder slide out rack to remove toast Important Always use an oven mitt or pot holder to remove food from the oven as the door and the slide rack will be hot Note You must turn off...

Page 5: ...7 FOR BROILING Note When broiling preheat oven for 5 minutes 1 Use the Broiling Guide page 9 for cooking times 2 Turn the temperature selector to Broil Important You must set the timer or select Stay On for the oven to function 3 Set the timer to desired number of minutes or to Stay On if you want to control cooking time or need to cook your food longer than 60 minutes Important When using the TIM...

Page 6: ...t thermometer Open faced 1 4 slices 7 10 minutes For crispier sandwich cheese sandwich toast bread first Top bread with tomato and sliced cheese if desired Broil until tomato is hot and cheese is melted 10 9 Care and Cleaning This product contains no user serviceable parts Refer service to qualified service personnel Cleaning Your Oven Important Before cleaning any part be sure the oven is off unp...

Page 7: ...arato permanece cubierto mientras se encuentra en funcionamiento o si éste llegase a entrar en contacto con cualquier material inflamable incluyendo las cortinas y las paredes Asegúrese de no colocar nada sobre el aparato mientras se encuentre en uso No utilice almohadillas de fibras metálicas para limpiar el aparato Las fibras metálicas podrían entrar en contacto con las piezas eléctricas del apa...

Page 8: ... mostrador o de la mesa para evitar que un niño tire del mismo o que alguien se tropiece accidentalmente Si el aparato es del tipo que es conectado a tierra el cable de extensión deberá ser un cable de tres alambres conectado a tierra TORNILLO DE SEGURIDAD Advertencia Este aparato cuenta con un tornillo de seguridad para evitar la remoción de la cubierta exterior del mismo A fin de reducir el ries...

Page 9: ...elo a la izquierda o a la derecha hasta alcanzar el nivel deseado O Para asar Nota Precaliente el horno durante 5 minutos antes de asar 16 15 1 Gire el control selector de temperatura a la posición de función de tostar hornear apagado Toast On Bake Off 2 Ajuste el selector del grado de tostado al gusto Sugerencia para utilizar varios ciclos de tostado Para obtener los mejores resultados al hacer t...

Page 10: ...inalizar el ciclo de cocción suena el timbre de aviso Ajuste el control selector de temperatura a la posición de tostar encendido hornear apagado Toast On Bake Off La luz indicadora de funcionamiento se apaga 10 Abra la puerta del horno y con la ayuda de un protector o guante de cocina deslice la parrilla hacia afuera para retirar los alimentos Importante Siempre utilice un guante de cocina para r...

Page 11: ...ción 7 Al finalizar el ciclo de cocción suena el timbre de aviso y la luz indicadora de funcionamiento ON se apaga 8 Abra la puerta del horno y con la ayuda de un protector o guante de cocina deslice la parrillacorrediza hacia afuera para retirar los alimentos F Importante Siempre utilice un guante de cocina para retiar los alimentos del horno ya que la puerta de vidrio y la parrilla corrediza se ...

Page 12: ...resistente al calor o de cerámica sin tapas de vidrio Siga las indicaciones del fabricante Asegúrese de que haya un espacio mínimo de 3 81 cm 1 pulg entre el borde superior del recipiente y los elementos calefactores G DETECCIÓN DE FALLAS PROBLEMA POSIBLE CAUSA SOLUCIÓN El aparato no calienta o deja de calentar La toma de corriente no funciona o el horno está desconectado Verifique que la toma de ...

Page 13: ...ente un risque de secousses électriques Bien surveiller lorsqu on utilise des plats qui ne sont pas en métal ni en verre Ne rien ranger d autre que les accessoires recommandés par le fabricant IMPORTANTES MISES EN GARDE CONSERVER CES INSTRUCTIONS dans l appareil lorsqu il ne sert pas Ne pas placer l un des matériaux suivants dans le four du papier du carton de la pellicule plastique et d autres ma...

Page 14: ...S EXTÉRIEURES OU INTÉRIEURES DU FOUR PRÉPARATIFS Retirer tous les matériaux d emballage et toute étiquette Sortir la grille et le plat du four Les laver dans de l eau savonneuse les rincer et les assécher à l aide d un chiffon ou d un essuie tout Remettre la grille en place dans le four Choisir un emplacement pour l appareil Celui ci ne doit pas se trouver sous des armoires ni trop près d un mur a...

Page 15: ...onsécutifs Pour obtenir les meilleurs résultats lorsque vous procédez à des cycles d utilisation con sécutifs permettez à l appareil de refroidir brièvement entre chaque cycle de grillage Cuisson 1 Consulter le guide plus bas pour l aliment à cuire page 29 Note Afin d optimiser les résultats pour la cuisson toujours réchauffer le four pendant 8 minutes à la température voulue 2 Ouvrir la porte du ...

Page 16: ...ant dans les rails de soutien Réchauffer l appareil pendant 8 minutes avant d y placer l aliment Utiliser les durées de cuisson indiquées à titre de référence ROTÎSSAGE Note Pour griller les aliments préchauffer le four pendant cinq minutes 1 Consulter le guide de rôtissage pour déterminer la durée de cuisson page 31 2 Régler le sélecteur de température au cycle de rôtissage BROIL Important Il fau...

Page 17: ...iliser la position inférieure de la grille pour faire rôtir des hambourgeois des biftecks des darnes de poisson de gros morceaux de poulet du pain à l ail et des plats gratinés Utiliser la position supérieure de la grille pour faire rôtir des filets de poisson de petits morceaux de poulet des saucisses fumées des croque monsieurs et des nachos Entretien et nettoyage L utilisateur ne peut entreteni...

Page 18: ...from state to state or province to province DÉPANNAGE PROBLÈME CAUSE POSSIBLE SOLUTION L appareil ne chauffe pas ou cesse de chauffer La prise de courant est défectueuse ou le four n est pas branché S assurer que la prise de courant fonctionne bien Le régulateur de température et la minuterie doivent être réglés pour que le four fonctionne Le deuxième grillage est trop foncé Le four est réglé à un...

Page 19: ...re Ne pas retourner le produit où il a été acheté Ne pas poster le produit au fabricant ni le porter dans un centre de service On peut également consulter le site web indiqué sur la page couverture Garantie limitée de un an Valable seulement aux États Unis et au Canada Quelle est la couverture Tout défaut de main d oeuvre ou de matériau toutefois la responsabilité de la société Applica se limite a...

Page 20: ...icio Máquinas y Herramientas Ltda Av Apoquindo No 4867 Las Condes Santiago Chile Tel 562 263 2490 Colombia PLINARES Avenida Quito 88A 09 Bogotá Colombia Tel sin costo 01 800 7001870 Costa Rica Aplicaciones Electromecanicas S A Calle 26 Bis y Ave 3 San Jose Costa Rica Tel 506 257 5716 223 0136 Ecuador Servicio Master Ecuador Av 6 de Diciembre 9276 y Los Alamos Tel 593 2281 3882 El Salvador Sedeblac...

Page 21: ...marque sin costo 01 800 714 2503 Fabricado en la República Popular de China Impreso en la República Popular de China Fabriqué en République populaire de Chine Imprimé en République populaire de Chine R12006 5 18 42E S F 1350 W 120 V CAT NO EHB500 TYPE 1 160 W 120 V AC ONLY 60Hz 60Hz is a trademark of The Black Decker Corporation Towson Maryland USA Marca registrada de The Black Decker Corporation ...

Reviews: