background image

6

5

How to Use

This product is for household use only.

GETTING STARTED
1.  Wash all parts as instructed in the Care and Cleaning section. 
2.  Insert the crumb tray underneath the bottom heating elements.
3.  Plug the unit into a standard outlet.
TOASTING

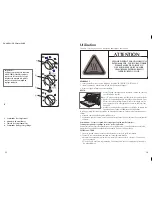
1.  Insert the slide rack in the rack slot with the curved end toward 

the back of the oven 

(C). 

Note: It is not necessary to preheat the oven for toasting.

2.  Set the toast browning control as desired. for best results, select 

the medium setting for your first cycle, then adjust lighter or 

darker to suit your taste.

3.  Turn temperature control to Toast setting. The On indicator light 

comes on and stays on during the toasting cycle. When toasting 

is done, you hear a bell sound. The On indicator light goes out.

4.  Turn the toast browning control off (0).
5.  Using an oven mitt or pot holder, open the door and slide out the slide rack to remove food.
Caution: The oven is hot. Do not touch any surface.
Tip for Multiple Toasting Cycles:
for best results, when making consecutive batches of toast, allow a short cool down period 

between toasting cycles.
BAkING
1.  Place bake pan containing food to be cooked on the slide rack.
Note: Be sure the top edge of the food or container is at least 1½” (3.81 cm) away from the upper 

heating elements.
2.  Turn the temperature control to the desired temperature setting.
  a. If not using the timer, turn the control to Stay On (I) and monitor the food. 
  b. If using the 60-minute timer, turn the control to the desired number of minutes.
Important: When using the TIMER function, always turn the dial past 20 and then turn back  

or forward to desired setting.
Note:
 for best results, always preheat the oven for 5 minutes.
3.  When finished cooking, turn the temperature control to off (0). 

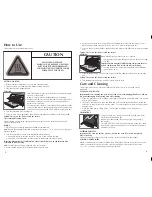
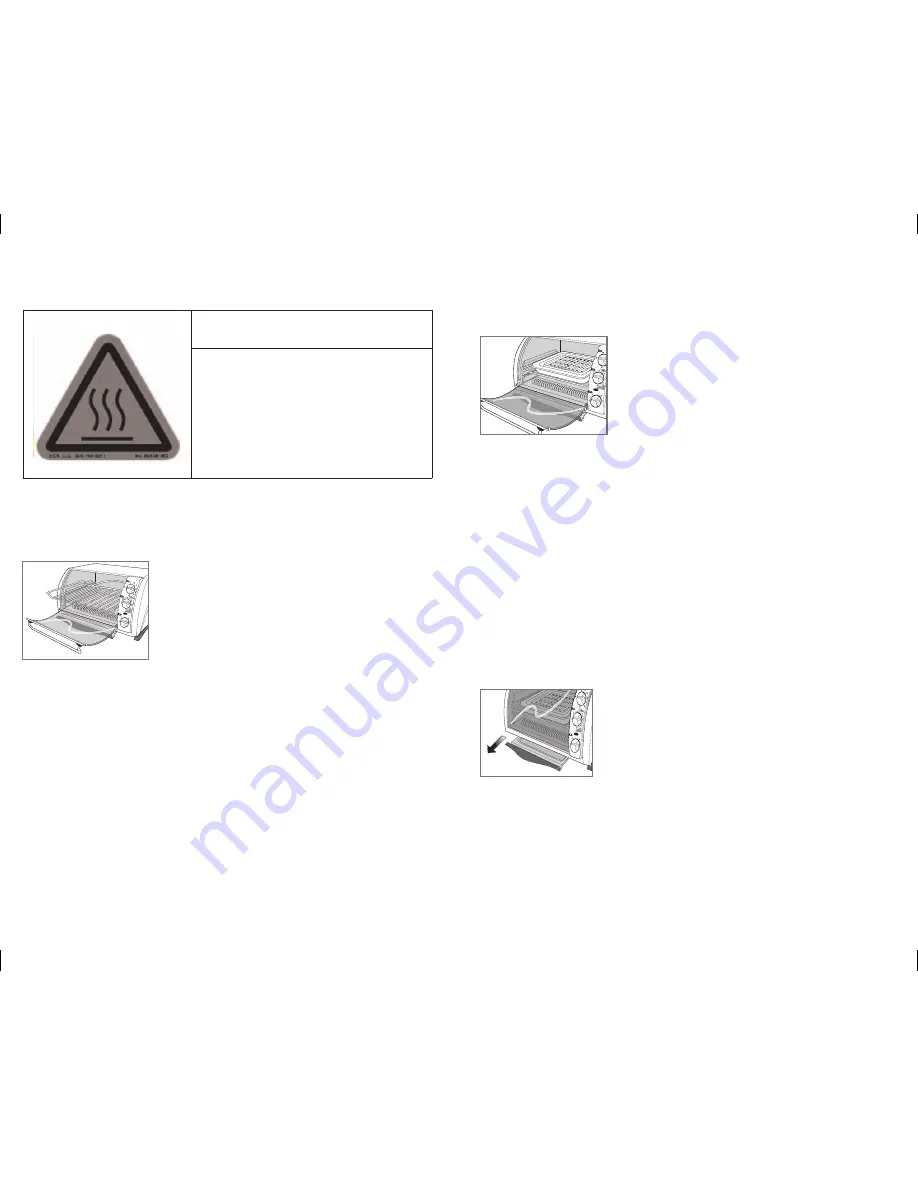
$ "65 *0/

THIS OVEN GETS HOT. WHEN

IN USE, ALWAYS USE OVEN

MITTS OR POT HOLDERS

WHEN TOUCHING ANY OUTER

OR INNER SURFACE OF THE

OVEN

THIS OVEN GETS HOT. 

WHEN IN USE, ALWAYS USE OVEN 

MITTS OR POT HOLDERS WHEN 

TOUCHING ANY OUTER OR INNER 

SURFACE OF THE OVEN. 

CAUTION

C

4.  If using the 60-minute timer, you will hear a bell sound once it reaches the set time. If not, 

when cooking is done, turn the Timer to 0 (off). The On indicator light goes out.

5.  Using an oven mitt or pot holder, open the door and slide out the slide rack to remove the bake 

pan.

Caution: The oven is hot. Do not touch any surface.
BROILING

Note: When broiling, preheat oven for 5 minutes.
1.  Insert the broil rack in the bake pan and place both on the slide 

rack 

(D).

Important: When using the TiMER function, always turn the dial 

past 20 and then turn back or forward to desired setting.
2.  Turn the temperature control to broil and the 60-minute timer 

control to stay on (I).

3.  When finished broiling, using an oven mitt or pot holder, slide out slide rack to remove bake 

pan.

Caution: The oven is hot. Do not touch any surface.
4.  Turn temperature control to Off and 60-minute timer to off (0 ).

Care and Cleaning

This product contains no user serviceable parts. Refer service to qualified service 

personnel.
CLEANING YOUR OVEN
Important: Before cleaning any part, be sure the oven is off, unplugged and cool. Always 

dry parts thoroughly before using oven after cleaning.
1.  Clean the glass door with a sponge, soft cloth or nylon pad and sudsy water. Do not use 

a spray glass cleaner.

2.  To remove the slide rack, open the door and pull the rack forward and out. Wash the 

slide rack in sudsy water or in a dishwasher. To remove stubborn spots, use a polyester 

or nylon pad.

3.  Wash the bake pan in sudsy water. To minimize scratching, use a polyester or  

nylon pad.

CRUMB TRAY

1.  To open crumb tray, tip back oven and pull the crumb tray 

knob forward then down 

(E).

2.  Wipe with a dampened cloth or paper toweling and dry 

thoroughly.

3.  To close, pull the crumb tray knob forward, swing the crumb 

tray closed, and then push knob in to lock into place before 

operating the oven.

ExTERIOR SURFACES
Important: The oven top surface gets hot, be sure the oven has cooled completely  

before cleaning. 
Wipe the top and exterior walls with a damp cloth or sponge. Dry thoroughly.
COOkING CONTAINERS
Metal, ovenproof glass or ceramic bakeware without glass lids can be used in your oven. 

follow manufacturer’s instructions. Be sure the top edge of the container is at least  

1½” (3.81 cm) away from the upper heating elements.

E

D

Summary of Contents for Toaster-R-Oven CTO649C

Page 1: ...erver ce guide d entretien et d utilisation Toaster R Oven Countertop Oven Broiler Four de comptoir rôtissoire USA Canada 1 800 231 9786 www applicaconsumerproductsinc com Accessories Parts USA Canada Accessoires Pièces É U Canada 1 800 738 0245 Model Modèle CTO649C ...

Page 2: ... Extreme caution should be used when using containers constructed of other than metal or glass Do not store any material other than manufacturer s recommended accessories in this oven when not in use IMPORTANT SAFEGUARDS SAVE THESE INSTRUCTIONS GROUNDED PLUG As a safety feature this product is equipped with a grounded plug which will only fit into a three prong outlet Do not attempt to defeat this...

Page 3: ... 91 7 Slide out crumb tray Part 4850 8 Door handle 9 Bake pan Part 46 10 Broil rack Part 43 11 Extra deep curved interior Consumer replaceable removable parts A 1 Temperature control 2 60 minute timer 3 On indicator light 4 Toast browning control B Important When using the TiMER function always turn the dial past 20 and then turn back or forward to desired setting CONTROL PANEL ...

Page 4: ... will hear a bell sound once it reaches the set time If not when cooking is done turn the Timer to 0 off The On indicator light goes out 5 Using an oven mitt or pot holder open the door and slide out the slide rack to remove the bake pan Caution The oven is hot Do not touch any surface Broiling Note When broiling preheat oven for 5 minutes 1 Insert the broil rack in the bake pan and place both on ...

Page 5: ...ni toute autre pièce non amovible de l appareil Exercer une étroite surveillance lorsqu on utilise l appareil près d un enfant ou lorsque ce dernier s en sert Débrancher l appareil lorsqu on ne s en sert pas et avant de le nettoyer Le laisser refroidir avant d y ajouter ou d en retirer un accessoire Ne pas utiliser un appareil dont la fiche ou le cordon est abîmé qui présente un problème de foncti...

Page 6: ...ence c Lorsqu on utilise un cordon de rallonge il faut s assurer que 1 la tension nominale du cordon d alimentation ou de rallonge soit au moins égale à celle de l appareil et que 2 le cordon soit placé de sorte qu il ne soit pas étalé sur le comptoir ou la table d où des enfants pourraient le tirer ni placé de manière à provoquer un trébuchement par inadvertance Lorsque l appareil est de type mis...

Page 7: ...e la peau touche la surface Conseil pour optimiser le grillage en cas de cycles consécutifs Pour obtenir les meilleurs résultats lorsque vous procédez à des cycles d utilisation consécutifs permettez à l appareil de refroidir brièvement entre chaque cycle de grillage Cuisson au four 1 Placer le plat de cuisson contenant les aliments à cuire sur la grille coulissante 2 Tourner la commande de tempér...

Page 8: ...r de la prise et laisser refroidir avant de nettoyer 2 Nettoyer la porte en verre avec un tampon en nylon et de l eau savonneuse Ne pas utiliser de nettoyant a vitres en vaporisateur 3 Pour enlever la grille coulissante ouvrir la porte puis tirer la grille et la sortir Laver le dans de l eau chaude savonneuse ou au lave vaisselle Pour enlever les taches tenaces utiliser un tampon en nylon ou en po...

Page 9: ...illage Comme le four est fermé l humidité ne peut pas s évaporer comme elle le fait dans un grille pain Les aliments sont trop ou pas assez cuits La température et le temps de cuisson doivent possiblement être réglés Comme un grille pain four est beaucoup plus petit qu un four ordinaire il peut réchauffer et cuire plus rapidement Essayer de diminuer la température suggérée dans une recette ou sur ...

Page 10: ... province to province BESOIN D AIDE Pour communiquer avec les services d entretien ou de réparation ou pour adresser toute question relative au produit composer le numéro sans frais approprié indiqué sur la page couverture Ne pas retourner le produit où il a été acheté Ne pas poster le produit au fabricant ni le porter dans un centre de service On peut également consulter le site web indiqué sur l...

Page 11: ...Imprimé en République populaire de Chine 2008 1 21 19E F 1440 W 120 V CAT NO EHB500 TYPE 1 160 W 120 V AC ONLY 60Hz 60 Hz is a trademark of The Black Decker Corporation Towson Maryland USA Marque de commerce déposée de la société The Black Decker Corporation Towson Maryland É U Printed on recycled paper Impreso en papel reciclado Imprimé sur du papier recyclé ...

Reviews: