ServSwitch Wizard
™
DXS - Digital
877-877-2269 | blackbox.com
Page 34
5.9.2 Remotely exporting a disk drive to the host
1 On the remote system, log into the Wizard DXS - Digital using the VNC viewer.
2 Press
F8
and then
V
to display a
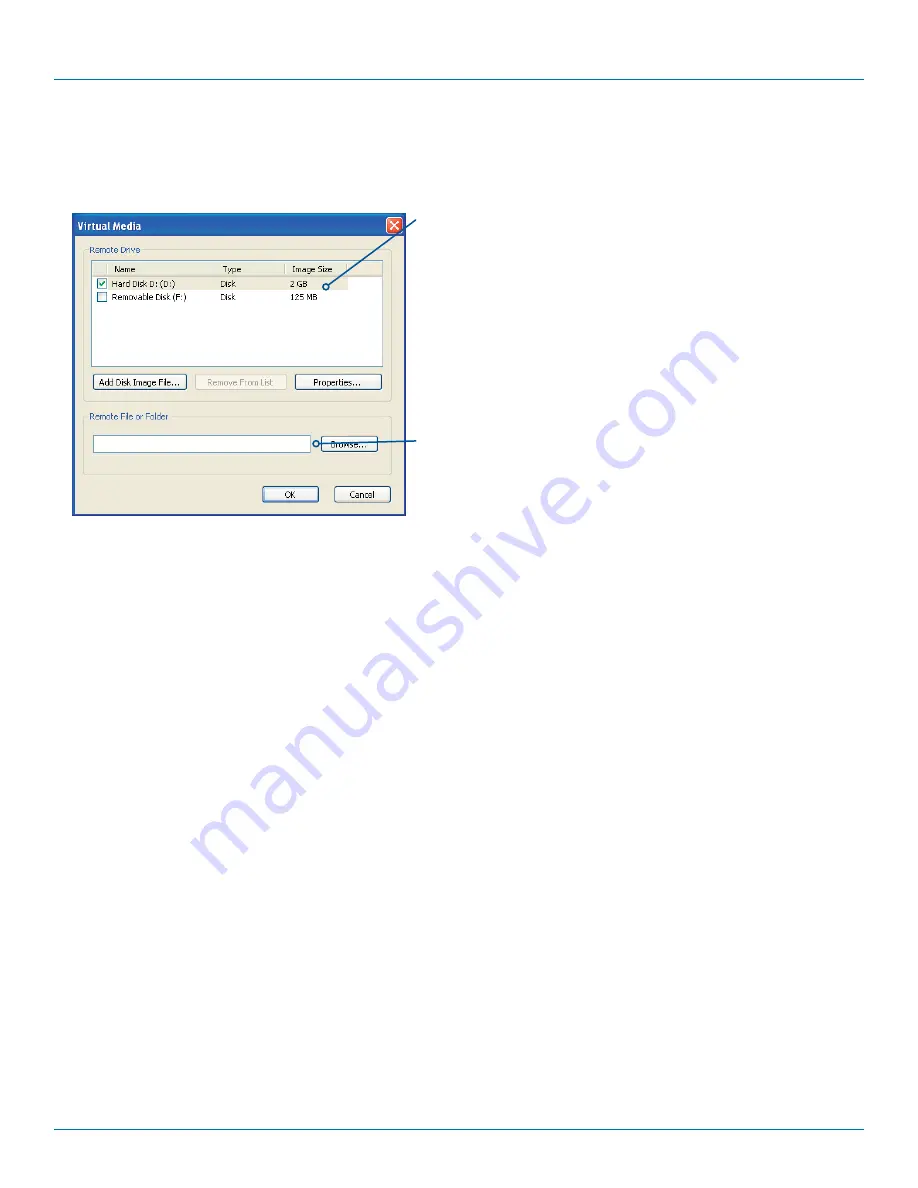
Virtual Media
dialog box:
Remote Drive(s)
This section lists any
located storage devices
on the remote system that
are 2GB or less, and which
could be copied en masse
to the host computer, if
desired.
Remote Files or Folders
Click Browse to search
for and select single or
multiple files/folders to
be copied to the host
computer.
When the
Create ISO
Image
option is ticked this
creates a bootable disk so
that it’s possible to boot
the host computer from
the virtual media drive.
3 You can select an entire drive or a disk image (e.g. .iso) file:
• Select a disk drive: Click the checkbox adjacent to the listed disk drive that you wish to make available to the host computer,
or
• Add a Disk Image File: Select the disk image file and click
Open
.
4 In the
Virtual Media
dialog box, click the OK button to announce the availability of the drive to the host computer. On the host
computer, the new drive will appear in the same way as any removable drive would on your computer.
Note: Remember, at this point the selected drive has not yet been transferred to the host system, it is just visible there.
5 On the host computer (either directly from Wizard DXS - Digital local console or via the VNC viewer) locate the new virtual
drive (shown as a Removable Disk) and copy the files to the required location on the host computer.
Note: The Remote File or Folder section of this Virtual Media dialog box provides yet another method of creating a virtual drive
from some files or folders, as described above.


