14
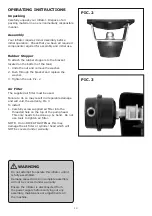
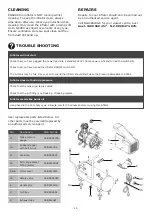
PIC. 9
DRAIN TAP
Pic. 9
After use open the drain tap to drain excess air
and any moisture. The excess air will also help
purge the moisture. Leave the drain tap open
when inflator is not in use, so any moisture can
continue to drain
To open the drain tap pull the lever down
to vertical.
To seal the drain tap push the lever up
to horizontal.
NOTE: Remember to seal the drain tap before
starting the compressor.
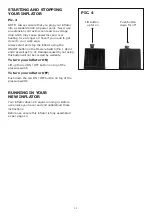
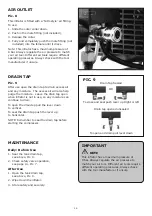
PIC. 8
AIR OUTLET
Pic. 8
This inflator is fitted with a ‘Nitto style’ air fitting.
To use:
1. Slide the outer collar down.
2. Push in the male fitting (not included).
3. Release the collar.
4. Fully and completely push the male fitting (not
included) into the female until it clicks.
Note: This inflator has a maximum pressure of
8 bar. Always regulate the air pressure to match
your air tool. Different air tools require different
operating pressures. Always check with the tool
manufacturer if unsure.
Drain Tap Sealed
OR
To close and seal push lever up Right or left
To open and drain pull lever down
Drain tap opened unsealed
P
P
P
P
P
P
P
P
P
P
P
P
P
P
P
P
P
P
P
P
P
P
P
P
P
P
P
P
P
P
P
P
IC
IC
IC
IC
IC
IC
IC
IC
IC
IC
IC
C
IC
IC
IC
IC
C
C
C
C
C
C
C
C
I
C
C
C
C
IC
IC
IC
C
C
C
C
IC
C
C
C
C
IC
C
C
C
C
C
C
C
C
C
IC
C
C
C
C
I
C
C
I
IC
I
IC
C
C
IC
C
C
C
C
C
C
IC
.
.
.
.
.
.
.
.
.
8
8
8
8
8
8
8
MAINTENANCE
Daily: Before Use
1. Seal the tank drain tap,
see above, Pic. 9.
2. Check safety valve operation,
see page 13, Pic. 7.
After Use
1. Open the tank drain tap,
see above, Pic. 9.
2. Wipe down the inflator.
3. Store safely and securely.
IMPORTANT
NOTE
This inflator has a maximum pressure of
8 bar. Always regulate the air pressure to
match your air tool. Different air tools require
different operating pressures. Always check
with the tool manufacturer if unsure.


