ENG
LIS
H
ENG
LIS
H
|
Owner’s Manual
blackstoneproducts.com/support
ENG
LIS
H
FIRST TIME CLEANING
Blackstone Griddles are pre-treated
with cooking oil to prevent rust and
damage during shipping. For first
time use, wash griddle with hot,
soapy water.
THIS IS THE ONLY TIME YOU
SHOULD USE SOAP ON THE
GRIDDLE COOKING SURFACE.
Rinse and dry completely. Proceed
with seasoning instructions. (Please
reference the Griddle Seasoning
Instructions section.)
PROTECTING YOUR
GRIDDLE TOP
Store griddle in a cool, dry loca-
tion. Always cover griddle if stored
outdoors. Choose from a variety of
griddle covers offered by Blackstone.
When protecting griddle with soft
cover, use the “tenting” method to
prevent water from accumulating
on griddle top. “Tenting” involves
placing an object (a bowl, tennis
ball or PVC pipe) beneath soft cover
in the center of griddle in order to
allow water to slide off. “Tenting”
helps prevent rust.
CUTTING ON THE
GRIDDLE TOP
Using a knife directly on the surface
of the griddle will not harm the
griddle top.
REMOVING RUST
If rust appears on the griddle surface,
rub it off with steel wool, low grit
sandpaper or the
Blackstone
Pumice Stone
and re-season
the surface.
!
WA R N I N G
NEVER APPLY COLD
WATER ACROSS THE
WHOLE SURFACE OF A
HOT GRIDDLE AT ONCE
.
This may cause warping.
Adding a large amount
of cold or frozen food (or
food with significant water
content) to a hot griddle may
cause griddle to warp.
!
C AU T I O N
DO NOT USE SOAP ON
THE GRIDDLE COOKING
SURFACE.
This will destroy
the griddle’s seasoning.
ASSEMBLY VIDEOS
View Product Assembly and
Technical Support videos online at
blackstoneproducts.com/support
and on YouTube
@BlackstoneGriddles
Recovering your Blackstone
Griddle Top
youtube.com/
watch?v=thPE2IgnSiI
Care & Maintenance
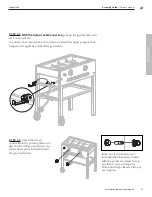
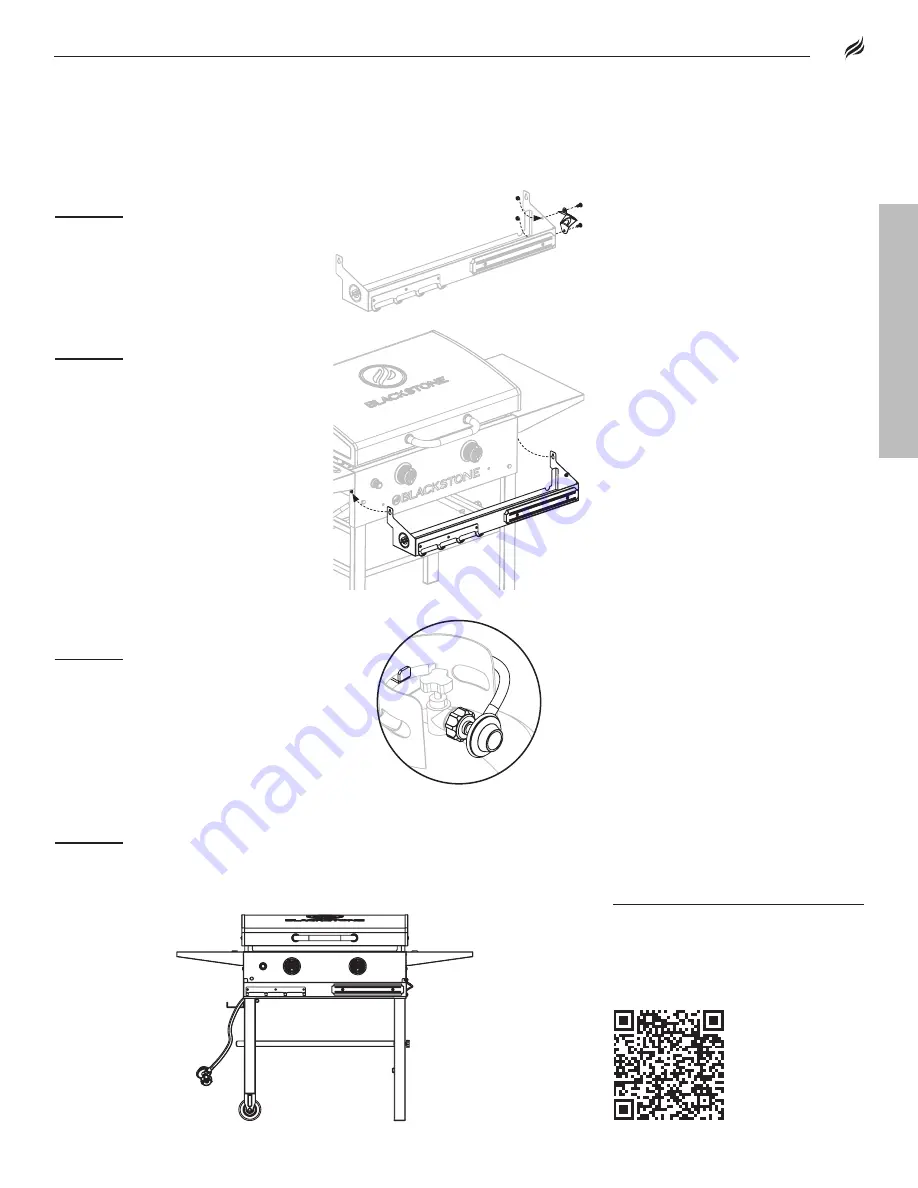
STEP 09
Align the keyholes on
the sides of the front shelf with the
pre-installed screws of the griddle
body, and slide down to secure.
STEP 08
Use two (2) M6x12
screws and two (2) locknuts to
attach the bottle opener to the side
of the front shelf.
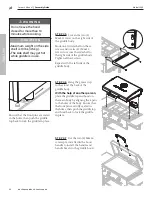
STEP 10
Connect the propane
tank (not included) and hook it
on the upper propane hanger so
that it nestles against the lower
propane holder. (Please reference the
Connection & Removal section of
the Fuel chapter.)
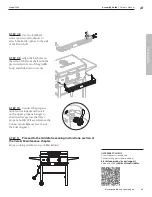
STEP 11
Proceed to the Griddle Seasoning Instructions section of
the Care & Maintenance chapter.
Enjoy cooking outdoors on your Blackstone!
09
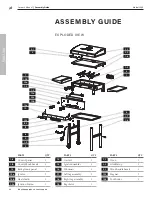
Model 2086
Assembly Guide


