Getting Started
12
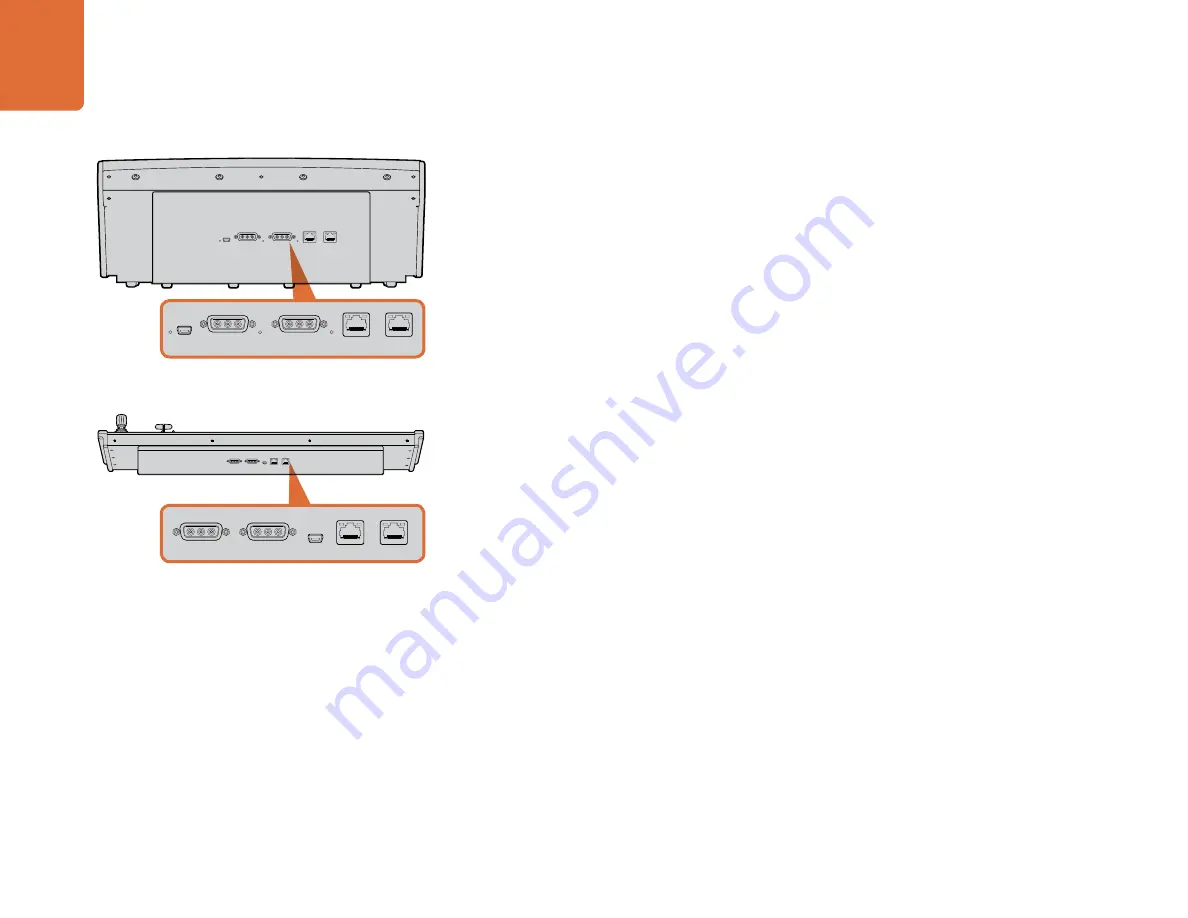
Plugging in a Control Panel
If you have purchased an ATEM Broadcast Panel, then you won't want to wait to plug in your computer, as
it's much more fun to plug in the hardware panel first!
Plugging in the ATEM Broadcast Panel is simple, because it's already set to the correct network settings to
plug into your ATEM processor chassis without any changes required.
Step 1.
Plug in the power to the ATEM Broadcast Panel. If you want redundant power supplies, then you
can purchase a second power supply and plug that into the second power connector.
Step 2.
Plug one end of an ethernet cable into one of the control panel’s ethernet ports. Either of the
ports will do, as there is an ethernet switch inside the panel, so both ports work the same.
Step 3.
Plug the other end of the same cable into the ethernet port on the ATEM processor chassis
labeled switcher control.
If everything is working fine, you should see the lights on the ethernet port start to flicker, and the
panel should come alive with buttons illuminated, and the main display on the panel should say ATEM
Production Switcher.
If you don't see this appear, then check the ATEM processor chassis and the control panel are powered
correctly and the cables are screwed in tight.
If things are still not working, then you should make sure you are not plugged into a network, and that your
panel is connected directly to your ATEM switcher processor chassis. If this is correct, then the most likely
cause of the problem is the switcher and the chassis have IP addresses in different ranges to each other. In
this case, you will need to check and set these as described later in this manual.
If you need to manually set the network settings, then you might need to get the assistance of a technically
minded friend who understands how to set IP addresses. By default, the ATEM processor chassis is set to a
fixed IP address of 192.168.10.240, and the ATEM Broadcast Panel is set to fixed IP of 192.168.10.10, so when
connected directly they should communicate without any problems. Go to the connecting to the network
section in this manual to see how to check and set your switcher to these addresses. Then it should work OK
with a direct connection between the panel and the switcher processor chassis.
ATEM 1 M/E Broadcast Panel rear connectors
ATEM 2 M/E Broadcast Panel rear connectors
MAIN 12V POWER
BACKUP 12V POWER
USB 2.0
ETHERNET 2
ETHERNET 1
MAIN 12V POWER
BACKUP 12V POWER
USB 2.0
ETHERNET 2
ETHERNET 1
MAIN 12V POWER
BACKUP 12V POWER
USB 2.0
ETHERNET 2
ETHERNET 1
MAIN 12V POWER
BACKUP 12V POWER
USB 2.0
ETHERNET 2
ETHERNET 1


