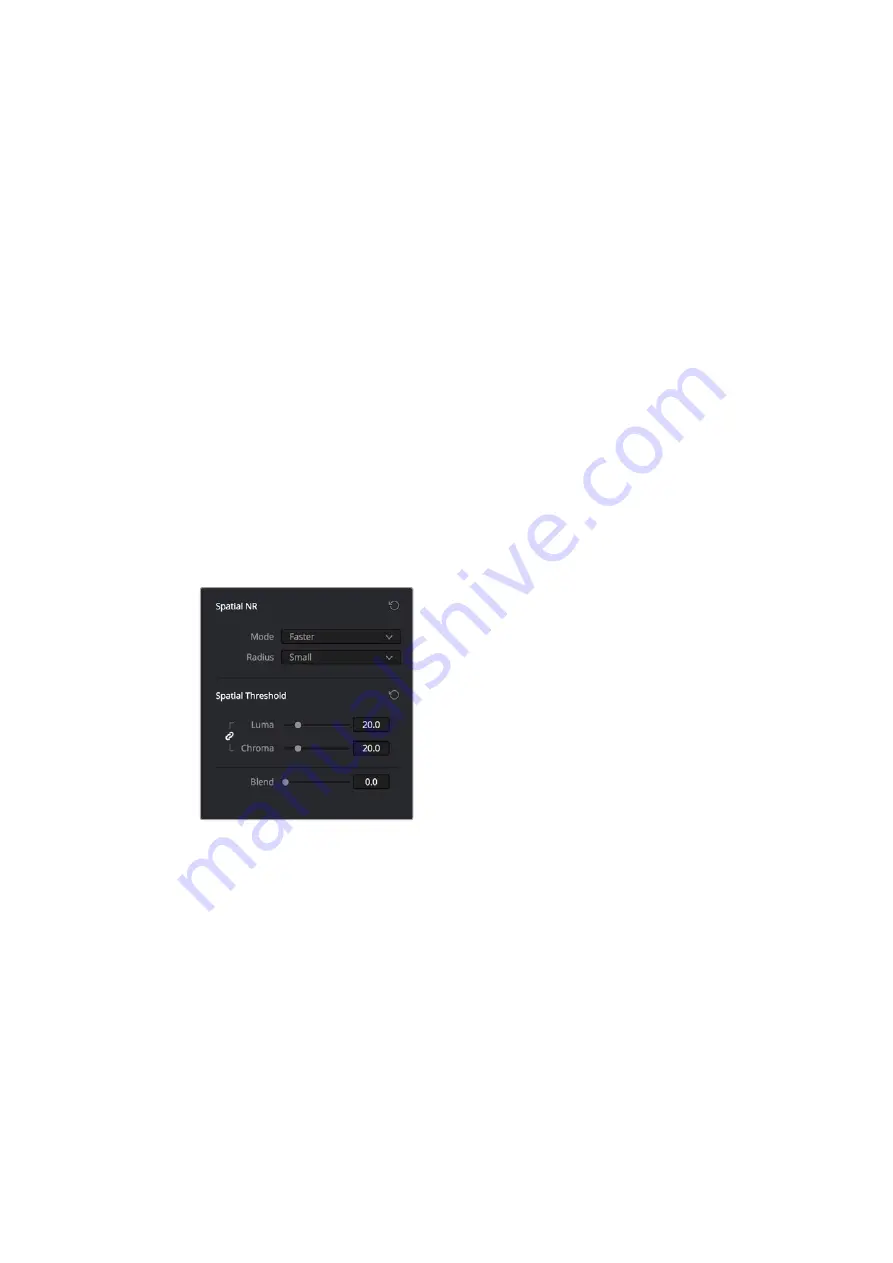
Luma/Chroma Threshold ganging:
Ordinarily, the luma and chroma threshold
parameters are ganged together so that adjusting one adjusts both. However, you can
ungang these parameters in order to adjust different amounts of noise reduction to
each component of the image, depending on where the noise happens to be worst.
Motion Threshold:
Defines the threshold separating moving pixels in motion, which
are above this threshold, versus moving pixels that are static, which are below this
threshold. Using ‘motion estimation’, temporal noise reduction is not applied to regions
of the image that fall above this threshold, in order to prevent motion artifacts by not
applying frame averaging to parts of the image that are in motion.
Lower values omit more of the image from temporal NR by considering more subtle
movements. Higher values apply temporal NR to more of the image by requiring faster
motion for exclusion. You can choose between 0 and 100, where 0 applies temporal
NR to no pixels, and 100 applies temporal NR to all pixels. The default value is 50,
which is a suitable compromise for many clips. Be aware that if you set too high a
motion threshold, you may see artifacts in moving parts of the image.
NR Blend:
Lets you dissolve between the image as it’s being affected by the Temporal NR
parameters (at 0.0) and the image with no noise reduction at all (100.0). This parameter lets
you easily split the difference when using aggressive temporal noise reduction.
Spatial NR Controls
The ‘spatial NR’ controls let you smooth out regions of high-frequency noise throughout the
image, while attempting to avoid softening by preserving detail. It’s effective for reducing noise
that temporal NR can’t.
Use the spatial NR settings to clean
noise that temporal NR settings can’t.
Mode:
Added in DaVinci Resolve 12.5, the ‘mode’ pop-up lets you switch spatial NR
between two different algorithms. ‘Faster’ uses the previously available method of
noise reduction that’s good at lower settings, but may produce artifacts when applied
at higher values. ‘Better’ switches the spatial NR controls to use a higher quality
algorithm that produces vastly superior results, at the expense of being more processor
intensive to render. Both modes of operation use exactly the same controls, so you can
switch between both modes using the same settings to compare your results.
Radius:
Options include ‘large’, ‘medium’, and ‘small’. A smaller radius offers greater
real time performance, and can provide good quality when using low luma and chroma
threshold values. However, you may see more aliasing in regions of detail when using
low NR threshold values.
83
Working with Clips in DaVinci Resolve
Summary of Contents for cintel
Page 99: ...Cintel Scanner インストール オペレーションマニュアル 2020年5月 日本語 ...
Page 196: ...Manuel d utilisation et d installation Mai 2020 Français Cintel Scanner ...
Page 293: ...Installations und Bedienungsanleitung Mai 2020 Cintel Scanner Deutsch ...
Page 395: ...Manual de instalación y funcionamiento Escáner Cintel Mayo 2020 Español ...
Page 492: ...安装操作手册 2020年5月 中文 Cintel Scanner ...
Page 589: ...설치 및 사용 설명서 Cintel 스캐너 2020년 5월 한국어 ...
Page 686: ...Руководство по установке и эксплуатации Русский Май 2020 г Cintel Scanner ...
Page 783: ...Manuale di istruzioni Cintel Scanner Maggio 2020 Italiano ...
Page 880: ...Manual de Instalação e Operação Cintel Scanner Maio 2020 Português ...
Page 977: ...Kurulum ve Kullanım Kılavuzu Cintel Tarayıcı Mayıs 2020 Türkçe ...


