Help
86
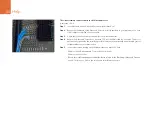
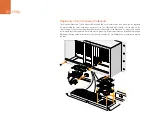
Each fan is designed to be replaced without needing to switch off power to the Videohub. The fan tray is
located at the base of the unit. Remove the left and right screws from the fan tray using a number 01 Phillips
head screwdriver. While supporting the tray with a thumb, remove the center screw. Having removed all
three screws, slowly allow the fan tray to swing open until you see the black, plastic dust-filter on top of
each fan. Gently pull the tray towards you while continuing to swing it down until you feel the rear of the
tray detach from the Universal Videohub chassis. Note which fan is faulty. You will see the colored power
cables connecting to each fan. Each fan power cable connects to the Videohub motherboard with a plastic
connector. While supporting the fan tray with one hand, unplug the plastic power connectors of all three
fans with the other hand. The fan tray can now be fully removed.
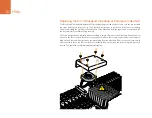
Place the fan tray on a flat surface and unclip the top of the dust-filter housing using the four clips. Remove
the top of the housing and the filter. Four screws will be revealed. Remove the four screws around the faulty
fan. Then remove the base of the dust-filter housing and also the faulty fan. Replace the fan with a spare
unit and then reinstate the base of the dust-filter housing. Secure the housing and fan with the four screws
and ensure the heads of the screws recess in to the dust-filter housing. If the screws fail to recess, flip over
the housing and try again. Place the dust filter over the base of the housing and then snap on the top of the
dust-filter housing.
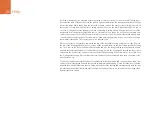
Position the fan tray underneath the base of the Universal Videohub chassis and connect all three fan power
cables to the motherboard. All three fans should immediately start running. Gently dock the rear of the fan
tray with the Universal Videohub chassis. Swing up the front of the fan tray and simultaneously push the tray
towards the Videohub motherboard until the rear of the fan tray slides in to place and the front swings shut.
Reinstall the three screws.

