COMPRESSOR ASSEMBLY
CB5A-021 page 16/24
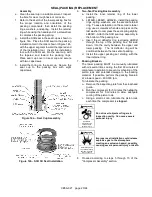
c. After the lower set of packing is started over the
piston rod, make sure the oil deflector ring
(excluding LB602) is properly aligned (with the
flat side down) over the piston rod. Use the hole
in the side of the packing box to center the
deflector ring. Once the deflector ring is over the
rod, the packing box can be fully inserted.
d. Install the upper packing box O-ring on the end
of the packing box.
e. Place the packing box spacer ring over the
O-ring.
f. Install the packing box retainer ring, with new
nylon locking inserts, and tighten securely.
g. Repeat the above steps for the remaining
packing box.
6. Rotate the crankshaft by hand a few times, then
uniformly tighten the crosshead guide capscrews per
Table 7 - "Bolt Torque."
7. Break in new packing per the "Seal (Packing)
Replacement" section of this manual.
8.
CYLINDER ASSEMBLY
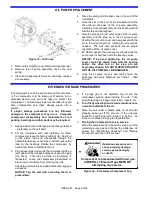
a. Install new O-rings in the bottom of the cylinder.
A small amount of grease may be used to hold
the O-rings in place during assembly.
b. Set the cylinder over the piston rods and against
the crosshead guide.
c. Install the cylinder capscrews. DO NOT tighten.
9.
PISTON RINGS
a. Place an expander in the top groove of the
piston. Place an expander in the second groove
with the break in this expander 180 degrees from
the break of the top expander. Place the third
expander in the bottom groove with its break in
the same position as the top expander.
b. Place piston rings in all three grooves of the
piston. Align the breaks in the piston rings
directly opposite the breaks in the corresponding
expanders.
10.
PISTONS
a. Rotate the flywheel by hand to bring one piston
rod to top dead center of the cylinder assembly.
b. Set the thrust washer and one shim on the
shoulder of the piston rod.
c. With light pressure, squeeze the piston rings
inward while threading the piston clockwise onto
the rod. Tighten with the 3" adjustable spanner
wrench.
d. Follow this same procedure for the second
piston.
e. Rotate the crankshaft by hand a number of times
to verify that the pistons are centered in the
cylinder bores. Adjust the cylinder so that the
pistons DO NOT touch the cylinder walls.
f. Using an alternating pattern, torque the cylinder
capscrews per Table 7 - "Bolt Torque."
11.
PISTON CLEARANCE
a. Rotate the flywheel by hand to bring one piston
to the top.
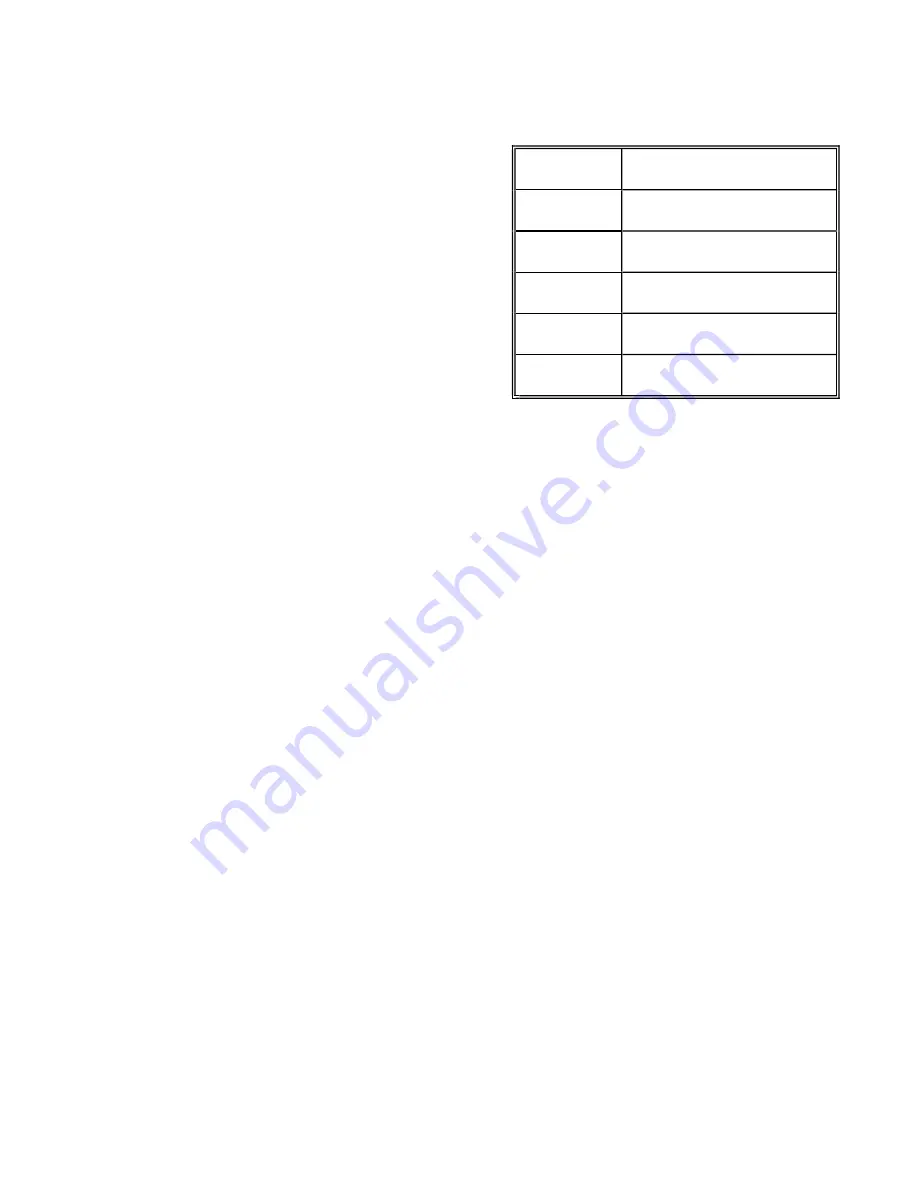
b. Measure the distance from the top of the piston
to the top of the cylinder.
LB161B
.010" to .025"
(.254 to .635 mm
LB162B
.015" to .030"
(.381 to .762 mm)
LB361B
.020" to .035"
(.508 to .889 mm)
LB362C
.025" to .040"
(.635 to 1.016 mm)
LB601B
.020" to .035"
(.508 to .889 mm)
LB602C
LB602B
.030" to .045"
(.762 to 1.143 mm)
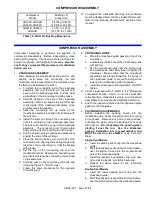
Table 11 - Piston Clearance
c. If necessary, remove the piston and add or
subtract shims accordingly.
d. Install new nylon locking inserts in the piston
retainer nuts.
e. Thread the piston nut onto the piston rod and
tighten securely with the spanner wrench.
f. Follow this same procedure for the second
piston.
12.
CYLINDER HEAD ASSEMBLY
If the valve assemblies have been removed from the
cylinder head, refer to the "Valve Replacement"
section of this manual.
a. Place the cylinder head O-rings in the grooves
located on top of the cylinder.
b. Place the cylinder head assembly on top of the
cylinder.
c. Hand tighten the outer capscrews and center
capscrews into the cylinder head.
d. Gaskets MUST be used on the center
capscrews of the LB161 and LB162 models.
e. Uniformly torque the cylinder head capscrews
per Table 7 - "Bolt Torque."
13. Rotate the compressor by hand to verify that it turns
freely. Ensure that the pistons are not hitting the
cylinder head assembly.
14. Follow all procedures listed in the "Pre-Startup
Check List" and "Startup Procedure" sections of this
manual.
15. Start the compressor and bring to normal operating
temperature. Stop the compressor, allow it to cool
and retorque the valve hold down screws per Table
7 -"Bolt Torque."

