background image

17

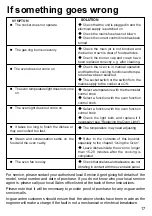
If something goes wrong

   SYMPTOM

n

The cooker does not operate.

n

The gas ring burns unevenly

n

  The oven does not come on

n

The oven temperature light does not come

on

n

The oven light does not come on

n

It  takes too long to finish the dishes, or

they are cooked too fast.

n

Steam  and  condensation  settle  on  the

food and the oven cavity.

n

The oven fan is noisy

   SOLUTION

u

Check that the unit is plugged in and the

electrical supply is switched on

u

Check the mains fuse has not blown

u

Check the correct control knob has been

turned.

u

Check  the  main  jet  is  not  blocked  and

the burner crown is clear of food particles.

u

Check the burner cap and crown have

been replaced correctly, e.g. after cleaning.

u

Check the oven is in manual operation

and that both a cooking function and tempe-

rature have been selected.

u

The socket switch or the switch from the

mains supply to the cooker are ON.

u

Select a temperature with the thermostat

control knob

u

Select a function with the oven function

control knob.

u

Select a function with the oven function

control knob

u

Check  the  light  bulb,  and  replace  it  if

necessary (see "Replacing the Oven Light")

u

The temperature may need adjusting

u

Refer  to  the  contents  of  this  booklet,

especially to the chapter “Using the Oven”.

u

Leave dishes inside the oven no longer

than  15-20  minutes  after  the  cooking  is

completed.

u

Check that shelves and bakeware are not

vibrating in contact with the oven back panel.

For service, please contact your authorised local Service Agent giving full details of the

model, serial number and date of purchase. If you do not know who your local service

agent is, please call your local Sales office listed at the back of these instructions.
Please note that it will be necessary to provide proof of purchase for any in-guarantee

service calls.
In-guarantee customers should ensure that the above checks have been made as the

engineer will make a charge if the fault is not a mechanical or electrical breakdown.

Summary of Contents for BC 75 X

Page 1: ...1 AU Instructions for the use and care of BC 75 X Mixed fuel cooker...

Page 2: ...ld or transferred to another person ascertain that the brochure is also given in order that the new user can be aware of the correct use of the machine and the relative warnings THESE WARNINGS HAVE BE...

Page 3: ...ng of a window or a more efficient ventilation by increasing the power of mechanical extraction if existing Contents MANUFACTURER ELECTROLUX ZANUSSI S p a Viale Bologna 298 47100 Forl Italy Important...

Page 4: ...er control knob normal 4 Central burner control knob double crown 5 Front right burner control knob simmer 6 Back right burner control knob normal 7 Oven function control knob 8 Thermostat control kno...

Page 5: ...nerator to be activated automatically To ensure maximum burner efficiency you should only use pots and pans with a flat bottom fitting the size of the burner used see table If you use a saucepan which...

Page 6: ...n allows you to roast or roast and bake simultaneously using any shelf Defrosting This function can also be used to assist in thawing of frozen food Thermostat Control Knob Turn the thermostat control...

Page 7: ...od with an acoustic alarm The maximum timing is 60 minutes Turn the Minute Minder knob clockwise to the maximum time position then turn it back to the required time The Minute minder will not affect i...

Page 8: ...AX 3 Open a window for ventilation 4 Allow the oven to run empty for approximately 45 minutes This procedure should be repeated with the fan cooking and grill function for approximately 5 10 minutes A...

Page 9: ...they transmit heat to the food inside them A Aluminium earthenware oven glassware and bright shiny utensils re duce cooking and underneath browning Hints and Tips B Enamelled cast iron anodized alumi...

Page 10: ...l when blind baking pastry It may also be used to finish off quiches or flans to ensure the base pastry is cooked through Food Temperature C Shelf Cooking Positions Time mins Biscuits 170 200 6 8 25 3...

Page 11: ...rring 170 8 12 Fillets Plaice Cod 170 4 6 Kebabs 180 10 15 Kidneys Lamb Pig 170 4 6 Liver Lamb Pig 170 5 10 Sausages 180 10 15 Toast 250 1 2 Heating through and Browning e g au gratin lasagne shepherd...

Page 12: ...h use conventional cooking l Even Heating for Baking The fan oven has uniform heating on all runner positions This means that batches of the same food can be cooked in the oven at the same time Howeve...

Page 13: ...akes Small and queen 160 170 Sponges 160 170 Madeira 140 150 Rich Fruit 130 140 Christmas 130 140 Meringues 90 100 Fish 170 190 Fruit Pies and Crumbles 170 200 Milk Puddings 130 140 Pastry Choux Short...

Page 14: ...more easily than if it is left to cool The Hob Top Regularly wipe over the hob top using a soft cloth well wrung out in warm water to which a little wasing up liquid has been added Avoid the use of t...

Page 15: ...local Service Centre who will be pleased to advise further Oven Cavity The enamelled oven cavity is best cleaned whilst the oven is still warm Wipe the oven over with a soft cloth soaked in warm soap...

Page 16: ...el To remove the back panel use a screwdriver This is a good opportunity to clean the back of the rear panel Wash the panels with very hot water and a detergent using a soft cloth If the shelf support...

Page 17: ...re ON u Select a temperature with the thermostat control knob u Select a function with the oven function control knob u Select a function with the oven function control knob u Check the light bulb and...

Page 18: ...V Top Heating Element 0 87 kW Bottom Heating Element 1 1 kW Grill Element 1 9 kW Convection Fan 30 W Circular element 2 18 kW Oven light 15 W Total rating 2 23 kW Supply voltage 50 Hz 230 240 V TYPE...

Page 19: ...all surface situated within 200mm from the edge of any hob burner and above the height of the hob must be a suitable non combustible material for a height of 150 mm for the entire depth and width of t...

Page 20: ...or then unscrew the bottom part of the foot until you obtain the required height Repeat the same operation with the other feet 4 Screw the feet into the relevant holes indicated in figure 1 5 Lift the...

Page 21: ...nto the instruction book envelope 3 After cleaning the hob from possible grease and film residuals left fix the gasket on the rear part of the hob paying attention not to close the fan slots Fig 4 4 T...

Page 22: ...is is the position of the stability bracket 3 Fix the stability bracket using two of the provided five fixing holes to the rear wall see diagram 4 Pull the cooker towards the rear wall as shown in the...

Page 23: ...lete combustion of gas proper flueing and to maintain temperature of immediate surroundings within safe limits Connection to the gas supply Gas connection must be carried out in conformity with the re...

Page 24: ...Upon completion of installation always check l that all the joints are completely sealed by using a soapy solution never a flame l that the gas pressure has been regulated to 1 00kPa for Natural Gas a...

Page 25: ...opriate pressure regulator should be installed on the entry tube In case pressure regulators for U LPG are used these should conform to the regulations in force Regulation of the minimum To regulate t...

Page 26: ...ce should be interposed between the appliance and the supply The yellow green earth cable must not be interrupted by the interrupter The brown coloured phase cable situated at terminal L of the termin...

Page 27: ...Park Cnr Bowen Bridge Road Campbell Street Bowen Hills QLD 4006 Telephone 07 3253 2000 Facsimile 07 3216 1688 Service and Spare Parts Tri Us Appliance Repairs Telephone 07 3274 3931 Facsimile 07 3287...

Page 28: ...0 890 900 910 Total cooker height 830 840 850 860 870 880 890 900 910 Height indicator for feet adjustment Follow the instructions Warning The installation must be carried out by quialified personnel...

Reviews: