www.blaubergventilatoren.de
vento eco(2) a50-4 Pro
10
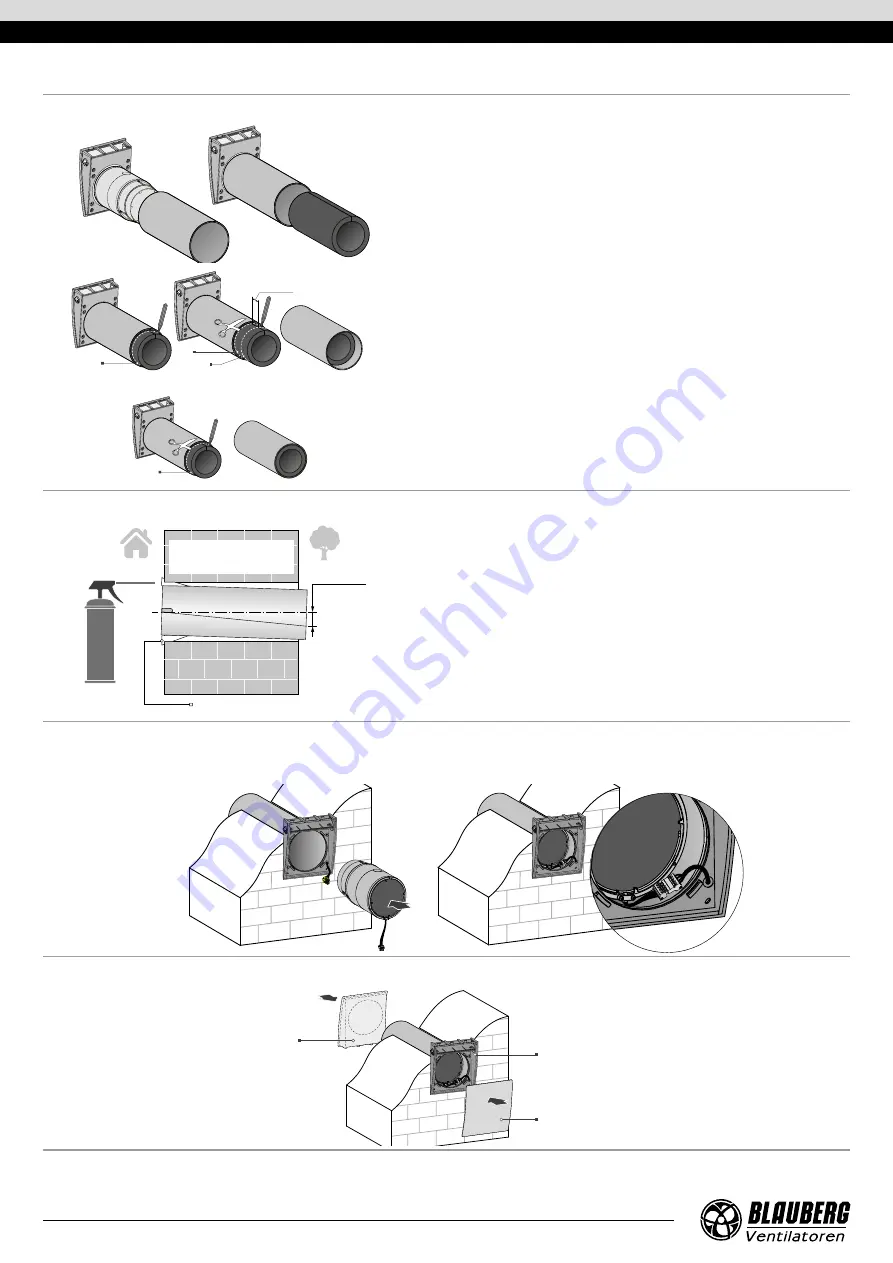
3.
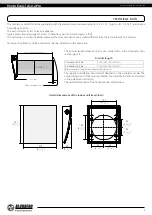
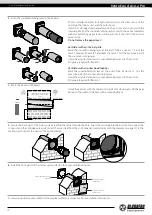
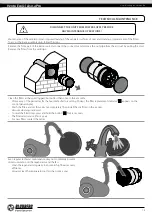
Insert the sound-absorbing layer in the air duct.
Prior to installation adjust its length with respect to the dimensions of the
cartridge, the indoor unit, and the outer hood.
Insert the cartridge during adjustment in the air duct and cover it with the
internal grille. Roll the sound-absorbing layer to match the air duct diameter
with the protecting paper layer outside and insert the roll in the air duct
against stop.
Do not remove the paper layer!
1
2
50 mm (2”)
1
Ventilator with an internal grille
Mark the sound-absorbing layer at the end of the air duct as 1. From the
mark 1 measure 50 mm (2’’) and make the mark 2. Cut the excessive part of
the sound-absorbing layer.
Insert the adjusted and ready sound-absorbing layer into the air duct.
No glue is required for fixation!
1
Ventilator with an outer hood (option).
Mark the sound-absorbing layer at the end of the air duct as 1. Cut the
excessive part of the sound-absorbing layer.
Insert the adjusted and ready sound-absorbing layer into the air duct.
No glue is required for fixation!
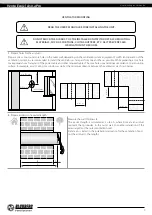
4. Insert the air duct in the wall.
Fill the gaps between the wall
and the hole with a mounting
foam.
Foam wedge
min 3 mm
Install the air duct with the minimum slope 3 mm downwards. Fill the gaps
between the wall and the hole with a mounting foam.
5.
Secure the back part of the indoor unit by leading the cable through the hole. Insert the cartridge into the air duct. Disconnect the
connector on the cartridge wire and connect the wires (laid from the control panel in accordance with the diagram on page 12) to the
mating part. Connect the parts of the terminal block.
6.
Install the front panel of the indoor unit and fasten the outer ventilation hood.
Front part of the
indoor unit
Back part of the
indoor unit
Outer ventilation hood
(option)
For mounting of the outer ventilation hood, please refer to a respective hood installation instruction.


