8
www.blaubergventilatoren.de
VENTO Eco / VENTO Eco2
WALL-MOUNTED CONTROL PANEL INSTALLATION AND CONNECTION
INSTALLATION AND CONNECTION OF THE CONTROL PANEL SHALL ONLY BE
PERFORMED BY A PROFESSIONAL ELECTRICIAN.
MAKE SURE THAT THE CONTROL PANEL IS NOT DAMAGED. DO NOT USE A DAMAGED
CONTROL PANEL!
DO NOT INSTALL THE CONTROL PANEL ON AN UNEVEN SURFACE!
WHILE TIGHTENING THE SCREWS, DO NOT APPLY EXCESSIVE FORCE TO PREVENT THE
CONTROL PANEL CASING DEFORMATION.
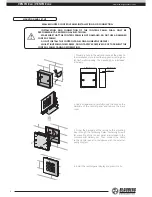
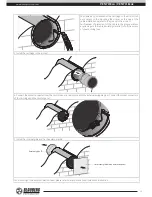
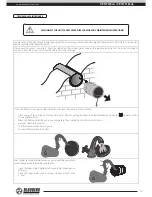
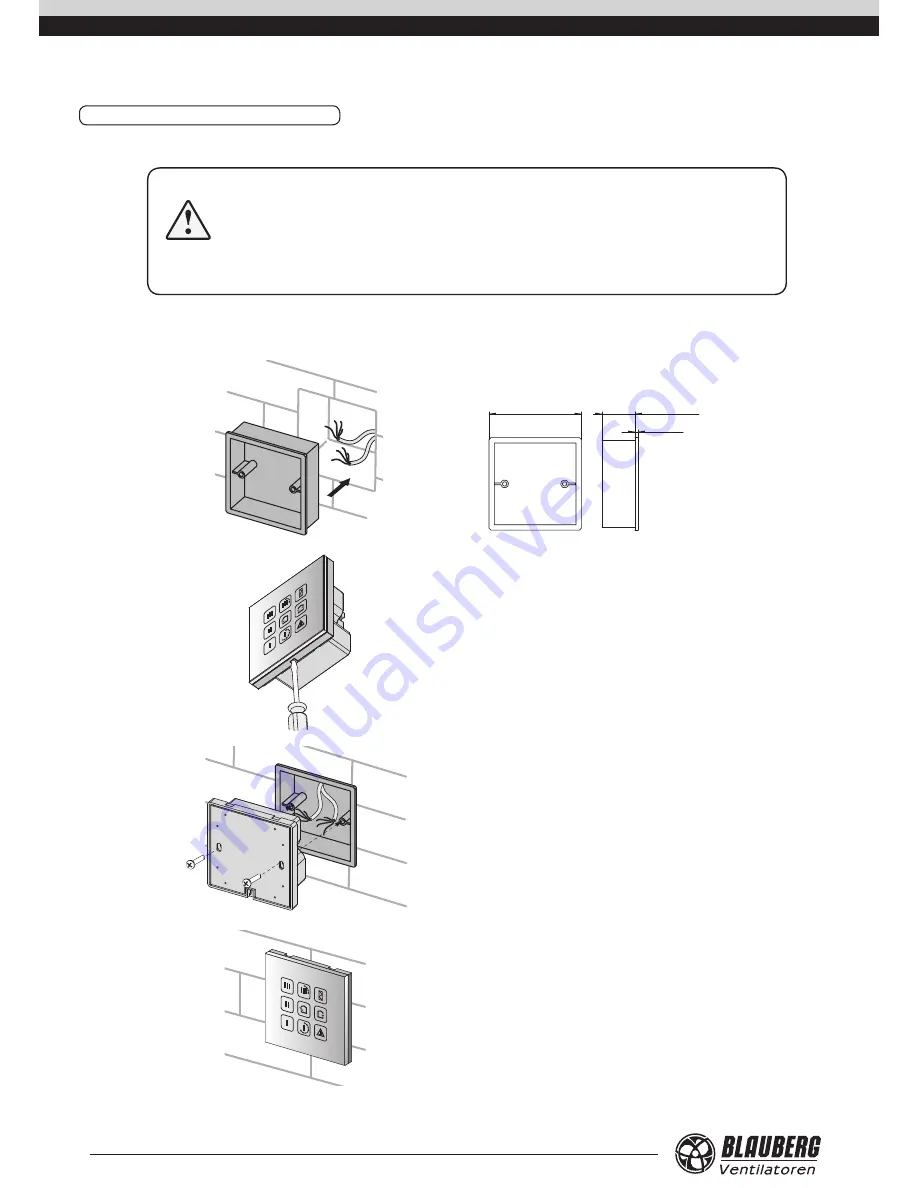
1. Prepare a hole in the wall and route all the wires to
the installation place. Insert the supplied mounting box
for flush wall mounting. The mounting box is included
in delivery.
94 mm (3 11/16")
34 mm (1 5/16")
3 mm (1/8")
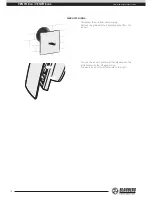
2. Use a screwdriver to carefully undo the clips on the
backside of the control panel and remove the back
cover.
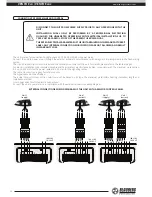
3. Screw the backside of the casing to the mounting
box through the fastening holes. Fastening screws
for mounting of the control panel are included in the
control panel delivery set. Then connect the cable
to the control panel in compliance with the external
wiring diagram.
4. Install the control panel display and press it to fix.
MOUNTING AND SET-UP


