background image

55

ENGLISH

DEUTSCH

FRANÇAIS

IT

ALIANO

NEDERLANDS

SVENSKA

ESP

AÑOL

POR

TUGUÊS

TECHNICAL DATA

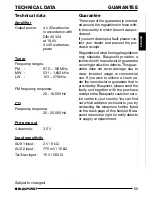
Technical data

Amplifier

Output power:

4 x 25 watts sine
in accordance with
DIN 45 324
at 14.4 V
4 x 45 watts max.
power

Tuner

Frequency ranges:
FM

:

87.5 – 108 MHz

MW :

531 – 1,602 kHz

LW

:

153 – 279 kHz

FM frequency response:

20 - 16,000 Hz

CD

Frequency response:

20 - 20,000 Hz

Pre-amp out

4 channels:

3,5 V

Input sensitivity

AUX 1 input :

2 V / 6 k

AUX 2 input :

775 mV / 10 k

Tel./Nav. input :

10 V / 560 

Subject to changes!

Guarantee

The scope of the guarantee is orientat-
ed around the regulations in force with-
in the country in which the unit was pur-
chased.

If your unit develops a fault, please con-
tact your dealer and present the pur-
chase receipt.

Regardless of what the legal regulations
may stipulate, Blaupunkt provides a
twelve-month manufacturer guarantee
covering production defects. This guar-
antee does not cover damage due to
wear, incorrect usage or commercial
use. If you wish to enforce a claim un-
der the manufacturer guarantee that is
provided by Blaupunkt, please send the
faulty unit together with the purchase
receipt to the Blaupunkt customer serv-
ice centre in your country. You can find
out which address is closest to you by
contacting the telephone hotline listed
on the back page of this booklet. Blau-
punkt retains the right to rectify defects
or supply a replacement.

 GUARANTEE

Summary of Contents for CASABLANCA Casablanca CD51

Page 1: ...Radio CD Casablanca CD51 Operating instructions ...

Page 2: ...2 Bitte aufklappen Open here Ouvrir s v p Aprite la pagina Hier openslaan a u b Öppna Por favor abrir Favor abrir ...

Page 3: ...3 ENGLISH DEUTSCH FRANÇAIS ITALIANO NEDERLANDS SVENSKA ESPAÑOL PORTUGUÊS 3 2 10 1 4 5 11 6 7 9 8 12 13 14 15 16 ...

Page 4: ...e time DIS to change the display con tents 8 MENU button opens the basic settings menu 9 button opens the flap and removable control panel flip re lease panel CONTROLS Arrow buttons OK button confirms menu en tries and starts the SCAN func tion DEQ button digital equalizer switches the equalizer on off AUD button audio adjusts bass treble balance and fader LD switches loudness function on off aura...

Page 5: ...ivable stations SCAN 39 Setting the scantime 39 Programme type PTY 39 Optimising radio reception 41 Displaying scrolling text 41 Setting the display 41 Traffic information reception 42 CD mode 43 Switching to CD mode 43 Selecting a track 43 Fast forwarding rewinding audible 43 Random play MIX 43 Scanning tracks SCAN 43 Repeating a track REPEAT 44 Pausing playback PAUSE 44 Changing the display 44 T...

Page 6: ...with the unit be fore setting off on your journey You should always be able to hear police fire and ambulance sirens from afar For this reason set the volume of whatever you are listen ing to to a reasonable level Installation If you want to install your car radio your self please read the installation and connection instructions that follow these operating instructions Accessories Only use access...

Page 7: ...oid making direct skin contact with the control panel s contacts If necessary clean the contacts with a lint free cloth soaked in alcohol Removing the control panel 1 Press the button 1 The control panel locking mechanism opens First pull the control panel straight off the unit and then out towards the left The unit switches off after the con trol panel is removed All the current settings are save...

Page 8: ... again The unit switches on The settings ra dio CD CD changer or AUX that were set before the unit was switched off will be reactivated Switching on off using button 3 To switch the unit on press button 3 To switch the unit off press button 3 for longer than two seconds The unit switches off Switching on by inserting a CD If the unit is switched off and the CD drive does not contain a CD Press the...

Page 9: ... cause hearing damage When you have finished making your changes press the MENU 8 or OK button VOLUME ADJUSTMENT Mute instantaneous volume reduction This feature allows you to instantane ously reduce mute the volume to a lev el preset by you Briefly press button 3 MUTE appears in the display Setting the mute level You can set the unit s mute level Press the MENU button 8 Keep pressing the button u...

Page 10: ...peed at which the vehicle is travelling In or der for this to work your car radio must be connected in the manner described in the installation instructions The automatic sound level can be ad justed in six steps from 0 to 5 Press the MENU button 8 Keep pressing the button un til AUTO SOUND appears in the display Set the automatic sound level us ing the and buttons When you have finished making yo...

Page 11: ...on to prevent the car radio from switching to al ternative frequencies that are transmitting different programme content Note REG must be separately activated de activated in the unit s menu Switching REG on off Press the MENU button 8 Keep pressing the button un til REG followed by ON or OFF appears in the display To switch REG on off press the or button Press the MENU 8 or OK but ton Switching t...

Page 12: ...eception or to also tune into those with a weak re ception Press the MENU button 8 Keep pressing the button un til SENS appears in the display Press the button The display shows the currently set val ue for sensitivity SENS HI6 means that the tuner is highly sensitive SENS LO1 means it is set to the lowest sensitivity setting If SENS LO is selected lo lights up in the display Set the required sens...

Page 13: ... the OK button Scanning is stopped and the station that was tuned into last will then continue to be heard Setting the scantime Press the MENU button 8 Keep pressing the button un til SCANTIME appears in the dis play Set the required scantime using the and buttons When you have finished making your changes press the MENU 8 or OK button Note The set scantime also applies to scan ning carried out in...

Page 14: ...1 6 to select a programme type that is stored on one of these buttons The selected programme type is dis played briefly Press the or button to start the search The next station corresponding to your selected programme type will then be tuned into Note If no station is found that corresponds to the selected programme type you will hear a beep sound and NO PTY ap pears briefly in the display The sta...

Page 15: ...u experience a high radio station density Switching SHARX on off Press the MENU button 8 Keep pressing the button un til SHARX appears in the display Press the or button to switch SHARX on off SHARX OFF means no automatic bandwidth switching will be carried out SHARX ON means that automatic bandwidth switching will be carried out Press the MENU 8 or OK button Displaying scrolling text Some radio s...

Page 16: ...y listening to if while listening to a CD you leave the reception area of a traffic infor mation station that you are tuned into and the subsequent automatic search cannot find a new traffic in formation station if you retune the radio from a traffic information station to a station that does not broadcast traffic informa tion If you hear the warning sound you can either switch off traffic informa...

Page 17: ...If a CD is already inserted in the drive Keep pressing the CD C button until CD appears in the display Playback begins from the point at which it was last interrupted Selecting a track Press one of the arrow buttons to select the next or previous track If you press the button or button once the current track will be heard again from the beginning Fast forwarding rewinding audible To fast forward r...

Page 18: ... or several times for longer than two seconds until the required display appears Traffic announcements in CD mode If you want to receive traffic an nouncements whilst listening to a CD press the TRAF button Traffic announcement priority is active when the traffic symbol lights up in the display For further details please read the chapter entitled Traffic information reception Naming CDs The car ra...

Page 19: ... Press the button 9 The flip release panel opens and the CD is ejected Remove the CD and close the con trol panel CD changer mode Note Information on handling CDs inserting CDs and operating the CD changer can be found in the operating instructions accompanying your CD changer Switching to CD changer mode Keep pressing the CD C button until CHANGER appears in the display Playback is started using ...

Page 20: ...l the tracks on the current CD in random order briefly press button 5 MIX MIX CD appears briefly and MIX lights up in the display To play the tracks on all the insert ed CDs in random order press but ton 5 MIX again MIX ALL appears briefly and MIX lights up in the display Note In the case of the CDC A 08 and the IDC A 09 all the CDs in the changer are selected randomly In the case of other changer...

Page 21: ...ill appear in the display The currently active input position flashes Press the or button to se lect the character you want If you want an empty space simply select the underscore Press the or button to move from one input position to an other To save the name press the MENU 8 or OK button Deleting a CD name Listen to the CD whose name you wish to delete Press the MENU button 8 Press the or button...

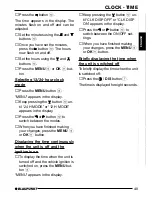
Page 22: ... listen to do not support this feature you can also set the time manually Setting the time automatically To set the time automatically press the MENU button 8 Keep pressing the button un til CLOCK MAN manual or CLOCK AUTO automatic ap pears in the display Press the button until CLOCK AUTO appears in the dis play When you have finished making your changes press the MENU 8 or OK button twice If the ...

Page 23: ...ress the or button to switch between the modes When you have finished making your changes press the MENU 8 or OK button Displaying the time continuously when the unit is off and the ignition is on To display the time when the unit is turned off and the vehicle ignition is switched on press the MENU but ton 8 MENU appears in the display Keep pressing the button un til CLK DISP OFF or CLK DISP ON ap...

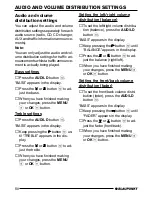
Page 24: ...ing the button un til TREBLE appears in the dis play Press the or button to ad just the treble When you have finished making your changes press the MENU 8 or OK button Setting the left right volume distribution balance To set the left right volume distribu tion balance press the AUD LD button BASS appears in the display Keep pressing the button until BALANCE appears in the display Press the or but...

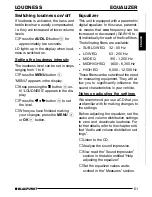
Page 25: ...ramet ric means that one frequency can be increased or decreased GAIN 8 to 8 individually for each of the five filters The following filters are available SUB LOW EQ 32 50 Hz LOW EQ 63 250 Hz MID EQ 315 1 250 Hz MID HIGH EQ 1 600 6 300 Hz HIGH EQ 8 000 12 500 Hz These filters can be set without the need for measuring equipment They will al low you to significantly influence the sound characteristi...

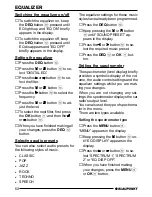
Page 26: ...IC POP JAZZ ROCK TECHNO SPEECH The equalizer settings for these music styles have already been programmed Press the DEQ button Keep pressing the or button until SOUND PRESET ap pears in the display Press the or button to se lect the required music preset Press the DEQ or OK but ton Setting the spectrometer The spectrometer level display briefly provides a symbolic display of the vol ume the audio ...

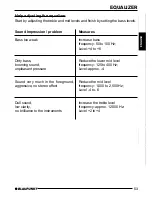
Page 27: ...s too weak Dirty bass booming sound unpleasant pressure Sound very much in the foreground aggressive no stereo effect Dull sound low clarity no brilliance to the instruments Measures Increase bass frequency 50 to 100 Hz Level 4 to 6 Reduce the lower mid level frequency 125 to 400 Hz Level approx 4 Reduce the mid level frequency 1 000 to 2 500 Hz Level 4 to 6 Increase the treble level frequency app...

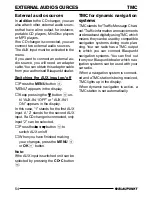
Page 28: ...st AUX input A 2 stands for the second AUX input If a CD changer is connected only input 2 can be selected Press the or button to switch AUX on off When you have finished making your changes press the MENU 8 or OK button Note If the AUX input is switched on it can be selected by pressing the CD C button TMC for dynamic navigation systems TMC stands for Traffic Message Chan nel Traffic information ...

Page 29: ...e country in which the unit was pur chased If your unit develops a fault please con tact your dealer and present the pur chase receipt Regardless of what the legal regulations may stipulate Blaupunkt provides a twelve month manufacturer guarantee covering production defects This guar antee does not cover damage due to wear incorrect usage or commercial use If you wish to enforce a claim un der the...

Reviews: