180-AF25 v1.11 per PE32 revs
March 15, 2021
Page 19
AF25
INSTALLATION INSTRUCTIONS
Flue Collar Installation
1.
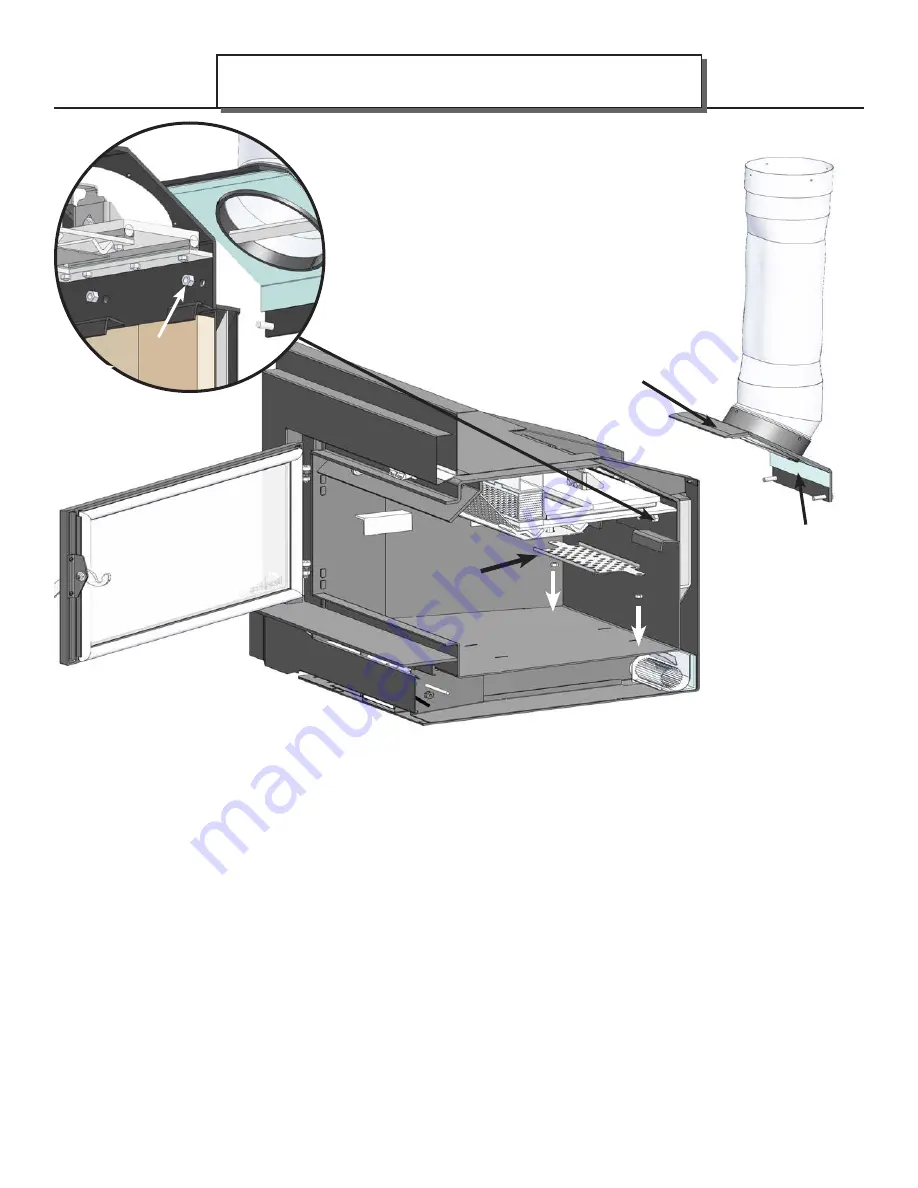
Open the loading door and remove the bypass sheild from the bypass opening using a 7/16” wrench, set
parts aside.
2.
Open the bypass door then reach up through bypass opening to grab flue collar assembly. Pull down to
align bolts with through holes in firebox rear then pull forward.
NOTE: ENSURE TOP SURFACE IS MATING WITH FIREBOX TOP. THE GASKET OF THE FLUE
COLLAR NEEDS TO BE IN CONTACT WITH THE FIREBOX ON ALL SIDES. FEEL THE AREA
WHERE THE FLUE COLLAR MAKES CONTACT WITH THE FIREBOX, IF THERE IS A GAP, THE FLUE
COLLAR IS NOT SEATED PROPERLY AND NEEDS TO BE REALIGNED.
3.
Once sealed, fasten flue collar assembly to firebox using a 9/16” wrench, and the supplied stainless steel
nuts (
Fig. 9
). Tighten flue adapter bolts evenly so a tight seal is maintained.
4.
Re-attach the bypass sheild using a 7/16” wrench.
Fig. 9
NUTS
NOTE: TO REMOVE THE INSERT FOR
THE PURPOSE OF INSPECTING THE
FIREPLACE INSERT AND FIREPLACE,
DO STEPS 1 to 4 IN REVERSE.
#Z2015
FLUE COLLAR
ASSEMBLY
#2055
1/4” GASKET
#2079
BYPASS SHEILD


