11
10
SECTION 4 – INSTALLATION
4.1
ABOVE-COUNTER INSTALLATION
1� Place blender on a flat, clean, and dry surface�
2� Ensure that the unit is turned off before plugging it into a separate 120-volt outlet�
3� Ensure that blender vents are unobstructed to allow proper cooling during use�
4.2
IN-COUNTER INSTALLATION
Preparation
1� Identify the best place to install your blender� Consider proximity to ingredients,
available counter space and access to a power outlet�
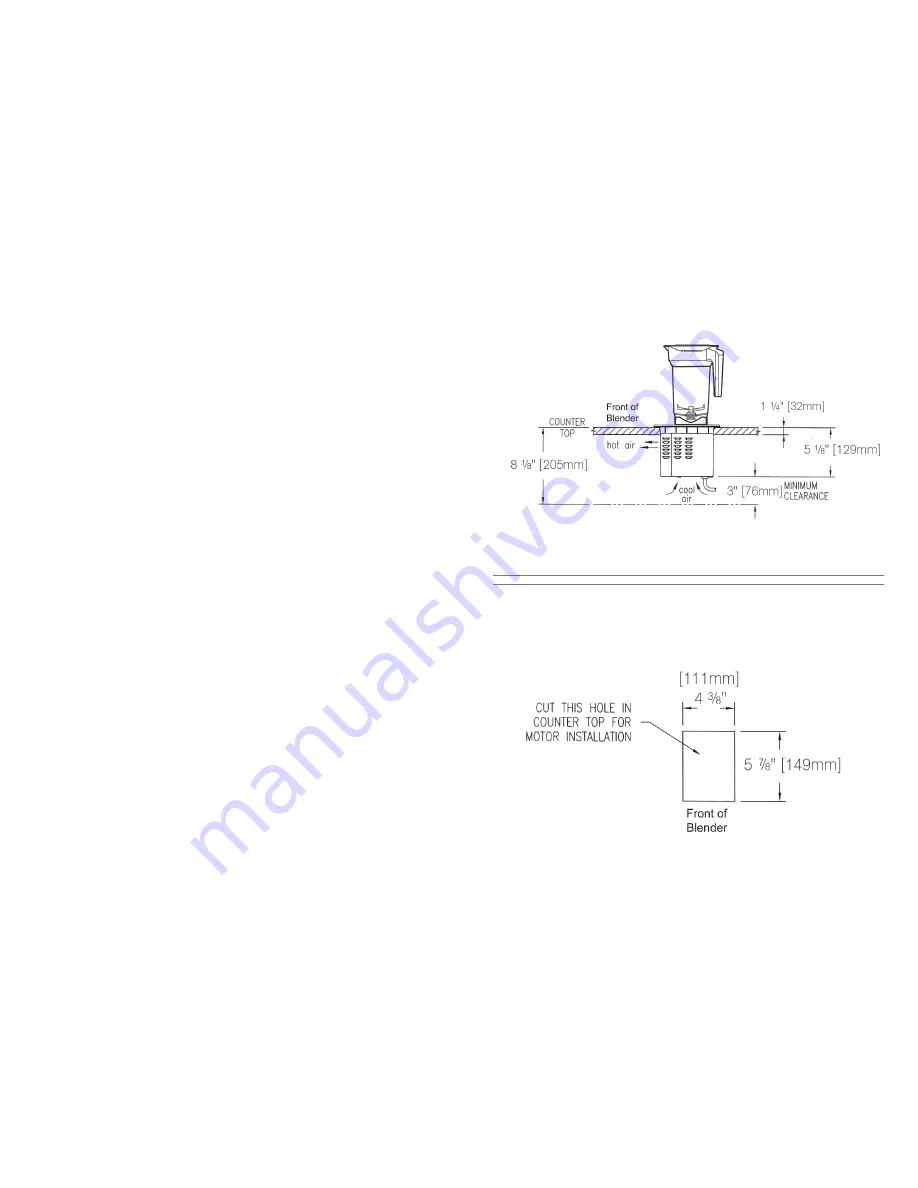
2� Ensure that the location meets all dimensional requirements (see Figure 3)�
• The countertop must be no thicker than 1 ¼ inch (32 mm) to ensure
adequate ventilation�
• For multiple blenders, allow 14-16 inches (356-406 mm) center-to-center
blender spacing�
NOTE: Ensure sufficient air circulation beneath the blender base� Hot air should
not be trapped beneath the counter top� Nothing should be stored within 3 inches
(76 mm) of the bottom of the motor�
3� Cut a hole in the counter top 4 ⅜ inches (111 mm) wide and 5 ⅞ inches (149
mm) long with the shorter side facing the operator (see Figure 4)� Make sure
all space requirements and measurements are correct BEFORE cutting� It is
recommended that you consult with a professional before cutting�
Installation
1� Remove the motor base from the motor base cover�
2� Slide the blender base into the new hole in your countertop, the LCD indicator
and touchpad facing the operator side of the blender� The rubber gasket on the
rim of the motor base should fit into the hole and rest lightly on the countertop�
3� Make sure the power switch is off� Plug the unit into a 120 volt outlet with 15
amp protection�
FIGURE 3
FIGURE 4


