Electric Pilot System V5
© Blichmann Engineering, LLC 2019
4
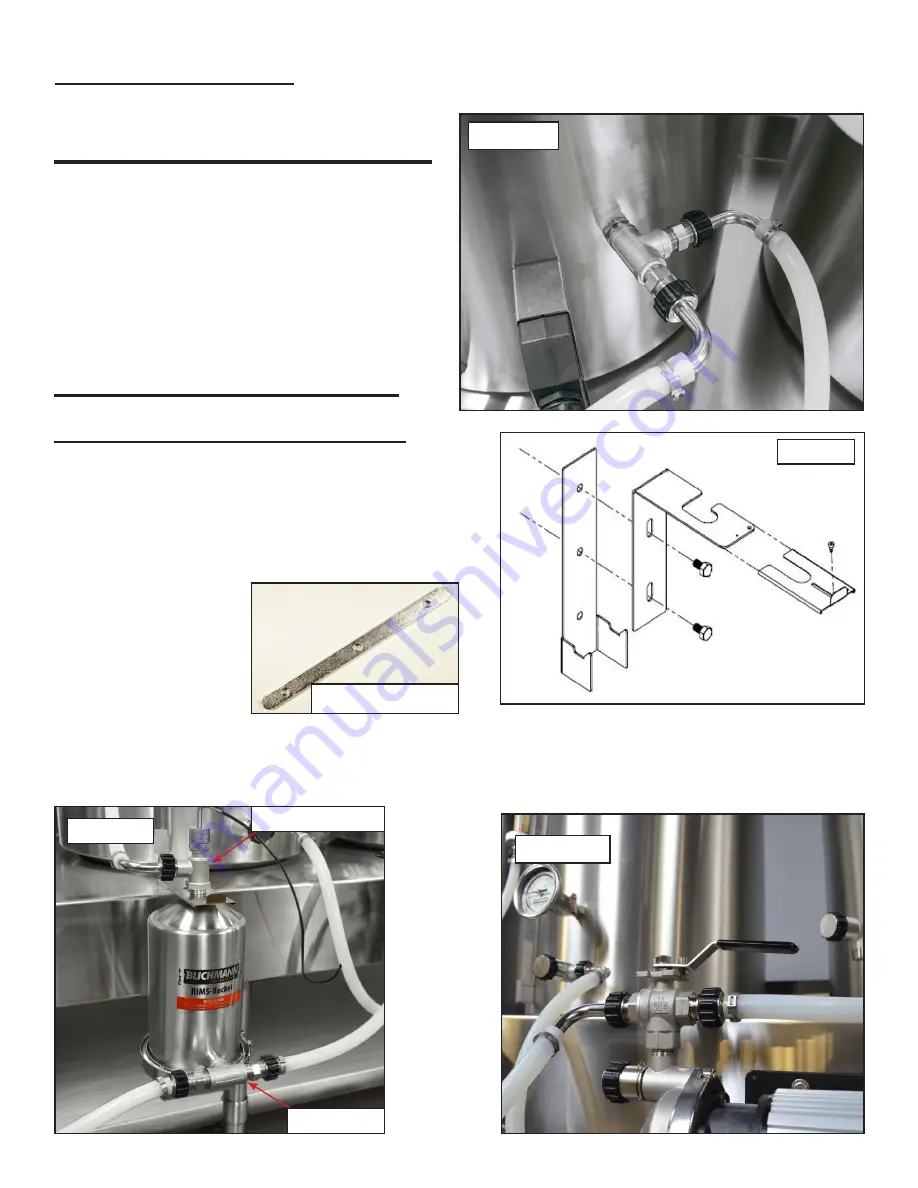
Installing the RIMS-Rocket™
Mount the RIMS-Rocket™ with the HopRocket™ Mounting
Bracket. Use the 5/16 hardware to secure the mounting
bracket to the table. (
Figure 1a
)
NOTE:
The Mounting Bracket will come with a t-slot plate that
is used for the TopTier stand. This will not be needed for the
Pilot System.
Not Needed
RIMS SYSTEM ONLY
Attach the temperature sensor to the top of the RIMS-Rocket™ with
PTFE tape. Attach the Tee Fitting to the front of the RIMS-Rocket™
with PTFE tape.
(Figure 1b)
Attach the Hex Nipples to the ends of
the Tee Fitting.
Attach the 3 way valve to the right RipTide outlet with
PTFE tape on a RIMS System.
(Figure 1c)
Figure 1a
Figure 1b
Sensor Fitting
Tee Fitting
Figure 1c
Use thread tape on all male threads except when using QuickConnects™.
Attach the Tee Fitting on your HERMS system to the bottom of
the HERMS coil with PTFE Tape. Attach the hex nipples to the
ends of the Tee Fitting using PTFE tape.
(Figure AB)
Figure AB
Thread Sealing Tape
HERMS SYSTEM ONLY
Summary of Contents for 1BBL
Page 8: ...Electric Pilot System V5 Blichmann Engineering LLC 2019 8 ...
Page 9: ...Electric Pilot System V5 Blichmann Engineering LLC 2019 9 ...
Page 10: ...Electric Pilot System V5 Blichmann Engineering LLC 2019 10 ...
Page 12: ...Electric Pilot System V5 Blichmann Engineering LLC 2019 12 ...
Page 13: ...Electric Pilot System V5 Blichmann Engineering LLC 2019 13 ...
Page 14: ...Electric Pilot System V5 Blichmann Engineering LLC 2019 14 ...
Page 16: ...Electric Pilot System V5 Blichmann Engineering LLC 2019 16 ...
Page 17: ...Electric Pilot System V5 Blichmann Engineering LLC 2019 17 ...


