background image

Blocks One  
3D Printer User Manual    


www.blockstec.com  | info@blockstec.com 

5


INSTALLATION   GUIDE   


1.


Unpack   your   new   Blocks   one.   

2.


Connect   the   power   cables   to   the   electronics.   

3.


Assemble   the   bowden   system.   

4.


Plug   in   the   power   cord.   

5.


Switch   on   your   Blocks   one.   


LEVELLING   THE   PLATE   


1.


Make   sure   the   nozzle   is   clean.   

2.


Get   a   sheet   of   regular   printer   paper   and   place   it   on   the   printing   glass.   

3.


Press   the   Knob   and   go   to   Control   

!

Level   Plate

!

Start   (If   the   nozzle   is   hot   wait   until   

it   cools   down).   

4.


Adjust   the   plate   level   knob   closest   to   the   nozzle   until   it   touches   the   paper   (you   must   
feel   some   friction   when   you   try   to   move   the   paper).   

5.


Press   the   Knob   to   continue   to   the   next   calibration   point.   

6.


Repeat   steps   4   and   5,   until   you   complete   the   remaining   4   calibration   points.   

7.


Press   OK.   


(Figure   2   –   Levelling   Knob   Detail)   

Summary of Contents for One

Page 1: ... www blockstec com USER MANUAL ...

Page 2: ...Blocks One 3D Printer User Manual www blockstec com info blockstec com 2 ...

Page 3: ... DIAGRAM 4 INSTALLATION GUIDE 5 LEVELLING THE PLATE 5 LOAD FILAMENT 6 FIRST PRINT 7 RECOMMENDED SOFTWARE 7 CAD SOFTWARE 7 3D MODEL DATABASE 7 SLICER SOFTWARE 7 CARE AND MAINTENANCE 8 CLEANING AND LUBRIFICATION 8 CLEANING THE NOZZLE 8 UPDATING THE FIRMWARE 8 SAFETY PRECAUTIONS 9 TECHNICAL SPECIFICATIONS 9 ...

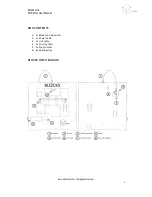
Page 4: ...e 3D Printer User Manual www blockstec com info blockstec com 4 BOX CONTENTS 1 1x Blocks one 3D printer 2 1x Power cable 3 1x Usb cable 4 1x Printing Glass 5 2x Spool holder 6 4x Bulldog clips BLOCKS ONE DIAGRAM ...

Page 5: ... clean 2 Get a sheet of regular printer paper and place it on the printing glass 3 Press the Knob and go to Control Level Plate Start If the nozzle is hot wait until it cools down 4 Adjust the plate level knob closest to the nozzle until it touches the paper you must feel some friction when you try to move the paper 5 Press the Knob to continue to the next calibration point 6 Repeat steps 4 and 5 ...

Page 6: ...Wait until the hotend reaches the appropriate temperature 3 Pull the extruder hindge while inserting the filament aproximately 2 5 cm in the extruder hole Figure 3 4 Select insert and press check if the filament being pulled 5 Wait until the extruder stops it may take a minute 6 Remove the extruded filament Figure 3 Extruder Hindge Detail ...

Page 7: ...cks one will home its axis and then heat up When the nozzle is at the desired temperature the print will start 8 After the print finishes remove the bulldog clips and the glass with the printed part 9 Let the glass cooldown naturally and then detach the part If the part gets stuck to the glass use a spatula to detach it RECOMMENDED SOFTWARE CAD SOFTWARE Onshape opensource complete modelling softwa...

Page 8: ...wait until it reaches the temperature 3 Remove the plastic from the nozzle using a pair of tweezers 4 Repeat Step 1 and select 0ºC UPDATING THE FIRMWARE We are constantly updating the firmware adding new features and correcting bugs It s advisable to keep up with our updates subscribing to our newsletter and our facebook 1 Download latest firmaware http www blockstec com one html 2 Install arduino...

Page 9: ...mage to the operator 4 Don t access the electronics bay while the power socket is plugged in 5 Don t use the printer in explosive environments or near any chemicals 6 Don t let any liquids near the printer 7 Always supervise the printing process TECHNICAL SPECIFICATIONS Print volume o 200x200x200mm Print speed o Up to 150mm s Travel speed o 200mm s Maximum layer resolution o 40 µm Extrusion o Bowd...

Reviews: