9
HDIP
Instruction Manual
Section 3 – Installation & Power-up
3.1 Unpacking
You will find the following items in the box:
• HDIP Encoder Unit (QTY=1)
• Power Adapter (QTY=1)
FOR SAFE AND RELIABLE OPERATION, DO NOT PLACE OBJECTS WITHIN 1 INCH OF THE UNIT THAT
BLOCK AIRFLOW.
FOR SAFE AND RELIABLE OPERATION, ONLY USE THE POWER ADAPTER
SUPPLIED WITH THE HDIP ENCODER.
3.3 Installation
The HDIP Encoder is designed to be mounted on a desk-top or table-top in the close proximity to a 120 VAC – 60 HZ power
plug.
3.3 Power-up
Plug the Power Adapter into a power plug (120 VAC – 60 HZ). Plug the power pin into the back of the HDIP unit at the
input marked “DC Power”.
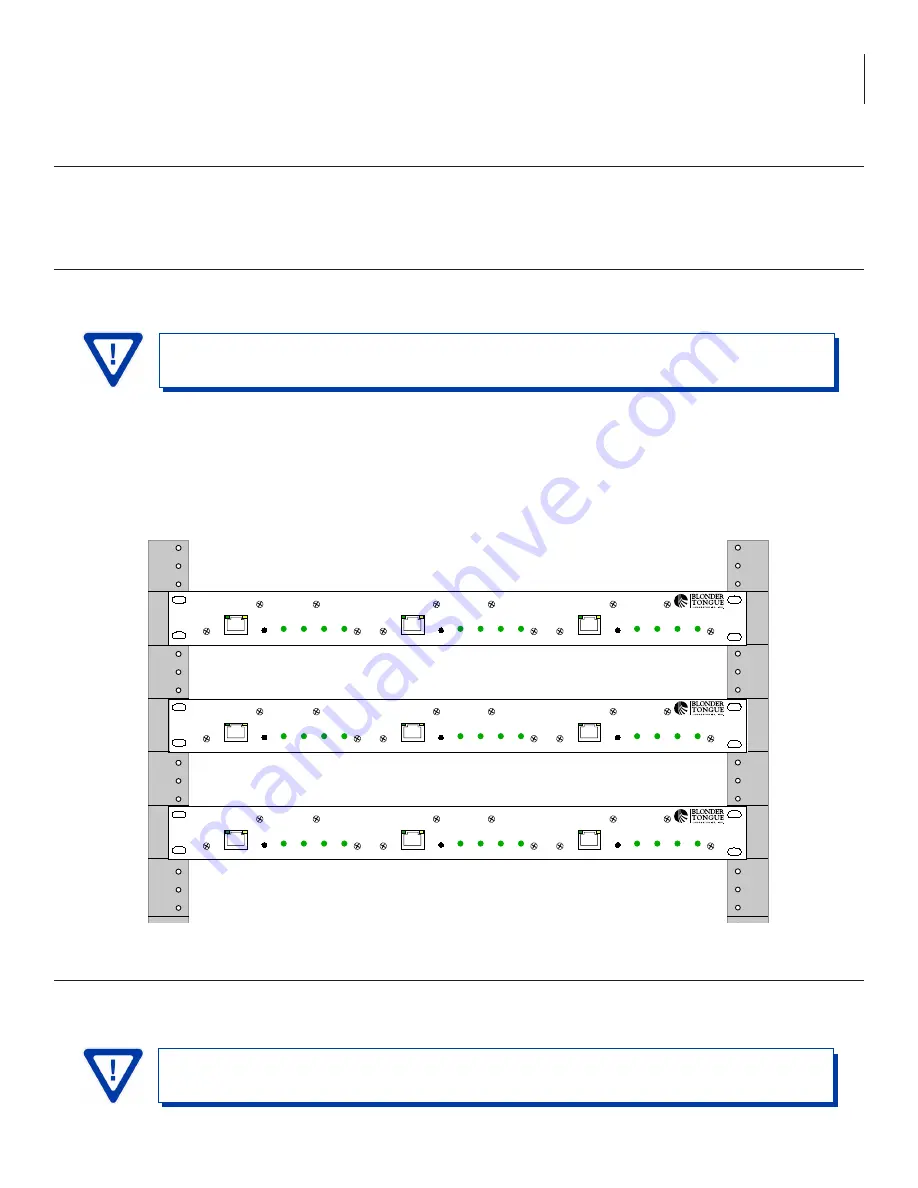
A 1RU (1.75”) open space must be provided above the encoders when mounted in a 19 inch rack or cabinet to allow air
flow for encoder heat dissipation. The Blonder Tongue HDIP-RP-3 accessory or a standard 19” rack shelf can be used for
mounting 3 encoder modules in 1RU. See example diagram image below.
10/100
INPUT
CONTROL
POWER
IP
RESET
OUTPUT
ENCODING
10/100
INPUT
CONTROL
POWER
IP
RESET
OUTPUT
ENCODING
10/100
INPUT
CONTROL
POWER
IP
RESET
OUTPUT
ENCODING
HDIP RACK ELEVATION DRAWING
FRONT VIEW
10/100
INPUT
CONTROL
POWER
IP
RESET
OUTPUT
ENCODING
10/100
INPUT
CONTROL
POWER
IP
RESET
OUTPUT
ENCODING
10/100
INPUT
CONTROL
POWER
IP
RESET
OUTPUT
ENCODING
L
10/100
INPUT
CONTROL
POWER
IP
RESET
OUTPUT
ENCODING
10/100
INPUT
CONTROL
POWER
IP
RESET
OUTPUT
ENCODING
10/100
INPUT
CONTROL
POWER
IP
RESET
OUTPUT
ENCODING
HDIP Encoder
HDIP Encoder
HDIP Encoder


