14
BT-CMTS Series
Setup Guide
7.2 “DHCP Relay” Panel
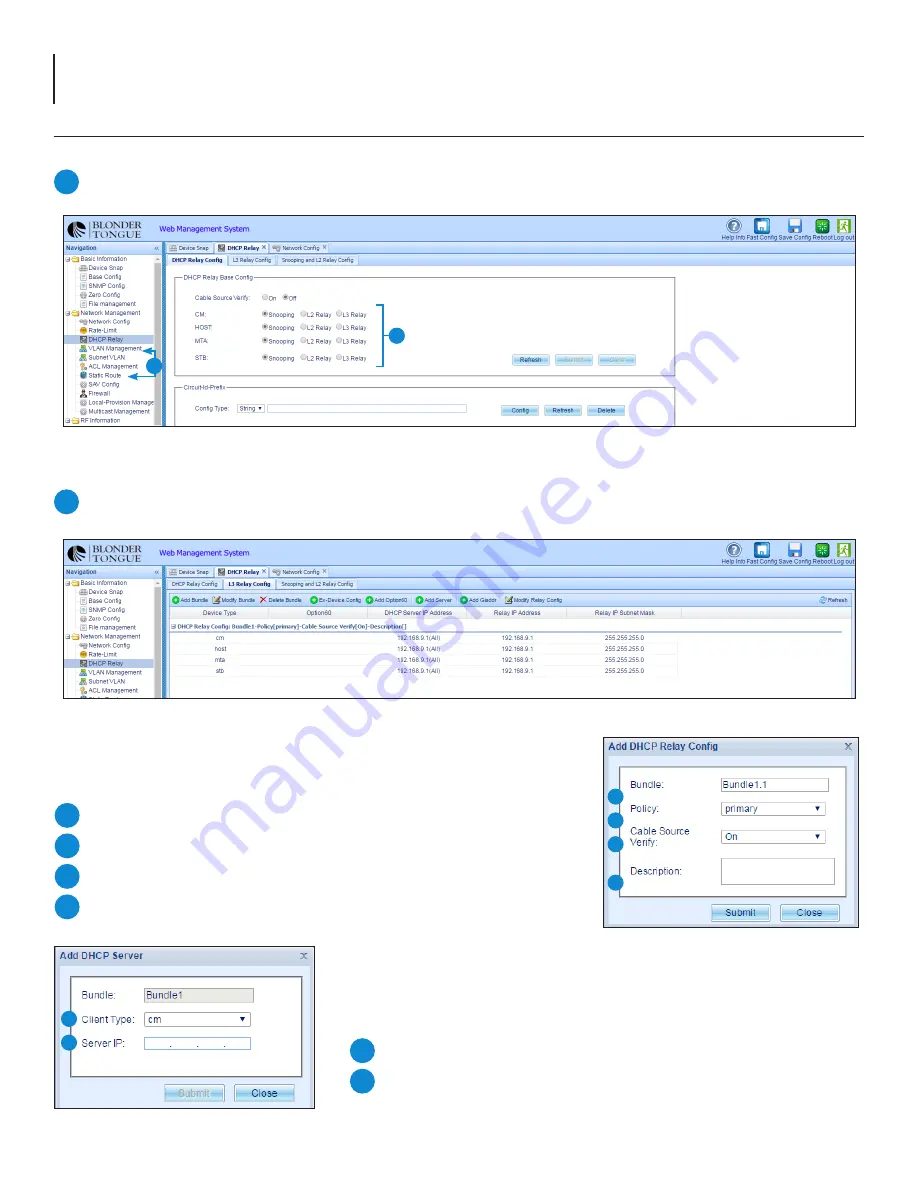
To set up the DHCP Relay (Figure 7.2a), do the following:
Find “Network Management” under the left navigation pane, expanding the category if needed. Click on the sub-category
“DHCP Relay” to open in the right pane.
Figure 7.2a - “DHCP Relay Config” Tab
Figure 7.2b - “L3 Relay Config” Tab
Select each device type by clicking on each row to enable editing for the following:
Click “
Add Server
” and make sure the following parameters are set:
Server Client Type: Set to “all”
Server IP:
This is the IP address of the DHCP/TFTP server
8
9
1
In the right panel, the first sub-tab will be “DHCP Relay Config”.
Set all four options (CM, HOST, MTA, STB) to “
Snooping
” and click submit.
2
Next click the “
L3 Relay Config
” sub-tab in order to set up bundle configuration.
Click “
Add Bundle
” set the following parameters:
Bundle: (optional) user-defined name
Policy: Set to “primary”
Cable Source Verify: Set to “On”
Description: (optional) user-defined description
4
5
6
7
Figure 7.2c - “Add DHCP Relay Config”
4
5
6
7
2
1
Figure 7.2d - “Add DHCP Server”
8
9


