7
BT-CMTS Series
Setup Guide
5.1 Accessing the User Interface
You must complete the steps described in the prior sections
before proceeding as follows:
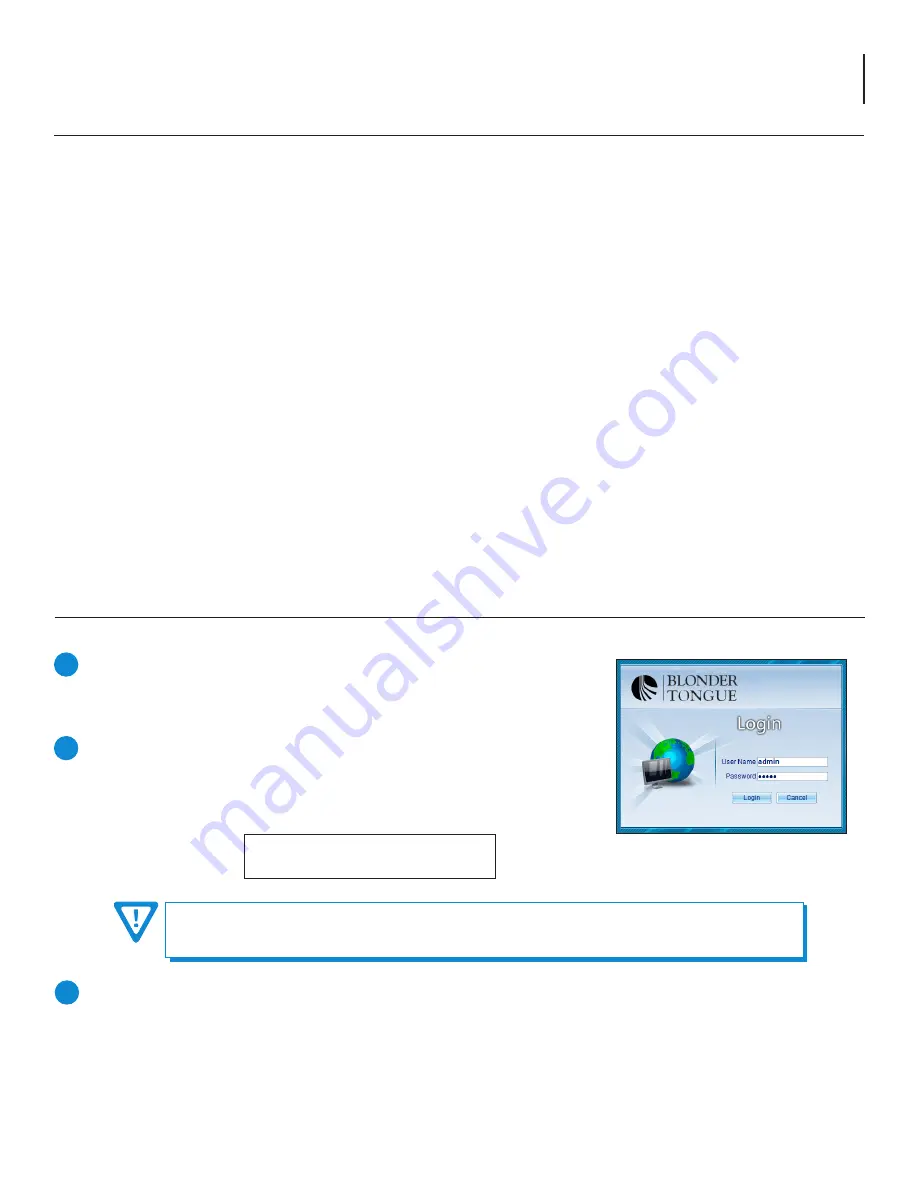
Figure 4.2a - “Login” Screen
Open a web browser on your computer (Chrome, Firefox or Internet Explorer
8+ is recommended). Using the default management IP address, enter the
following URL
(http://192.168.168.100)
into the address bar of your browser.
The “Login” screen (
Figure 4.2a) will appear.
Enter the following case-sensitive factory-default Username and Password
and click
[Login]
.
NOTE: When the user is logged in as Admin, the user has administrative read
and write permissions. Only one Admin can be logged in at a time.
Username =
admin
(case-sensitive)
Password =
admin
(case-sensitive)
1
2
3
Within the Advanced menu (see Sections 5.2 and 5.3), on the left-side, choose “Network Config” and the 2 following
IP Addresses can be set up:
•
GigE: This address should be on the same LAN as the router.
•
Outbound: This address is optional.
To ensure the security of the device, please consider modifying the default password after your first login.
Password modification is achieved through the Advanced Menu under the “System Management ” tab
and clicking on “User Management”. (See Sections 5.2 and 5.3)
Section 5 – Getting Started
The following steps explain how to do this for a computer with
Windows 7 (or higher) operating software:
(a) On your computer, navigate to the “Network and Sharing Center”.
(Note: It can be found using the search box in the Start Menu or for Windows 8.x, the Start Screen)
(b) Once open, click on “Change Adapter Settings” on left hand side of the window.
(c) Right-click on the “Local Area Connection”, and then click on the “Properties”.
(d) A dialog box entitled “Local Area Connection Properties” will appear. In this box, double-click on the “Internet
Protocol Version 4 (TCP/IPv4)”.
(e) A dialog box entitled ”Internet Protocol Version 4 (TCP/IPv4) Properties” will appear. Select the “Use the following
IP address” option and enter the following addresses:
IP address:
192.168.168.101
Subnet mask:
255.255.255.0
No need to enter a value for the Default Gateway.
Click
OK to close the dialog box. Your computer is now ready to communicate with the unit.
4.2 Ethernet Access (continued)


