115
e n r o u t e
e m e r g e n c i e s
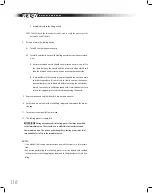
3. To loosen the tapered dowels which surround each stud, use a 1.5” diameter
brass drift and 5-6 lb hammer. Hold the brass drift against the center of the
axle shaft flange, inside the round driving lugs. Firmly striking the end of the
brass drift with the hammer will dislodge the tapered dowels.
[CAUTION]
Do not use a chisel or wedge to loosen the axle shaft and tapered
dowels. Doing so can damage the axle shaft, gasket, seal, or axle hub.
4. Mark the axle shaft so that it can easily be identified for reinstallation on the
side of the axle from which it is removed. Carefully remove the axle shaft, tak-
ing measures to catch the axle lubricant which may spill. Install a cover plate
over the open end of the hub to prevent dirt contamination and lubricant
spillage during towing.
5. Repeat the above procedure to remove the other axle shaft.
6. If the bus is equipped with air brakes, and if full working air pressure is not
present in the system, the spring brakes must be mechanically caged before
the vehicle can be towed. Proceed as follows:
[WARNING]
Caging the spring brakes disables the parking brake. Ensure
that the bus is completely secured against rolling by wheel chocks before cag-
ing the spring brakes.
6.1 On each of the rear combination brake chambers, a special release
stud tool is carried in a storage socket cast into the body of the cham-
ber. Remove the nut and washer from the end of the release stud tool,
and remove the tool from its socket.
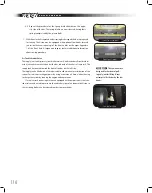
6.2 Remove the rubber dust cap from the access hole in the upper end of
the spring brake chamber. Insert the toggle end of the release stud
tool into the access hole. Be sure that the tapered end of the tool has
entered the hole in the piston inside the
chamber. Insert the tool until it bottoms.
6.3 Rotate the release stud tool a quarter turn
clockwise and pull outward, to engage the
toggle end with the piston. While holding
the bolt in its engaged position, install the
washer and nut onto the end of the tool.
Turn the nut down against the flat washer
until finger tight.
6.4 Using a 3/4” hand wrench, (do not use an
impact-type wrench), turn the release nut
clockwise until the internal spring is fully
caged.
Brass Drift
Summary of Contents for VISION 2011
Page 1: ...10013333 2011 BBCV D R I V E R S H A N D B O O K 10013333 BBCV BLUE BIRD VISION 2011 ...
Page 2: ......
Page 3: ...10013333 Revision B ...
Page 8: ...VISION D R I V E R S H A N D B O O K 6 ...
Page 26: ...VISION D R I V E R S H A N D B O O K 24 ...
Page 70: ...VISION D R I V E R S H A N D B O O K 68 ...
Page 137: ...135 Notes n o t e s ...
Page 138: ...VISION D R I V E R S H A N D B O O K 136 Notes ...
Page 139: ......
Page 140: ...10013333 2011 BBCV D R I V E R S H A N D B O O K 10013333 BBCV BLUE BIRD VISION 2011 ...


