________________________________________________________________________________________________________________________________________________
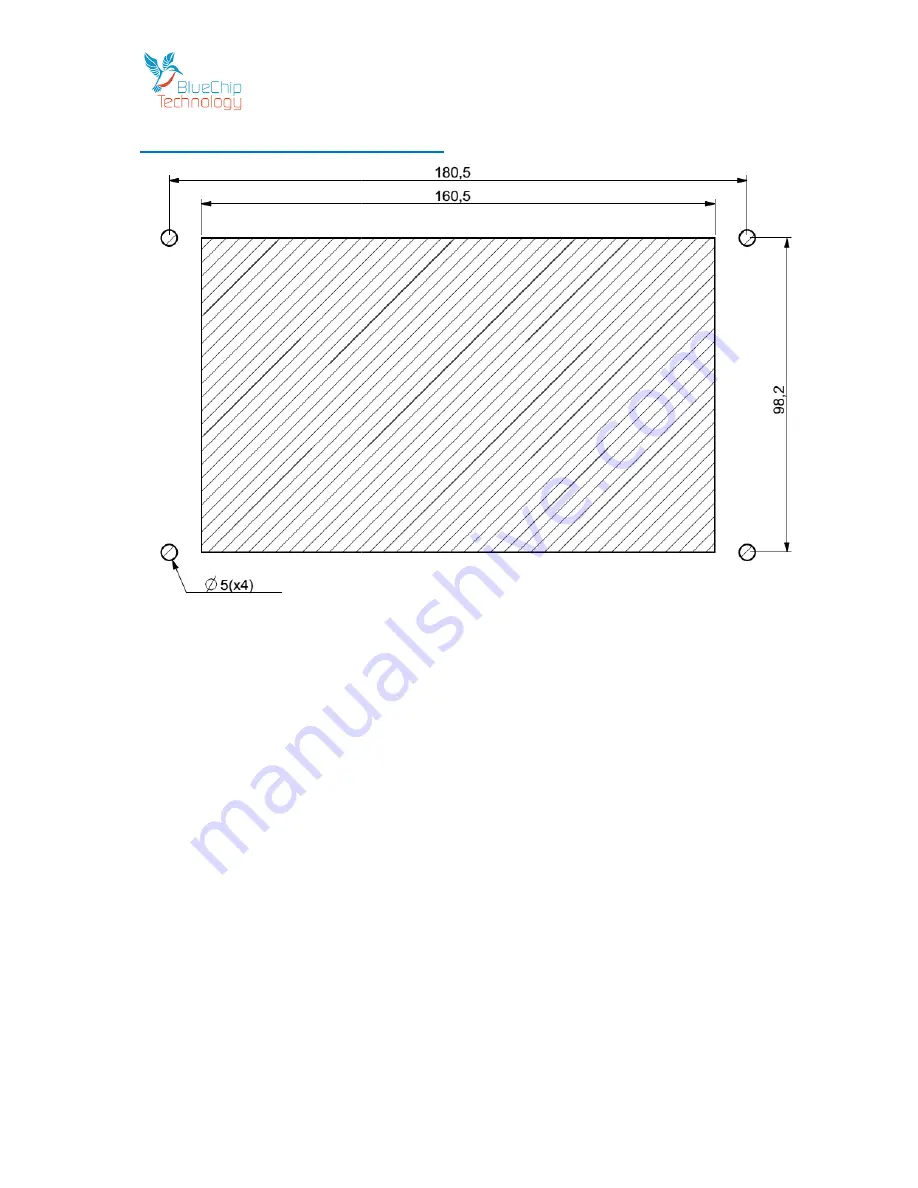
Mounting Outline -
Beta 712H
All dimensions are shown in millimetres.
Your Beta 712H is supplied with four threaded
712H in the four M4 brass inserts.
Once located you can mount your Beta 712H into the outline (as above) and then attach the supplied four
thumb nuts screws onto the nylon studs with your fingers. When the thumb nuts are finger tight the Beta
712H is mounted into your unit.
Please do not use pliers or any other tool to increase the tightness on the thumb nuts as this may cause the
nylon studs to break.
Beta Touch Computer
____________________________________________________________________________________________________________________________________________
Beta 712H
re shown in millimetres.
threaded nylon studs which are to be screwed into the rear of the Beta
Once located you can mount your Beta 712H into the outline (as above) and then attach the supplied four
thumb nuts screws onto the nylon studs with your fingers. When the thumb nuts are finger tight the Beta
e pliers or any other tool to increase the tightness on the thumb nuts as this may cause the
Beta Touch Computer
_____________________________________
Page | 28
studs which are to be screwed into the rear of the Beta
Once located you can mount your Beta 712H into the outline (as above) and then attach the supplied four
thumb nuts screws onto the nylon studs with your fingers. When the thumb nuts are finger tight the Beta
e pliers or any other tool to increase the tightness on the thumb nuts as this may cause the


