ProxySG 900 Series Maintenance & Upgrade Guide
91
Prepare the Equipment Rack
This procedure describes how to prepare the equipment rack for the Blue Coat ProxySG 900
series rail installation. Rack preparation includes selecting an appliance location on the
equipment rack, marking bracket locations, and installing cage nuts (if necessary).
To prepare the equipment rack for rail installation:
1.
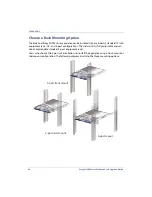
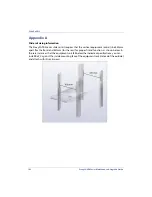
Choose a suitable rack location for the appliance. Keep in mind, rack mount equipment
should be loaded from the bottom-up to reduce the possibility of a tip over. If you decide
to install the appliance in an enclosed rack or cabinet, be sure it has sufficient depth to
accommodate the unit.
e
TIP:
Installing the appliance lower in the equipment rack offers easier installation and
better service access.
2.
Prepare the equipment rack for rail installation:
a.
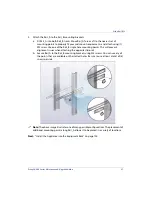
Mark the top and bottom edges of the 1U vertical area selected for the appliance
using a marker pen.
b.
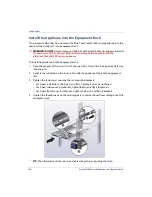
(Optional) If your equipment rack has 3/8 inch square holes, install 3/8 inch cage nuts.
The cage nuts are installed into (2) square holes; (1) at the bottom and (1) at the top
of the 1U area marked off in the previous step.
If you are installing into a 4-post rack with square holes, you must also install the cage
nuts into the rear vertical rails (cage nuts are not included with this kit).
3.
Double-check the marker location on the vertical rails to verify that they are even on all
sides of the equipment rack.
Summary of Contents for ProxySG SG900-10
Page 6: ...6 ProxySG 900 Series Maintenance Upgrade Guide...
Page 28: ...About This Guide 28 ProxySG 900 Series Maintenance Upgrade Guide...
Page 34: ...34 ProxySG 900 Series Maintenance Upgrade Guide Fan Assembly...
Page 56: ...56 ProxySG 900 Series Maintenance Upgrade Guide Memory Module...
Page 86: ...86 ProxySG 900 Series Maintenance Upgrade Guide BIOS Battery...
Page 103: ......
Page 104: ...www bluecoat com...

