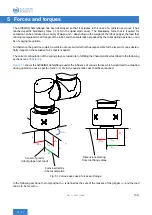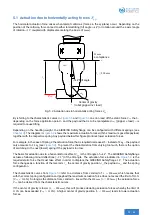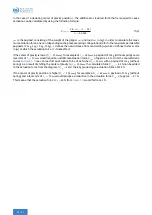
38
38
38
4
6
,4
8
5
4
,1
2
2,2
2
1,7
5
1,
3
2
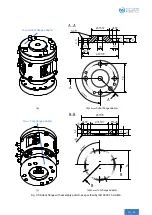
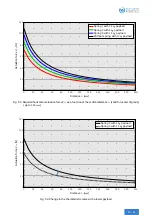
(a) Spring 1 (up to
2
.
5 kg
payload)
38
38
38
4
6
,4
8
5
4
,1
2
2,2
2
1,7
5
1,
3
2
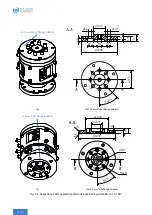
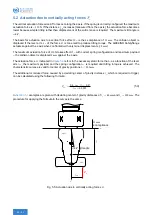
(b) Spring 2 (
2
.
5
-
5 kg
payload)
38
38
38
4
6
,4
8
5
4
,1
2
2,2
2
1,7
5
1,
3
2
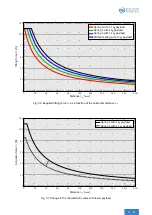
(c) Spring 3 (
5
-
7
.
5 kg
payload)
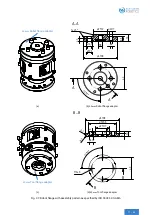
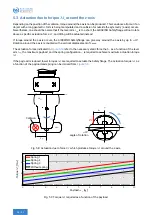
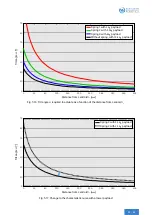
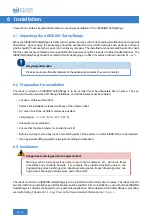
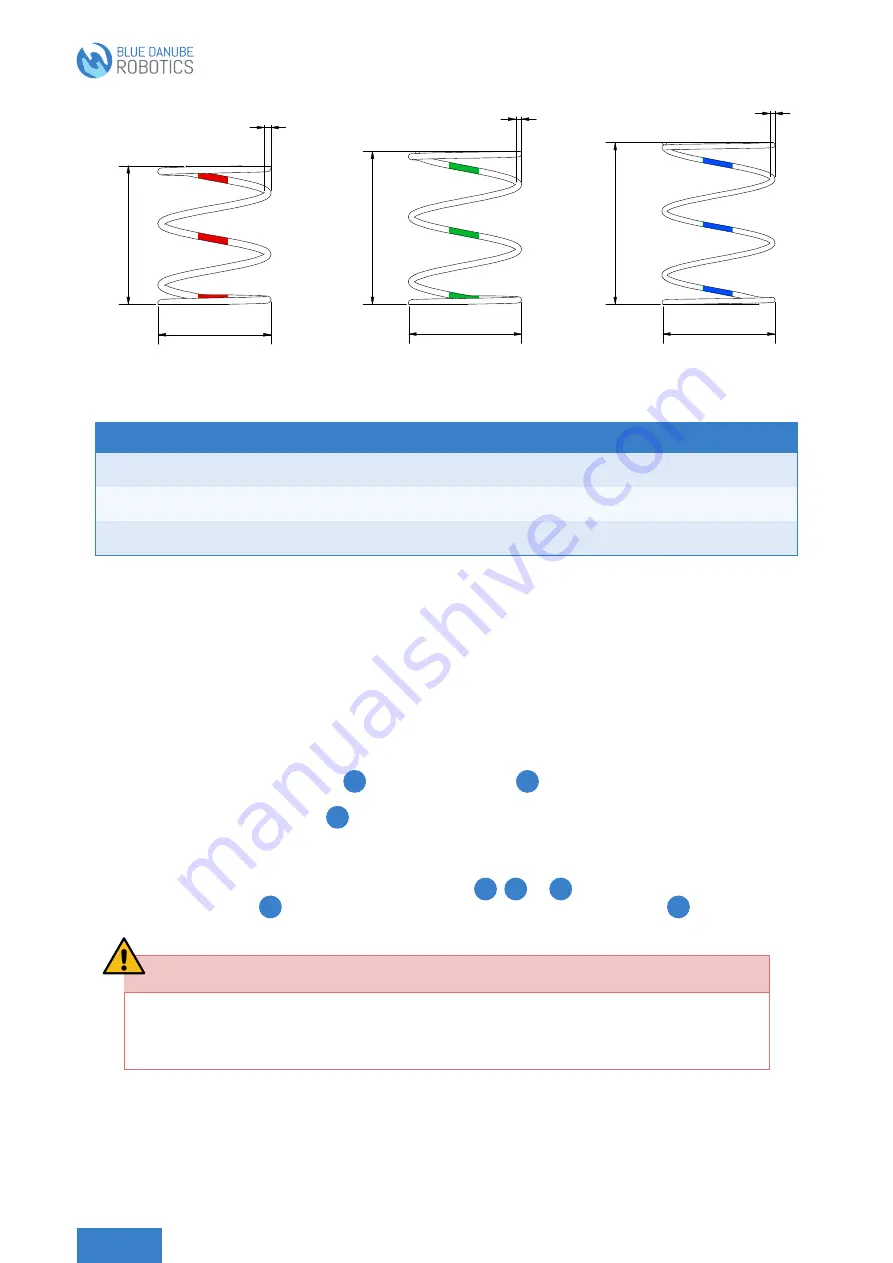
Fig. 4.3: Dimensions of the configurable springs (in
mm
).
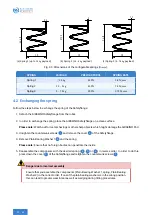
SPRING
PAYLOAD
PRELOAD FORCE
SPRING RATE
Spring 1
≤
2
.
5 kg
61
.
5 N
2
.
8 N
/
mm
Spring 2
2
.
5
-
5 kg
42
.
9 N
1
.
6 N
/
mm
Spring 3
5
-
7
.
5 kg
22
.
2 N
0
.
75 N
/
mm
4.2 Exchanging the spring
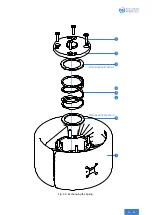
Follow the steps below to exchange the spring of the Safetyflange:
1. Detach the AIRSKIN® Safetyflange from the robot.
2. In order to exchange the spring, place the AIRSKIN® Safetyflange on a clean surface.
Please note:
Watch out for metal shavings or other sharp objects which might damage the AIRSKIN® Pad.
3. Untighten the countersunk screws
and remove the cover
of the Safetyflange.
4. Remove Plain Bearing Washer 1
and the spring.
Please note:
Ensure that no foreign bodies can penetrate the inside.
5. Reassemble the components with the desired spring (
or
) in reverse order. In order to do this,
press down the cover
of the Safetyflange and retighten the countersunk screws
Danger due to incorrect assembly
Ensure that you assemble the components (Plain Bearing Washer 1, spring, Plain Bearing
Washer 2) in the correct order. If one of the plain bearing washers is in the wrong position,
this can lead to greater wear & tear as well as wedging during tilting procedures.


