background image

Contact 1.800.762.1142 for assistance.

Do not return to place of purchase.

3

Owner’s manual: model 82300C portable outdoor heater 

Safety First!

Read and become familiar with this entire manual, especially the following 
precautions .
If you are unsure of anything in these instructions, STOP and contact  
 .800 .762 .42 for assistance . 

Caution:  This appliance is for outdoor use only (outside any 
enclosure). Always make sure there is fresh air ventilation.

•  Use only outdoors in a well-ventilated space, never use in a building, 

garage or any other enclosed area .

•  Always maintain at least 36” clearance (top) and 24” clearance (side) 

from combustible materials .

• Always place heater on a hard and level surface .
• Do not use if the wind velocity is greater than 0 miles per hour .
• Unit will operate at reduced efficiency below 40ºF (5ºC) .
• Keep sprinklers and other water sources away from burner and controls .

•  Always use extreme caution when near heater. Alert both children 

and adults to the hazards of high temperatures, especially to avoid 
burns or clothing catching fire.

•  Young children and pets should be carefully supervised when they 

are in the area of heater.

•  Do not hang clothing or other flammable materials either on or near 

heater.

•  Any guard or other protective device removed for servicing the 

heater must be replaced prior to operating the heater.

•  Certain materials or items, when stored under heater, will be subjected 

to radiant heat and could be seriously damaged .

•  Do not alter heater in any manner .
•  The pressure regulator and hose assembly supplied with the appliance 

must be used and replacements must be those specified by the 
manufacturer .

•  Inspect heater before each use .  If a damaged part is detected, do not 

operate until an original equipment replacement part has been properly 
installed . Use of unauthorized parts will void warranty and create an 
unsafe condition .

•  Do not attempt to use this appliance without a functional factory-

supplied gas regulator in place . If regulator becomes damaged, use only 
a factory-supplied replacement .

•  Prior to operating heater, replace any guards or protective devices 

removed for servicing .

•  During operation, do not touch burner assembly . The surface of heater’s 

emitter can reach temperatures approaching 600ºF .

•  After shutdown, do not touch burner assembly until heater has cooled 

(approximately 45 minutes after use) .

Notice:

 This product should not be used with any fuel other than liquid 

propane . Use of other fuels will detract from heaters performance and will 
void your warranty . 

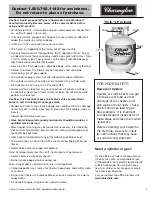
Before you do anything else,  

read and understand all  

precautions in Safety First!

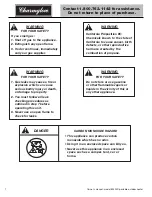
WARNING

FOR YOUR SAFETY

•  Purchaser assumes all risk in 

the assembly and operation 
of this unit. Failure to follow 
this manual’s warnings and 
instructions can result in 
severe personal injury, death 
or property damage.

•  Combustion of propane 

creates carbon monoxide, 
which, when used in 
enclosed areas, can kill you.

•  Dome is extremely hot to 

the touch during operation. 
Never touch the dome while 
the heater is operating. 
Wait for unit to cool down 
(approximately 45 minutes) 
after use.

•  Do not use in an explosive 

atmosphere. Keep heater 
away from areas where 
flammable liquids, gasoline, 
vapors, or explosives are 
stored or used.

Summary of Contents for Charmglow 82300C

Page 1: ...ARNING FOR YOUR SAFETY Improper installation adjustment alteration service or maintenance can cause injury or property damage Read the installation operation and maintenance instructions thoroughly be...

Page 2: ...use gasoline or other flammable vapors or liquids in the vicinity of this or any other appliance WARNING California Proposition 65 Chemicals known to the state of California to cause cancer birth defe...

Page 3: ...9 Step 9 Securing Tank 10 Operation Before Turning Gas Supply ON 11 Before Lighting 11 Lighting 11 Re Lighting 12 Shutdown 12 Operation Checklist 13 Troubleshooting 14 Maintenance 15 Storage 16 Servic...

Page 4: ...ulator and hose assembly supplied with the appliance must be used and replacements must be those specified by the manufacturer Inspect heater before each use If a damaged part is detected do not opera...

Page 5: ...ke it unsafe Keep burner area clean of all spiders webs or insects Inspect heater before each use Have heater inspected annually and repairs should be made by a qualified service person More frequent...

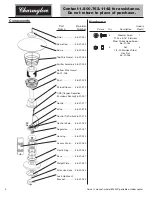
Page 6: ...Part Re order Name Number Finial 56 01 001 Dome Cap 56 01 002 Dome 56 01 003 Top Wire Guard 56 01 004 Emitter Assembly 56 01 005 Bottom Wire Guard 56 01 006 Post 56 01 009 Shroud Cover 56 01 012 ODS...

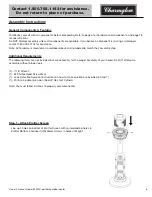
Page 7: ...ll hardware is mounted on a cardboard pack and numbered to match their assembly step Additional Requirements The following items are not included but are necessary for the proper assembly of your heat...

Page 8: ...th the holes Step 3 Attach Dome to Emitter Line up three studs in Emitter with holes in Dome Slide Dome carefully over studs clamping Top Wire Guard securely in place Note It may be necessary to adjus...

Page 9: ...hose always locate the hose out of pathways where people may trip over it or in areas where the hose may be subject to accidental damage To connect 14 1 oz or 16 4 oz cylinder Only cylinders marked p...

Page 10: ...y mixing one part liquid dishwashing soap and 3 parts water Spoon several drops or use squirt bottle of the solution onto the regulator canister connections Inspect the connections and look for bubble...

Page 11: ...bject and insert the 2 bolts through the open holes in one bracket and into the matching threaded holes in the second bracket Position bracket within 6 of the middle of the cylinder Finger tighten bol...

Page 12: ...dissipate Lighting 1 Turn Gas Control Knob to OFF position 2 Push in Control Knob and rotate to ON position This will activate the built in ignitor and light the burner If necessary keep depressing an...

Page 13: ...en heater is ON Emitter screen will become bright red due to intense heat The color is more visible at night Burner will display tongues of blue flame These flames should not be yellow or produce thic...

Page 14: ...soline or other flammable liquids or vapors q Heater is away from windows air intake openings sprinklers and other water sources q Heater is at least 36 clearance top and 24 clearance side from combus...

Page 15: ...DS Clean contact Contact certified technican Burner flame is low Note Heater operates at reduced efficiency below 40 F 5 C Gas pressure is low Outdoor temperature is less than 40 F and tank is less th...

Page 16: ...holes by using a heavy duty pipe cleaner Compressed air may help clear away smaller particles Carbon deposits may create a fire hazard Clean dome and emitter with warm soapy water if any carbon deposi...

Page 17: ...surfaces and to help prevent build up in air passages Never leave LP cannister exposed to direct sunlight or excessive heat Note Wait until heater is cool before covering Service To learn how to serv...

Page 18: ...e or service by you or any third party or failure to perform normal and routine maintenance on the product as set out in this owner s manual In addition the Limited Warranty does not cover damage to t...

Page 19: ...11 000 BTU hr input Heat Range Up to 10 foot diameter Fuel Liquid Propane Gas LP Cylinder Size Nominal 20 lb 5 Gallon OR 14 1 oz 400 grams 16 4 oz 465 grams Inlet gas supply pressure Maximum 150 PSI...

Page 20: ...pe 7 avant d utiliser l appareil 3 Ne jamais utiliser de flamme nue afin de d tecter une fuite MISE EN GARDE POUR VOTRE S CURIT Ne pas utiliser ni stocker d essence ou de liquides et autres vapeurs in...

Page 21: ...ment Avant d ouvrir le gaz ON 11 Avant d allumer l appareil 11 Allumer l appareil 11 Rallumer l appareil 12 teindre l appareil 12 Liste de v rifications effectuer avant la mise en marche 13 Guide de d...

Page 22: ...l Ne modifiez en aucune fa on l appareil Utilisez uniquement le r gulateur et le tuyau fournis avec l appareil Utilisez uniquement les pi ces de rechange sp cifi es pas le fabricant V rifiez le radiat...

Page 23: ...appareil Veillez ce que la zone du br leur demeure propre et sans toiles d araign es ou insectes V rifiez l appareil avant chaque utilisation Faites inspecter le radiateur ext rieur une fois par an et...

Page 24: ...ander Fleuron 56 01 001 Chapeau du d me56 01 002 D me 56 01 003 Protecteur sup rieur 56 01 004 metteur 56 01 005 Protecteur inf rieur56 01 006 P le montant 56 01 009 Couvercle du car nage 56 01 012 D...

Page 25: ...manquantes ou endommag es appelez le 1 800 762 1142 Accessoires suppl mentaires Les articles suivants ne sont pas fournis mais sont n cessaires afin de monter l appareil NE PAS tenter de monter l appa...

Page 26: ...ec les trous tape 3 Fixer le d me l metteur Alignez les trois tiges de l metteur avec les trous du d me Glissez le d me avec pr caution sur les tiges en fixant la partie sup rieure du protecteur m tal...

Page 27: ...onbonne de gaz de 14 1 oz 400 g ou 16 4 oz 465 g Utilisez uniquement des bonbonnes marqu es propane Remarque Du gel risque de se former sur certaines bonbonnes de 1 lb 453 g lorsqu elles sont presque...

Page 28: ...s apparaissent vous venez de d couvrir une fuite Desserrez puis serrez nouveau le raccord V rifiez nouveau le raccord Si des bulles persistent apr s plusieurs tentatives d branchez la source de propan...

Page 29: ...x moiti s de l trier de fixation autour de l objet et introduisez les boulons de 5 cm dans les trous de l trier et dans les trous filet s correspondant de l autre moiti de l trier Placez l trier moins...

Page 30: ...ez le gaz en r glant le bouton de contr le sur OFF arr t 2 Poussez le bouton de contr le et tournez le sur ON Vous amorcerez ainsi l allumeur int gr qui allumera le br leur Si n cessaire continuez mai...

Page 31: ...dra rouge vif en raison de l intensit de la chaleur La couleur est plus visible la nuit Des flammes bleues et jaunes appara tront au niveau du br leur Ces flammes ne devraient pas tre jaunes ni produi...

Page 32: ...de vapeurs inflammables q Le radiateur ext rieur est loin de fen tres bouches d air arroseurs automatiques et autres sources d eau q Laissez toujours un espace d au moins 36 po 91 cm au dessus et de...

Page 33: ...flamme du br leur est basse Remarque L appareil fonctionne un rendement moindre en dessous de 40 F 5 C La pression du gaz est trop basse La temp rature ext rieure est inf rieure 40 F 5 C et le r servo...

Page 34: ...ts de claq uement Les araign es et les insectes peuvent s introduire dans le br leur et les orifices de l appareil Ces obstacles risquent de provoquer des probl mes et de pr senter un danger lors de l...

Page 35: ...en plein soleil ou en contact direct avec une chaleur excessive Remarque attendez que le radiateur ext rieur ait refroidi avant de le couvrir Service apr s vente Pour toute assistance afin de vous pr...

Page 36: ...couvre pas le fini savoir les rayures les bosses les traces de d coloration de rouille ou les dommages r sultant des intemp ries apr s achat de l article Cette garantie remplace toute autre garantie...

Page 37: ...000 BTU heure P rim tre chauff Jusqu 3 m tres de diam tre Combustible Propane liquide gaz LP Type de bonbonne 20 lbs 5 galons 9 kg 18 9 litres OU 14 1 oz 400 grammes 16 4 oz 465 grammes Pression du ga...

Page 38: ...Pour toute assistance appeler le 1 800 762 1142 Ne pas retourner cet appareil au point de vente 19 Manuel d utilisation et directives d assemblage radiateur ext rieur portatif mod le 82300C...

Page 39: ...Pour toute assistance appeler le 1 800 762 1142 Ne pas retourner cet appareil au point de vente 20 Manuel d utilisation et directives d assemblage radiateur ext rieur portatif mod le 82300C...

Page 40: ...ourcing LLC All Rights Reserved Charmglow is a registered trademark of Homer TLC Inc Fabriqu en Chine pour Blue Rhino Global Sourcing LLC Winston Salem NC 27104 ETATS UNIS 1 800 762 1142 www bluerhino...

Reviews: