Contact 1-800-762-1142 for assistance.
Do not return to place of purchase.
®
Owner’s manual: model 200209 outdoor patio heater 7/28/04
11
Contact 1-800-762-1142 for assistance.
Do not return to place of purchase.
®
Owner’s manual: model 200209 outdoor patio heater 7/28/04
12
Step 12 – Check for Leaks
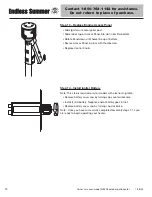
• Make 2-3 oz. of leak check solution by mixing one part liquid
dishwashing soap and three parts water.
• Turn tank valve ON.
• Check Gas Line / Control Valve for leaks:
• Spoon several drops of solution onto Gas Line and Control Valve
connection.
• Inspect the solution at the connection to look for bubbles.
• If NO bubbles appear, then the connection is secure.
• If bubbles appear, there is a leak -
• Turn Tank valve OFF.
• Loosen screw on Clip.
• Release Gas Line fitting from control valve and re-attach making sure
connection is secure (see Step 7).
• Retighten Clip.
• If you continue to see bubbles after several attempts, contact
1-800-762-1142 for assistance.
Check Gas Line / Tank valve for leaks:
• Turn tank valve ON.
• Spoon several drops of solution onto Gas Line and Tank valve
connection.
• Inspect the solution at the connection to look for bubbles.
• If NO bubbles appear, then the connection is secure.
• If bubbles appear, there is a leak:
• Turn Tank valve OFF.
• Release Gas Line fitting from Tank valve and re-attach making sure
connection is secure (see Step 11).
• If you continue to see bubbles after several attempts, contact
1-800-762-1142 for assistance.
• Turn Tank Valve OFF.


