background image

Outdoor Patio Heater Model No. GWU9209SP & GWU9209W

Contact 1.800.762.1142 for assistance. Do not return to place of purchase.

page no.

Assembly Instructions (continued)

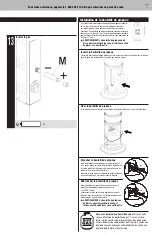
Installing LP Gas Tank

To operate you will need (1) precision-filled standard grill LP gas 
tank (20 lbs.) with external valve threads.

Note: 

An empty standard grill LP gas tank weighs approximately  

18 lbs.  A precision-filled standard grill LP gas tank should weigh 
no more than 38 lbs.

  Caution: LP gas tank must be properly 

disconnected and removed prior to moving this 

heater.

Insert LP Gas Tank

Place precision filled LP gas tank upright into hole in patio heater so it is arranged for vapor 
withdrawal.

Secure LP Gas Tank

Secure tank in place by attaching loose end of tank restraint chain to hole in right leg.

Connect LP Gas Tank

Before connecting, be sure that there is no debris caught in 
the head of the LP gas tank, head of the regulator valve or 
in the head of the burner and burner ports.     
 Connect gas line to tank by turning knob clockwise until it 
stops.

Disconnect LP Gas Tank

Before disconnecting make sure the LP gas tank valve is 
“CLOSED”.
Disconnect gas line from LP gas tank by turning knob
counterclockwise until it is loose.

  Caution: LP gas tank must be properly 

disconnected and removed prior to moving 

this heater.

Need a tank of gas? 

Try tank exchange service. It’s easy, fast, 

safe, and available at tens of thousands of conveniently located 
retail outlets nationwide. You can purchase a new full tank or 
exchange your empty for a precision filled one.

13

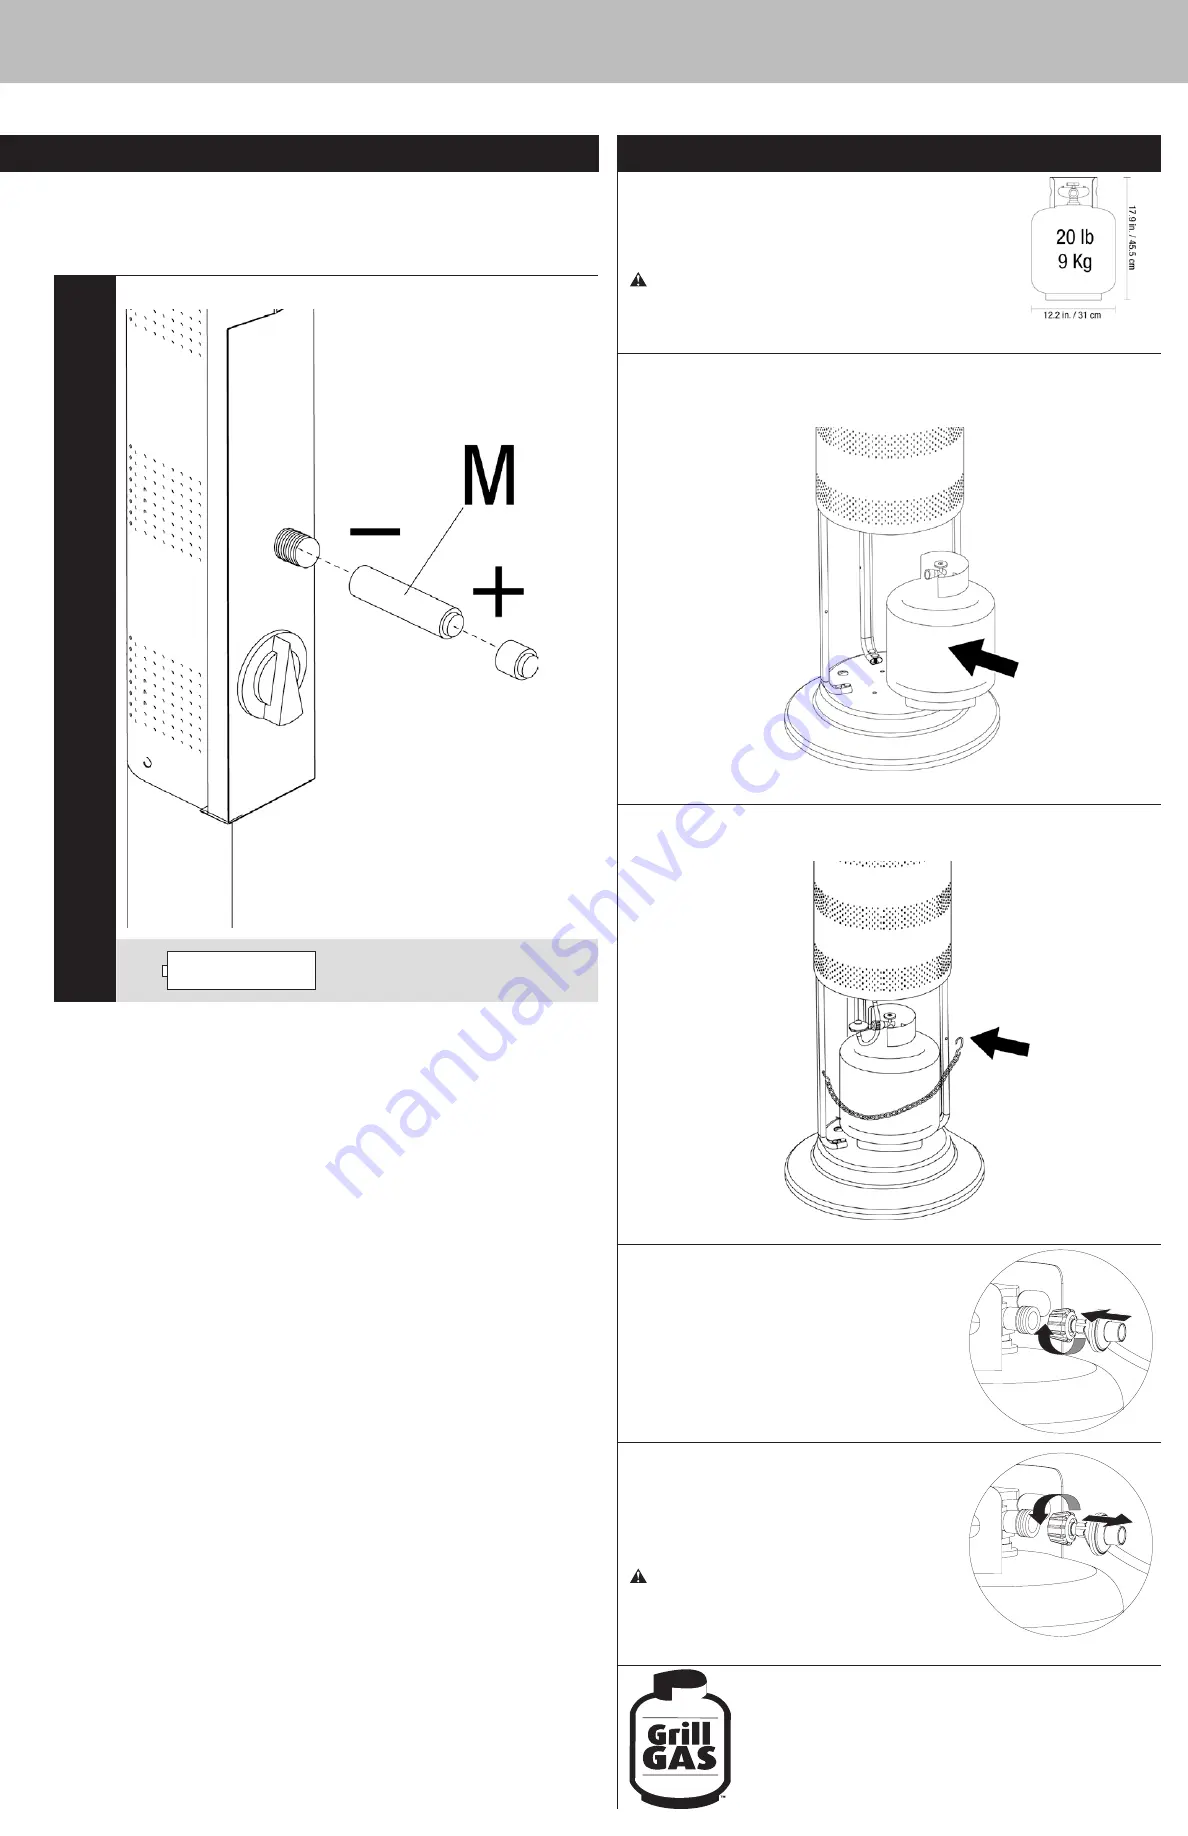
Insert Battery

M

x 1

Summary of Contents for Endless Summer GWU9209SP

Page 1: ...NG FOR YOUR SAFETY For Outdoor Use Only outside any enclosure Table of Contents Important Safeguards Page 2 Exploded View Hardware 3 Assembly Instructions 4 Installling LP Gas Tank 7 Insert LP Gas Tan...

Page 2: ...t heater before each use Installation and repair should be done by a qualified service person Do not alter heater in any manner Do not use the heater unless it is COMPLETELY assembled and all parts ar...

Page 3: ...144 22 Gas Line 56 01 190 23 Pole 56 01 158 24 Shroud 56 01 164 25 Platform 56 01 165 26 Gas Line Clip 56 01 213 27 Leg 3 56 01 491 28 Tank Retention Chain 56 01 186 29 Regulator Hose Assembly 56 01...

Page 4: ...ware When applicable tighten all hardware connections by hand first Once the step is completed go back and fully tighten all hardware Follow all steps in order to properly assemble your product To com...

Page 5: ...5 5 Attach Platform TIP To tighten use a 7 16 wrench on Bolt and a 7 16 socket wrench on Nut D x 6 H x 6 K x 6 6 Attach Shroud 8 Attach Gas Line clip B x 2 7 Attach Valve Housing Note One hole is at a...

Page 6: ...continued 10 Assemble Dome Note Each dome section has a pin mounted in the rolled bottom edge If necessary for proper alignment of dome sections loosen each screw prior to assembly A x 3 E x 1 I x 1...

Page 7: ...ng loose end of tank restraint chain to hole in right leg Connect LP Gas Tank Before connecting be sure that there is no debris caught in the head of the LP gas tank head of the regulator valve or in...

Page 8: ...the level of heat desired When heater is ON Emitter screen will become bright red due to intense heat The color is more visible at night Burner will display tongues of blue and yellow flame These fla...

Page 9: ...ch Vendor shall determine in its reasonable discretion upon examination to be defective Before returning any parts you should contact Vendor s Customer Service Department using the contact information...

Page 10: ...knob is not in ON position Review Lighting Instructions and try again LP gas pressure is low Turn LP gas tank valve CLOSED and replace LP gas tank Blockage in orifice Clear blockage Download and follo...

Page 11: ...e caravane une tente une voiture ou une maison AVERTISSEMENT POUR VOTRE S CURIT Pour usage l ext rieur seulement hors de tout abri clos Table des mati res Consignes de s curit importantes Page 2 Vue c...

Page 12: ...ier le chauffe patio avant chaque utilisation L installation et les r parations doivent tre effectu es par un r parateur qualifi Ne modifier en aucune fa on le chauffe patio Ne pas utiliser le chauffe...

Page 13: ...oupape 56 01 144 22 Tuyau de gaz 56 01 190 23 Montant tubulaire 56 01 158 24 Car nage de protection 56 01 164 25 Plaque de support 56 01 165 26 Bride de fixation du tuyau de gaz 56 01 213 27 Pied 3 56...

Page 14: ...que n cessaire serrez toute les fixations et la visserie en premier puis une fois l tape termin e serrez les compl tement Suivez toutes les tapes dans l ordre afin d assembler correctement cet article...

Page 15: ...o 11 mm pour serrer le boulon et une cl douille de 7 16 po 11 mm pour serrer l crou D x 6 H x 6 K x 6 6 Fixer le car nage de protection 8 Fixer la bride de fixation du tuyau de gaz B x 2 7 Fixer le lo...

Page 16: ...me Remarque Chaque partie du d me comporte une cheville dans le bord roul Pour que les parties du d me soient correctement align es desserrez chaque vis avant l assemblage si n cessaire A x 3 E x 1 I...

Page 17: ...orifice du pied droit Brancher la bouteille de propane Avant de proc der au branchement assurez vous qu il n y a pas de d bris au niveau de la t te de la bouteille de la t te du robinet du r gulateur...

Page 18: ...e sur OFF arr t attendez 5 minutes et reprenez la proc dure d allumage depuis de d but 9 Si pour une raison quelconque l allumeur ne produit pas d tincelle votre chauffe patio peut tre allum en ins ra...

Page 19: ...mp ries telles que la pluie la pluie vergla ante la gr le la neige la poussi re les vents forts et autres d bris 5 Si vous le souhaitez couvrez le chauffe patio afin de prot ger ses surfaces ext rieur...

Page 20: ...aux instructions d allumage et essayez nouveau La pression du gaz est basse Tournez le robinet de la bouteille de propane sur CLOSED ferm et remplacez la bouteille L orifice est bouch D bouchez l ori...

Reviews: