background image

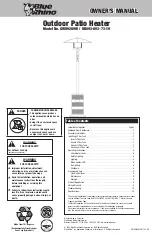
Outdoor Patio Heater Model No. GWU9209W / UB093-003-73-19

Contact 1.800.762.1142 for assistance. Do not return to place of purchase.

page no.

Tools Required for Assembly (Not Included)

7/16” Wrench

1/2” Wrench

9/16” Wrench

3/4” Wrench

1/2’’ Socket and Socket Wrench

7/16"

#2 Phillips Head Screwdriver

Parts List 

1

Finial

56-01-103

2

Dome Cap

56-01-104

3

Dome Plate

56-01-105

4

Dome Panel (3)

56-01-106

5

Dome Rib (3)

56-01-109

6

Dome Pin* (3)

56-01-459

7

Bottom Plate

56-01-110

8

Emitter Top*

56-01-399

9

Emitter Screen*

56-01-118

10

Burner*

56-01-334

11

Pilot Heat Shield*

56-01-151

12

Pilot Assembly*

56-01-127

13

Burner Orifice*

56-01-131

14

Electronic Igniter*

56-01-142

15

Igniter Button*

56-01-188

16

Control Knob*

56-01-156

17

Access Panel*

56-01-140

18

Valve*

56-01-144

19

Valve Bracket*

56-01-463

20

Tip Switch*

56-01-019

21

Valve Housing*

56-01-144

22

Gas Line

56-01-190

23

Pole

56-01-158

24

Shroud

56-01-164

25

Platform

56-01-165

26

Gas Line Clip

56-01-213

27

Leg (3)

56-01-491

28

Tank Retention Chain

56-01-186

29

Regulator/Hose Assembly

56-01-192

30

Base

56-01-196

31

Weight Plate

56-01-198

32

Wheel Hole Plug (2)*

56-01-402

* Pre Assembled

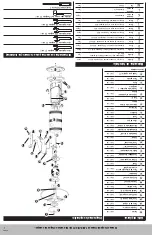
Exploded View

Hardware

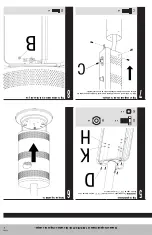
A

Screw

5/32” - 32 x 8 Stainless Steel Round Head

3 pcs

B

Screw 

3/16” - 24 x 15 Black Zinc Plated Philips Head

2 pcs

C

Screw 

1/4” - 20 x 16 Stainless Steel Philips Head

4 pcs

D

Bolt

5/16” - 18 x 30 Nickel Plated Hex Head

12 pcs

E

Bolt

3/8” - 16 x 35 Stainless Steel Hex Head

1 pc

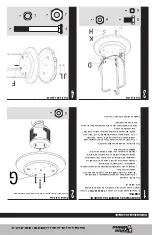
F

Bolt

3/8” - 16 x 95 Zinc Plated Hex Head

1 pc

G

Nut

1/4” - 20 Nickel Plated Hex

3 pcs

H

Nut

5/16” - 18 Nickel Plated Hex

12 pcs

I

Nut

3/8” - 16 Stainless Steel Hex

1 pc

J

Nut

3/8” - 16 Nickel Plated Hex

1 pc

K

Lock Washer

ø8 Nickel Plated

12 pcs

L

Lock Washer

ø10 Nickel Plated

1 pc

M

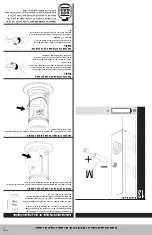
AA Battery

AA Battery

1 pc

2

4

21

24

29

28

31

25

30

7

8

9

10

17

1

3

6

11

19

23

26

27

5

12

13

14

15

16

20

18

32

22

Summary of Contents for Endless Summer GWU9209W

Page 1: ...R YOUR SAFETY For Outdoor Use Only outside any enclosure Table of Contents Important Safeguards Page 2 Exploded View Hardware 3 Assembly Instructions 4 Installling LP Gas Tank 7 Insert LP Gas Tank 7 S...

Page 2: ...passages clean Inspect heater before each use Installation and repair should be done by a qualified service person Do not alter heater in any manner Do not use the heater unless it is COMPLETELY asse...

Page 3: ...144 22 Gas Line 56 01 190 23 Pole 56 01 158 24 Shroud 56 01 164 25 Platform 56 01 165 26 Gas Line Clip 56 01 213 27 Leg 3 56 01 491 28 Tank Retention Chain 56 01 186 29 Regulator Hose Assembly 56 01 1...

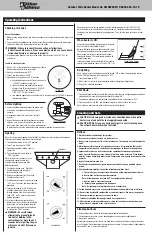
Page 4: ...ghten all hardware connections by hand first Once the step is completed go back and fully tighten all hardware Follow all steps in order to properly assemble your product To complete assembly you will...

Page 5: ...5 Attach Platform TIP To tighten use a 7 16 wrench on Bolt and a 7 16 socket wrench on Nut D x 6 H x 6 K x 6 6 Attach Shroud 8 Attach Gas Line clip B x 2 7 Attach Valve Housing Note One hole is at a...

Page 6: ...ons continued 10 Assemble Dome Note Each dome section has a pin mounted in the rolled bottom edge If necessary for proper alignment of dome sections loosen each screw prior to assembly A x 3 E x 1 I x...

Page 7: ...Secure tank in place by attaching loose end of tank restraint chain to hole in right leg Connect LP Gas Tank Before connecting be sure that there is no debris caught in the head of the LP gas tank hea...

Page 8: ...r any abrasion wear cuts to the hose Cleaning Surfaces 1 Wipe surfaces clean with mild dishwashing detergent or baking soda 2 For stubborn surfaces use a citrus based degreaser and a nylon scrubbing b...

Page 9: ...r invoice This Limited Warranty shall be limited to the repair or replacement of parts which prove defective under normal use and service and which Vendor shall determine in its reasonable discretion...

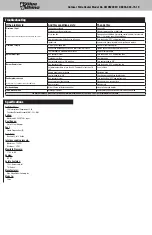
Page 10: ...ew igniter and replace Pilot won t stay lit Dirt built up around pilot Clean dirt from around pilot Connection between gas valve and pilot assembly is loose Tighten connection and perform leak check T...

Page 11: ...de la llama piloto Limpie la suciedad que hay alrededor de la llama piloto Conexi n floja entre la v lvula de gas y el conjunto de la llama piloto Apriete la conexi n y lleve a cabo una comprobaci n...

Page 12: ...y ayudar a evitar las obstrucciones en los conductos de aire 5 N o deje nunca el tanque de propano l quido expuesto a la luz directa del sol o a una fuente de calor excesiva Nota Espere hasta que el...

Page 13: ...ara as telara as o insectos Limpie las perforaciones del quemador usando un limpiador de tubo para trabajo pesado Un chorro de aire comprimido puede ayudar a desalojar las part culas m s peque as 6 R...

Page 14: ...ugar fijando el extremo suelto de la cadena de amarre del tanque en la pata derecha de la unidad Conecte el tanque de gas propano l quido Antes de conectar aseg rese que la parte superior del tanque d...

Page 15: ...e la c pula tiene una espiga montada en el borde enrollado inferior de la c pula Si para alinear apropiadamente las secciones de la c pula se hace necesario afloje cada tornillo antes de principiar a...

Page 16: ...11 mm en el perno y una llave de copa de 7 16 11 mm en la tuerca D x 6 K x 6 H x 6 6 Coloque la gualdera 8 Fije la abrazadera de la l nea de gas B x 2 7 Fije el alojamiento de la v lvula Nota Un orif...

Page 17: ...xiones de ferreter a Una vez que ha terminado el paso apriete completamente todos los elementos de ferreter a S iga todos los pasos en el orden indicado para armar debidamente esta unidad Para termina...

Page 18: ...miento de la v lvula 56 01 144 22 L nea de gas 56 01 190 23 Poste 56 01 158 24 Gualdera 56 01 164 25 Plataforma 56 01 165 26 Abrazadera de la l nea de gas 56 01 213 27 Pata 3 56 01 491 28 Cadena de re...

Page 19: ...el calentador antes de cada uso L a instalaci n y reparaci n de la unidad deben ser hechos por personal de servicio calificado N o altere el calentador de ninguna forma N o utilice el calentador a men...

Page 20: ...ero una tolda un autom vil o en la casa ADVERTENCIA PARA SU SEGURIDAD Solamente para uso en exteriores fuera de cualquier recinto Indice Salvaguardias importantes P gina 2 Diagrama de explosi n y elem...

Reviews: