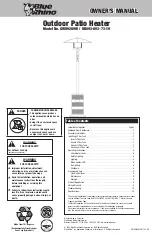
Outdoor Patio Heater Model No. GWU9209W / UB093-003-73-19
Contact 1.800.762.1142 for assistance. Do not return to place of purchase.
page no.
9
Maintenance
To enjoy years of outstanding performance from your heater, make sure you perform the
following maintenance activities on a regular basis:
1. Keep exterior surfaces clean.
2. Air flow must be unobstructed. Keep controls, burner, and circulating air passageways clean.
Signs of possible blockage include:
Gas odor with extreme yellow tipping of flame.
Heater does NOT reach the desired temperature.
Heater glow is excessively uneven.
Heater makes popping noises.
Note:
In a salt-air environment (such as near an ocean), corrosion occurs more quickly than
normal. Frequently check for corroded areas and repair them promptly.
TIP
: Use high-quality automobile wax to help maintain the appearance of your heater. Apply to
exterior surfaces from the pole down. Do not apply to emitter screen or domes.
Storage
Between uses:
1. Turn Control Knob OFF.
2. Disconnect LP source.
3. Store heater upright in an area sheltered from direct contact with inclement weather (such as
rain, sleet, hail, snow, dust and debris).
4. If desired, cover heater to protect exterior surfaces and to help prevent build up in air
passages.
Note:
Wait until heater is cool before covering.
During periods of extended inactivity or when transporting:
1. Turn Control Knob “OFF”.
2. Disconnect LP source and move to a secure, well-ventilated location outdoors.
3. Store heater upright in an area sheltered from direct contact with inclement weather (such as
rain, sleet, hail, snow, dust and debris).
4. If desired, cover heater to protect exterior surfaces and to help prevent build up in air
passages.
5. Never leave LP tank exposed to direct sunlight or excessive heat.
Note:
Wait until heater is cool before covering.
Product Registration
For faster warranty service, please register your product immediately at www.bluerhino.com or
call 1.800.762.1142.
Cleaning and Care (continued)
Limited Warranty
Blue Rhino Global Sourcing, Inc (“Vendor”) warrants to the original retail purchaser of this
product, and to no other person, that if this product is assembled and operated in accordance
with the printed instructions accompanying it, then for a period of one (1) year from the date
of purchase, all parts in such product shall be free from defects in material and workmanship.
Vendor may require reasonable proof of your date of purchase. Therefore, you should retain
your sales slip or invoice. This Limited Warranty shall be limited to the repair or replacement of
parts, which prove defective under normal use and service and which Vendor shall determine
in its reasonable discretion upon examination to be defective. Before returning any parts, you
should contact Vendor’s Customer Service Department using the contact information listed
below. If Vendor confirms, after examination, a defect covered by this Limited Warranty in any
returned part, and if Vendor approves the claim, Vendor will replace such defective part without
charge. If you return defective parts, transportation charges must be prepaid by you. Vendor will
return replacement parts to the original retail purchaser, freight or postage prepaid.
This Limited Warranty does not cover any failures or operating difficulties due to accident,
abuse, misuse, alteration, misapplication, improper installation or improper maintenance or
service by you or any third party, or failure to perform normal and routine maintenance on
the product as set out in this owner’s manual. In addition, the Limited Warranty does not cover
damage to the finish, such as scratches, dents, discoloration, rust or other weather damage,
after purchase.
This Limited Warranty is in lieu of all other express warranties. Vendor disclaims all warranties
for products that are purchased from sellers other than authorized retailers or distributors,
including the warranty of merchantability or the warranty of fitness for a particular purpose.
VENDOR ALSO DISCLAIMS AND ANY ALL IMPLIED WARRANTIES, INCLUDING WITHOUT
LIMITATION THE IMPLIED WARRANTIES OF MERCHANTABILITY AND FITNESS FOR A PARTICULAR
PURPOSE. VENDOR SHALL NO LIABILITY TO PURCHASER OR ANY THIRD PARTY FOR ANY
SPECIAL, INDIRECT, PUNITIVE, INCIDENTAL, OR CONSEQUENTIAL DAMAGES. Vendor further
disclaims any implied or express warranty of, and assumes no responsibility for, defects in
workmanship caused by third parties.
This Limited Warranty gives the purchaser specific legal rights; a purchaser may have other
rights depending upon where he or she lives. Some jurisdictions do not allow the exclusion or
limitation of special, incidental or consequential damages, or limitations on how long a warranty
lasts, so the above exclusion and limitations may not apply to everyone.
Vendor does not authorize any person or company to assume for it any other obligation or
liability in connection with the sale, installation, use, removal, return, or replacement of its
equipment, and no such representations are binding on Vendor.
Blue Rhino Global Sourcing, Inc
Winston-Salem, North Carolina USA
(800) 762-1142

