background image

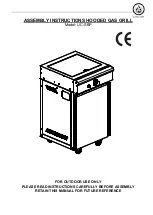
Outdoor Gas Grill Model No. GBC621CR-C

Contact 1.800.762.1142 for assistance. Do not return to place of purchase.

page no.

1.  This grill is for outdoor use only, and shall not be used in a building, 

garage, or any other enclosed area.  

2.  This grill is NOT for commercial use.
3.  This grill is for use with liquid propane (LP) gas only. The conversion 

to or attempted use of natural gas in this LP gas grill is dangerous and 

will void your warranty.

4.   LP gas Characteristics: 

a.  LP gas is flammable and hazardous if handled improperly.  Become 

aware of the characteristics before using any LP gas product.  

b.  LP gas is explosive under pressure, heavier than air, and settles and 

pools in low areas. 

c.  LP gas in its natural state has no odor.  For your safety, an odorant is 

added that smells like rotten cabbage.  

d. Contact with LP gas can cause freeze burns to skin.

5.   LP gas tank needed to operate. Only tanks marked “propane” may be 

used.  

6.  The LP gas supply tank must be constructed and marked in accordance 

with the 

Specifications for LP gas Cylinders

 of the U.S. Department of 

Transportation (DOT) or the National Standard of Canada, 

CAN/CSA-

B339, Cylinders, Spheres and Tubes for the Transportation of Dangerous 

Goods; and Commission.


7. LP gas tank must be arranged for vapor withdrawal.
8. The LP gas tank must have a listed overfilling prevention device (OPD).
9.  Only use 20-pound cylinders equipped with a cylinder connection 

device compatible with the connection for outdoor cooking appliances.

10. The LP gas tank must have a tank collar to protect the tank valve.
11.  Never use an LP gas tank with a damaged body, valve, collar, or 

footing.  

12.  Dented or rusted LP gas tanks may be hazardous and should be 

checked by your LP gas supplier prior to use.

13.  The LP gas tank should not be dropped or handled roughly. 
14.  Tanks must be stored outdoors out of the reach of children and must 

not be stored in a building, garage, or any other enclosed area. Your 

tank must never be stored where temperatures can reach over 125°F. 

15.  Never keep a filled LP gas tank in a hot car or car trunk. Heat will 

cause the gas pressure to increase, which may open the relief valve 

and allow gas to escape.

16.  Never attempt to attach this grill to the self-contained LP gas system 

of a camper trailer, motor home, or house.  

17.  The use of alcohol, or prescription or non-prescription drugs may 

impair the consumer’s ability to properly assemble or safely operate 

the appliance.

18.  Never use charcoal, lighter fluid, lava rocks, gasoline, kerosene, or 

alcohol with this product.

19.  Your grill has been checked at all factory connections for leaks.  

Recheck all connections, as movement in shipping can loosen 

connections.  

20.  Check for leaks even if your unit was assembled for you by someone 

else.

21.  Do not operate if gas leak is present. Gas leaks may cause a fire or 

explosion.

22.  You must follow all leak-checking procedures before operating. To 

prevent fire or explosion hazard when testing for a leak:

a.  Always perform leak test before lighting the grill and each time the 

tank is connected for use.

b.  No smoking.  Do not use or permit sources of ignition in the area 

while conducting a leak test. 

c.  Conduct the leak test outdoors in a well-ventilated area.  
d.  Do not use matches, lighters, or a flame to check for leaks.  
e.  Do not use grill until any and all leaks are corrected.  

If you are unable to stop a leak, disconnect the LP gas supply.  Call 

a gas appliance serviceman or your local LP gas supplier.

23.  Do not store or use gasoline or other flammable liquids or vapors 

within 25 feet (7.62 m) of this appliance.

24.  Do not use in an explosive atmosphere.  Keep grill area clear and free 

from combustible materials, gasoline and other flammable vapors and 

liquids.  

25.  Keep all combustible items and surfaces at least 21 inches (53 cm) 

away from the grill at all times. DO NOT use this grill or any gas 

product under any overhead or near any unprotected combustible 

constructions.

26.  It is essential to keep the grill’s valve compartment, burners, and 

circulating air passages clean.  Inspect grill before each use.

27.  Do not alter grill in any manner.
28.  Do not use the grill unless it is COMPLETELY assembled and all parts 

are securely fastened and tightened. 

29.  This grill should be thoroughly cleaned and inspected on a regular 

basis. Clean and inspect the hose before each use of the appliance.  If 

there is evidence of abrasion, wear, cuts, or leaks, the hose must be 

replaced prior to the appliance being put into operation.  

30.  Use only the regulator and hose assembly provided. The replacement 

regulator and hose assembly shall be that specified by the 

manufacturer.

31.  Use only Blue Rhino Global Sourcing, LLC. factory authorized parts. 

The use of any part that is not factory authorized can be dangerous. 

This will also void your warranty. Contact 1.800.762.1142.

32.  Do not use this appliance without reading “Operating Instructions” in 

this manual.  

33.  Do not touch metal parts of grill until it has completely cooled (about 

45 min.) to avoid burns, unless you are wearing protective gear (pot 

holders, gloves, BBQ mittens, etc.).

34.  When cooking, fire extinguishing materials shall be readily accessible.  

In the event of an oil grease fire, do not attempt to extinguish with 

water.  Use type BC dry chemical fire extinguisher or smother with 

dirt, sand or baking soda.

35. Do not install or use in or on boats or recreational vehicles.
36. Do not use grill in high winds.
37.  Never lean over the grill when lighting.
38.  Do not leave a lit grill unattended, especially keep children and pets 

away from grill at all times.  

39.  Do not attempt to move grill when in use.  Allow the grill to cool 

before moving or storing.

40.  Storage of grill indoors is permissible only if the tank is disconnected, 

removed from the grill and properly stored outdoors. 

41.  Always open grill lid carefully and slowly as heat and steam trapped 

within grill can severely burn you.

42.  Do not attempt to disconnect the gas regulator from the tank or any 

gas fitting while the grill is in use.

43.  Always place your grill on a hard non-combustible, level surface. An 

asphalt or blacktop surface may not be acceptable for this purpose.

44.  Do not use on wooden decks.
45.  Move gas hoses as far away as possible from hot surfaces and 

dripping hot grease.

46. Keep all electrical cords away from a hot grill.
47.  Do not use grill for indoor cooking or heating. TOXIC fumes can 

accumulate and cause asphyxiation. 

48.  After a period of storage and/or nonuse, check for leaks, burner 

obstructions and inspect for any abrasion, wear, cuts to the hose.

49.  Failure to open lid while igniting the grill’s burners, or not waiting 5 

minutes to allow the gas to clear if the grill does not light, may result 

in an explosive flame-up.

50. If grill is not in use, the gas must be turned off at the supply tank.
51. Never operate grill without heat plates installed.
52.  Always use a meat thermometer to ensure food is cooked to a safe 

temperature.

53. Do not store a spare LP gas tank under or near this appliance.
54.  Never fill the tank beyond 80 percent full.
55.  Deaths, serious injury or damage to property may occur if the above is 

not followed exactly.

Safety First

DANGERS and 

Cautions

WARNING 

FOR YOUR SAFETY

 If you smell gas -

1. Shut off gas to appliance.
2. Extinguish any open flame.
3. Open lid.
4.  If odor continues, immediately call your gas supplier or your fire 

department.

1.  Do not store spare LP cylinder within 10 feet (3.05 m) of this 

appliance.

2.  Do not store or use gasoline or other liquids with flammable vapors 

within 25 feet (7.62 m) of this or any other appliance.

3.  An LP cylinder not connected for use shall not be stored in the 

vicinity of this or any other appliance.

Summary of Contents for UniFlame GBC621CR-C

Page 1: ... unit for someone else give this manual to him or her to read and save for future reference Manufactured in China for Blue Rhino Global Sourcing LLC 104 Cambridge Plaza Drive Winston Salem NC 27104 USA 1 800 762 1142 www bluerhino com 2005 Blue Rhino Global Sourcing LLC All Rights Reserved UniFlame is a Registered Trademark of Blue Rhino Global Sourcing LLC All Rights Reserved GBC621CR C OM 108 EF...

Page 2: ...21 inches 53 cm away from the grill at all times DO NOT use this grill or any gas product under any overhead or near any unprotected combustible constructions 26 It is essential to keep the grill s valve compartment burners and circulating air passages clean Inspect grill before each use 27 Do not alter grill in any manner 28 Do not use the grill unless it is COMPLETELY assembled and all parts are...

Page 3: ... cart frame A Attach right front and rear legs to LP tank support using 4 sets of large screws B lock washers F and washers E B Insert axle into LP tank support C Insert rubber spacer G and wheels onto axle Secure using 2 nuts C D Place hub caps onto wheels Step 5 Attach frame braces and LP tank support wire A Insert frame braces into slots on left and right cart frames B Attach LP tank support wi...

Page 4: ...elf using large screw B lock washer F and washer E Step 8 Attach side shelves Attach left and right side shelves to cart frame using 8 sets of large screws B lock washers F and washers E Step 9 Attach handle to lid Attach handle to lid using 2 sets of washers E lock washers F and wing nuts D Step 11 Insert heat plate and cooking grids A Place heat plate onto heat plate supports B Place left and ri...

Page 5: ...ease cup into grease cup support Step 14 Completed Congratulations your assembly is now complete Read Operating Instructions before proceeding Note image is shown from the back Installing LP Gas Tank To operate you will need 1 precision filled standard grill LP gas tank 20 with external valve threads Insert LP Gas Tank Place precision filled LP gas tank into hole in grill body upright so it is arr...

Page 6: ...ank If your unit was assembled for you visually check the connection between the burner pipe and orifice Make sure the burner pipe fits over the orifice WARNING Failure to inspect this connection or follow these instructions could cause a fire or an explosion which can cause death serious bodily injury or damage to property Please refer to diagram for proper installation If the burner pipe does no...

Page 7: ...use alteration misapplication improper installation or improper maintenance or service by you or any third party or failure to perform normal and routine maintenance on the grill as set out in this owner s manual In addition the Limited Warranty does not cover damage to the finish such as scratches dents discoloration rust or other weather damage after purchase This Limited Warranty is in lieu of ...

Page 8: ...safety device by turning off knobs and LP gas tank valve Disconnect regulator Turn burner control knobs to HIGH Wait 1 minute Turn burner control knobs off Reconnect regulator and leak check connections Turn LP gas tank valve on slowly wait 30 seconds and then light grill Irregular flame pattern flame does not run the full length of burner Burner ports are clogged or blocked Clean burner ports Fla...

Page 9: ...19 Left Front Leg 55 15 178 20 Grease Cup 55 15 162 21 Grease Cup Support 55 15 163 22 LP Tank Support Wire 55 15 206 23 Right Condiment Holder 55 15 191 24 Right Rear Leg 55 15 194 25 Right Front Leg 55 15 193 26 Top Front Panel 55 15 208 27 Bottom Front Panel 55 15 151 28 Frame Support 55 15 161 29 Lighting Hook 55 14 308 30 LP Tank Support 55 15 205 31 Axle 55 15 148 32 Wheel 2 55 15 211 33 Hub...

Page 10: ...uffage 55 15 210 6 Grille de cuisson gauche 55 15 177 7 Grille de cuisson droite 55 15 192 8 Plaque déflectrice de chaleur 55 15 167 9 Tablette latérale gauche 55 15 181 10 Porte condiments gauche 55 15 176 11 Entretoise du cadre 2 55 15 160 12 Support arrière du cadre 55 15 149 13 Support de la plaque déflectrice de chaleur 2 55 15 168 14 Partie inférieure du barbecue 55 15 150 15 Support du tuya...

Page 11: ... sécurité de débit excessif en fermant les boutons et la valve de contrôle de la bonbonne Débranchez le régulateur Tournez les boutons du brûleur sur HIGH max Attendez 1 minute Tournez les boutons du brûleur sur OFF arrêt Rebranchez le régulateur et assurez vous que le raccord ne présente pas de fuite Flamme irrégulière flamme ne se répartissant pas sur toute la longueur du brûleur Les orifices du...

Page 12: ... étant couvert par la garantie et approuve la réclammation ce dernier remplacera gratuitement les dites pièces Si vous devez renvoyer des pièces défectueuses les pièces devront être expédiées port payé Le fabricant s engage à renvoyer les pièces à l acheteur initial port payé Cette garantie limitée ne couvre pas les pannes et dysfonctionnements survenant suite à tout accident mauvais usage entreti...

Page 13: ...suyez les surfaces du barbecue avec un liquide à vaisselle doux ou du bicarbonate de soude 2 Pour les tâches coriaces utilisez un dégraissant au citron et une brosse de nettoyage en nylon 3 Rincez à l eau Utilisation Rechercher une fuite potentielle Raccordements du brûleur Assurez vous que les branchements de la valve du régulateur et du tuyau ont été correctement effectués au niveau du brûleur e...

Page 14: ...se de récupération de graisse dans son support Terminé Félicitations vous venez de terminer l assemblage Veuillez lire les instructions d utilisation avant de pourvuivre Remarque vue de derrière Installer la bonbonne de propane LP Il est nécessaire de brancher une bonbonne de propane LP standard de 20 livres 9 kg pour barbecue avec valve de contrôle à filetage externe Insérer la bonbonne de propan...

Page 15: ... une grande vis B une rondelle de blocage F et une rondelle E Étape 8 Fixer les tablettes latérales Fixez les tablettes latérales gauche et droite au chariot en utilisant huit grandes vis B huit rondelles de blocage F et huit rondelles E Étape 9 Fixer la poignée au couvercle Fixez la poignée au couvercle en utilisant deux rondelles E deux rondelles de blocage F et deux écrous à oreilles D Étape 11...

Page 16: ...ort de la bonbonne de propane en utilisant quatre grandes vis B quatre rondelles de blocage F et quatre rondelles E B Insérez l essieu dans le support de la bonbonne de propane C Placez les entretoises en caoutchouc G et les roues sur l essieu Fixez les roues en utilisant deux écrous C D Placez les enjoliveurs sur les roues Étape 5 Fixer les entretoises du cadre et l étrier de retenue de la bonbon...

Page 17: ...rface et matière combustible se trouve toujours au mininum à 53 cm 21 po du barbecue NE PAS utiliser ce barbecue sous un abri une structure suspendue ou en saillie ou à proximité de toute construction combustible non protégée 26 Il est primordial que le compartiment de la valve de contrôle de l appareil les brûleurs et les passages par où l air circule demeurent propres Vérifier le barbecue avant ...

Page 18: ...n d assembler cet appareil pour une autre personne veuillez lui fournir le manuel afin qu elle puisse le lire et le consulter plus tard Fabriqué en Chine pour Blue Rhino Global Sourcing LLC 104 Cambridge Plaza Drive Winston Salem NC 27104 États Unis 1 800 762 1142 www bluerhino com 2005 Blue Rhino Global Sourcing LLC Tous droits réservés UniFlame est une marque déposée de Blue Rhino Global Sourcin...

Reviews: