background image

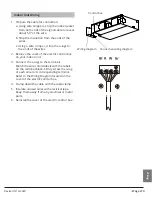
Oblique

Rough

Warped

90°

Fig 5.1

Refrigerant Piping


Connection

Page 23 

Revised 5/14/2020

Be extra careful not to damage, dent, or deform the pipe while cutting. This will drastically reduce the 

heating efficiency of the unit.

DO NOT DEFORM PIPE WHILE CUTTING

If the outdoor unit is installed higher than the indoor unit:
-It is recommended that vertical suction risers not be upsized. Proper oil return to the 

compressor should be maintained with suction gas velocity. If velocities drop below 1500fpm 

(feet per minute), oil return will be decreased. An oil trap should be installed every 20ft of vertical 

suction line riser.

CAUTION

The outdoor unit is installed higher than the 

indoor unit  

Indoor unit  

Outdoor unit  

Gas piping

Oil trap

20 ft

20 ft

Liquid 

piping

Connection Instructions – Refrigerant Piping

Step 1: Cut pipes
When preparing refrigerant pipes, take extra care 

to cut and flare them properly. This will ensure 

efficient operation and minimize the need for 

future maintenance.
1.  Measure the distance between the indoor and 

outdoor units.

2.  Using a pipe cutter, cut the pipe a little longer 

than the measured distance.

3.  Make sure that the pipe is cut at a perfect 90° 

angle. Refer to 

Fig. 5.1 for bad cut examples.

Summary of Contents for BM12MCD

Page 1: ...IMPORTANT NOTE Read this manual carefully before installing or operating your new air conditioning unit Make sure to save this manual for future reference This manual only describes the outdoor unit...

Page 2: ...le of Contents Owner s Manual 1 Safety Precautions 04 2 Unit Specifications and Features 06 1 Indoor unit 06 2 Operating temperature 07 3 Other features 07 3 Care and Maintenance 08 4 Troubleshooting...

Page 3: ...installation 19 4 Instructions for converting from rear air return to bottom air return 19 5 Motor and drain pump maintenance 20 6 Drill wall hole for connective piping 20 7 Connect drain hose 21 9 Re...

Page 4: ...ised around the unit at all times 1 Installation must be performed by qualified personnel according to the installation instructions Defective installation can cause water leakage electrical shock or...

Page 5: ...cord keeping of all checks is strongly recommended Page 5 Revised 5 14 2020 6 For all electrical work use the specified cables Connect cables tightly and clamp them securely to prevent external forces...

Page 6: ...the mode in the following order AUTO FORCED COOL OFF FORCED COOL mode In FORCED COOL mode the Operation light flashes The system will then turn to AUTO after it has cooled with a high wind speed for...

Page 7: ...press the ON OFF button on the remote control If the system has an auto restart function the unit will restart using the same settings Three minute protection feature some models A protection feature...

Page 8: ...angerous Removal and maintenance must be performed by a certified technician 3 Cleaning Your Indoor Unit Cleaning Your Air Filter A clogged air conditioner can reduce the cooling efficiency of your un...

Page 9: ...airs should be performed by an authorized dealer or a licensed service provider CAUTION Maintenance Long Periods of Non Use Maintenance Pre Season Inspection If you plan not to use your air conditione...

Page 10: ...unit will continue operating when the temperature fluctuates again The indoor unit emits white mist In humid regions a large temperature difference between the room s air and the conditioned air can...

Page 11: ...r leaks re seal if necessary and top off refrigerant Issue Possible Causes The outdoor unit makes noises The unit will make different sounds based on its current operating mode Dust is emitted from ei...

Page 12: ...or too low Install a manostat to regulate the voltage Poor heating performance The outdoor temperature is extremely low Use auxiliary heating device Cold air is entering through doors and windows Mak...

Page 13: ...e some models 1 Transfer connector 12 7 15 9 some models 1 Magnetic ring Hitch it on the connective cable between indoor unit and outdoor unit after installation some models Transfer connector 9 52 12...

Page 14: ...Install the indoor unit Install the drainpipe Install the outdoor unit Connect the refrigerant pipes Evacuate the refrigeration system Connect the wires 6 Installation Summary Installation Summary Pag...

Page 15: ...ustrations in this manual are for explanatory purposes The actual shape of your indoor unit may be slightly different The actual shape shall prevail Fig 2 1 NOTE The installation must be performed in...

Page 16: ...he indoor unit The air inlet and outlet are not blocked The airflow can fill the entire room There is no direct radiation from heaters DO NOT install unit in the following locations Areas with oil dri...

Page 17: ...chors Air outlet dimensions Air inlet dimensions Descending ventilation opening and mount points Electric control box Air filter Air filter MODEL Btu h Outline dimension air outlet opening size air re...

Page 18: ...unit Insure that your threaded rod is completely vertical and level at all 4 corners CAUTION Wood mounting Roof beam Hanging screw bolts Ceiling Blade shape insertion Slide insertion Hanging screw bol...

Page 19: ...be far enough apart enough to a avoid air passage short circuit 4 Connect the duct according to the following diagram 5 Refer to the following static pressure guidelines when installing the indoor uni...

Page 20: ...re that the hole is drilled at a slight downward angle so that the outdoor end of the hole is lower than the indoor end by about 0 5in This will ensure proper water drainage 3 Place the protective wal...

Page 21: ...talled incorrectly water may leak and cause a water level switch malfunction In HEAT mode the outdoor unit will discharge water Ensure that the drain hose is placed in an appropriate area to avoid wat...

Page 22: ...e vibration excessive noise Refer to the table below for specifications on the maximum length and drop height of piping Model Max Length Max Drop Height Add l Refrigerant 9k 12k 82 feet 33 feet 0 16 f...

Page 23: ...minute oil return will be decreased An oil trap should be installed every 20ft of vertical suction line riser CAUTION The outdoor unit is installed higher than the indoor unit Indoor unit Outdoor uni...

Page 24: ...t them on or change their direction after flaring See Fig 5 3 Pipe Reamer Point down Flare nut Copper pipe 4 Remove PVC tape from ends of pipe when ready to perform flaring work 5 Clamp flare form on...

Page 25: ...connecting refrigerant pipes be careful not to use excessive torque or to deform the piping in any way You should first connect the low pressure pipe then the high pressure pipe MINIMUM BEND RADIUS Wh...

Page 26: ...d electrical disconnect box mounted on an exterior wall near the condenser 6 Make sure to properly ground the air conditioner 7 Every wire must be firmly connected Loose wiring can cause the terminal...

Page 27: ...t 3 Connect the u lugs to the terminals Match the wire colors labels with the labels on the terminal block Firmly screw the u lug of each wire to its corresponding terminal Refer to the Wiring Diagram...

Page 28: ...separate manual When you have finished installing all indoor air handlers proceed to installation of the outdoor unit Complete installation instructions and startup procedures are given in the outdoor...

Reviews: