background image

11 


B

URNER CLEANING


Ring Grates and Top Grates 

TIP: Clean spills as soon as possible to prevent sticking and build up. 


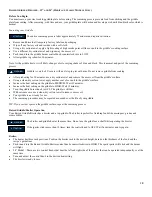
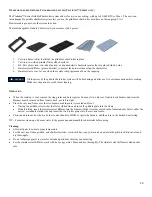
When burner is cool, remove the ring grate, top grate and center filler grate (30” models only).  


Wash in hot, soapy water. Rinse well and dry thoroughly to prevent rusting.  


Handle gently to prevent nicks/chips, which can lead to rusting 

TIP: If you have a nick or chip you can season the area to prevent rusting. Nicks or chips are not covered under warranty.   


Put corn oil or other high smoke point oil on a paper towel and rub onto rusted area. 


Wipe away excess oil and replace the part on the range. 

Do not submerge the burner grates in water for extended periods of time. Prolonged exposure to moisture may cause 
rusting. 


For heavy soiling, use a commercially available oven cleaner. Follow the cleaner manufacturer’s instructions.   

Make sure the cleaning chemicals do not contact any stainless steel or painted surface on your appliance. 


Reinstall grates in cooktop and make sure they are seated properly, and do not move unsteadily from side to side.


Burner Heads  

Burner head locations are specific to the valves on the front of the unit.  If burner heads are removed for cleaning or 
other purposes, they must be re-installed in the same location they were removed from.  Failure to do so may result 
in a burner that will not light or possibly have a high flame. 


TIP: Clean spills as soon as possible to prevent sticking and build-up, and to keep the burner ports clear. 


For fresh spills, make sure burner is cool and clean with a cloth and hot water. 

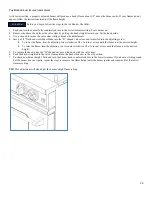
If needed, the burner head can be removed for cleaning: 


When cool, remove the ring grate and top grate. 


Lift the burner head up and slide the burner head unit including the venturi tube up and slightly toward the back of the rangetop so 
it clears the metal bar. 


Disconnect the orange igniter wire from its connector. 


Gently clean the exterior of the burner head with warm, soapy water. DO NOT submerge the burner head in water.  Rinse well 
and dry thoroughly. 


If the burner ports are clogged, use a push pin, safety pin or other metallic device to carefully clear the hole. Do NOT use a 
toothpick or any object that could become stuck in the hole. 


Replace the burner head by sliding the burner head unit underneath the metal bar; be sure the air shutter of the venturi tube slides 
over and is centered on the gas valve jet.  


Reconnect the orange igniter wire to the connector. 


Set the burner head in place. 


Replace the top grate and ring grate. 
 

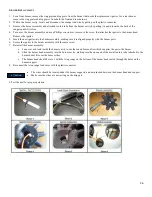
If the igniter wire is wet, you will hear clicking and the burner will not ignite. Turn the burner off, wait and try again 
later.  It will light after drying.  
Burner might ignite but clicking may continue until igniter dries. 


CAUTION 

ATTENTION 

ATTENTION 

ATTENTION 

Summary of Contents for Heritage Classic

Page 1: ...1 USE CARE MANUAL Rangetops RNB Heritage Classic Platinum...

Page 2: ...our building Immediately call your gas supplier from a neighbor s phone Follow the gas supplier s instructions If you cannot reach your gas supplier call the fire department Installation and service m...

Page 3: ...rds in the industry specifically to meet the needs of the world s most demanding chef you From simmering to saut ing these versatile rangetops provide the flexibility you need in any cooking applicati...

Page 4: ...his manual before leaving your residence Mail the completed checklist to Warranty Department Prizer Painter Stove Works Inc 600 Arlington Street Reading PA 19611 or Fax 610 376 2596 NOTE ALL RANGETOPS...

Page 5: ...l injury or death Do not store gasoline aerosol cans sealed containers or any flammable vapors and liquids in the vicinity of this or any other appliance If You Smell Gas Do not try to light any appli...

Page 6: ...if your appliance is equipped with a high shelf During heavy or continued use this shelf may become hot Do not place combustible materials or plastics on this shelf Do not sit stand or climb on any p...

Page 7: ...ward so they do not extend over adjacent burners or the front of the rangetop to reduce the risk of burns igniting flammable materials and spillage After use do not touch the rangetop surface until co...

Page 8: ...ckaging Do not remove zip ties beneath the burners These are needed to hold the igniter wires in place Wash all removable parts including ring grates and top grates in hot soapy water Rinse well and d...

Page 9: ...sassembly note the location of each burner If a burner is replaced in the wrong position it may not function correctly Become familiar with the location of your burners Below are the standard burner c...

Page 10: ...surface At the HIGH setting flames should appear as a defined cone with a dark blue center and light blue outside Some yellow orange flame may be seen depending on the type of gas and the supply line...

Page 11: ...from Failure to do so may result in a burner that will not light or possibly have a high flame TIP Clean spills as soon as possible to prevent sticking and build up and to keep the burner ports clear...

Page 12: ...arate wok ring TIP For best results use your rangetop s highest BTU rated burner for stir frying which are located in the front of the rangetop When burner is cool remove the ring grate from your sele...

Page 13: ...ack This is normal and part of the seasoning process Griddle is very hot Use care with next steps to prevent burns Do not remove griddle from cooktop After 30 minutes at 300 F use a dry cotton towel a...

Page 14: ...e seasoning process To prevent rust do NOT allow your griddle to stand without a fresh coating of oil Check the grease tray after each use to prevent overflowing PORCELAIN COATED CAST IRON GRIDDLE FOR...

Page 15: ...ell gas before the broiler lights This is normal After ignition turn the charbroiler control knob to adjust the flame to the desired height Do NOT put your face or hair near the charbroiler Charbroile...

Page 16: ...e re apply high smoke point oil like corn oil with a dry cotton cloth Wait an additional 30 minutes Turn French Top burner control knob to OFF While griddle is hot using extreme care remove excess oil...

Page 17: ...wel Never flood a hot French Top ring or surface with cold water This may cause the French Top s steel plates to crack or warp and will void your warranty If you choose to remove and wash your French...

Page 18: ...another coat of corn oil to the griddle s surface Increase the heat setting on the griddle to MEDIUM Wait 15 minutes Increase the heat setting on the griddle to HIGH Wait 15 minutes Turn the griddle b...

Page 19: ...er Cleaning Broiler racks Allow the broiler rack and attached grease pan to cool to room temperature Carefully remove the rack and grease pan Discard the grease and wash the rack assembly in hot soapy...

Page 20: ...s cool remove the ring grates and burner grates from any two adjacent front to back burners and set aside Burners must be removed from front to back not left to right Place the cast iron frame over th...

Page 21: ...s With each use Do not submerge in water for extended periods as this may cause rusting Do NOT allow commercial oven cleaner to touch painted or stainless steel surfaces Burner Ports Cast Iron Use a p...

Page 22: ...less steel French Top Wipe surfaces with warm wet cloth Dry with a cotton towel Apply a light coat of corn oil or high smoke point oil As needed Make sure the French Top always has a light coat of oil...

Page 23: ...e correct location Burner ignites clicking sound does not stop Burners are wet Burner setting too low Air draft flowing over cooktop Electrode wires not properly connected Electric plug not in grounde...

Page 24: ...ped blue flames However on some larger burners 22 000 BTU or 25 000 BTU the cones are close together and blend into one another The flame should be almost all blue If your flames do not appear follow...

Page 25: ...ve stem and is inserted into the adjusting screw To lower the flame turn the adjusting screw clockwise 1 8 of a turn at a time until the flame is at the desired height To raise the flame turn the adju...

Page 26: ...the burner assembly making sure it is aligned properly with the burner ports 6 Secure the igniter to the burner assembly with the same screw 7 Reinstall the burner assembly a Lean over and look insid...

Page 27: ...htning corrosive atmosphere loss of electrical power to the Product for any reason or other conditions beyond Prizer Painter s control Damage or repairs caused by alteration for outdoor use Damage or...

Page 28: ...l cover reasonable labor and material costs for repair or replacement service of a functional component during the applicable Warranty period Such repair or replacement service must be performed by a...

Page 29: ...ubstantive warranty rights and other claims will be the law of the state in which you purchased your Prizer Painter Product Any court having jurisdiction may enter judgment on the arbitration award 8...

Page 30: ...elephone ____________________________________ Company _________________________________ Dealer _______________________________________ Telephone ________________________________ CHECK ALL THAT APPLY A...

Reviews: