P/N 751001 Rev 1
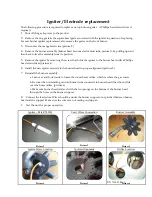
Igniter / Electrode replacement
The following procedure is required to replace any top burner igniter. A Phillips head screwdriver is
required.
1.
Shut off the gas & power to the product.
2.
Remove the ring grate & the square bowl grate associated with the igniter in question of replacing.
For rear burner igniter replacement, also remove the grates on the front burner.
3.
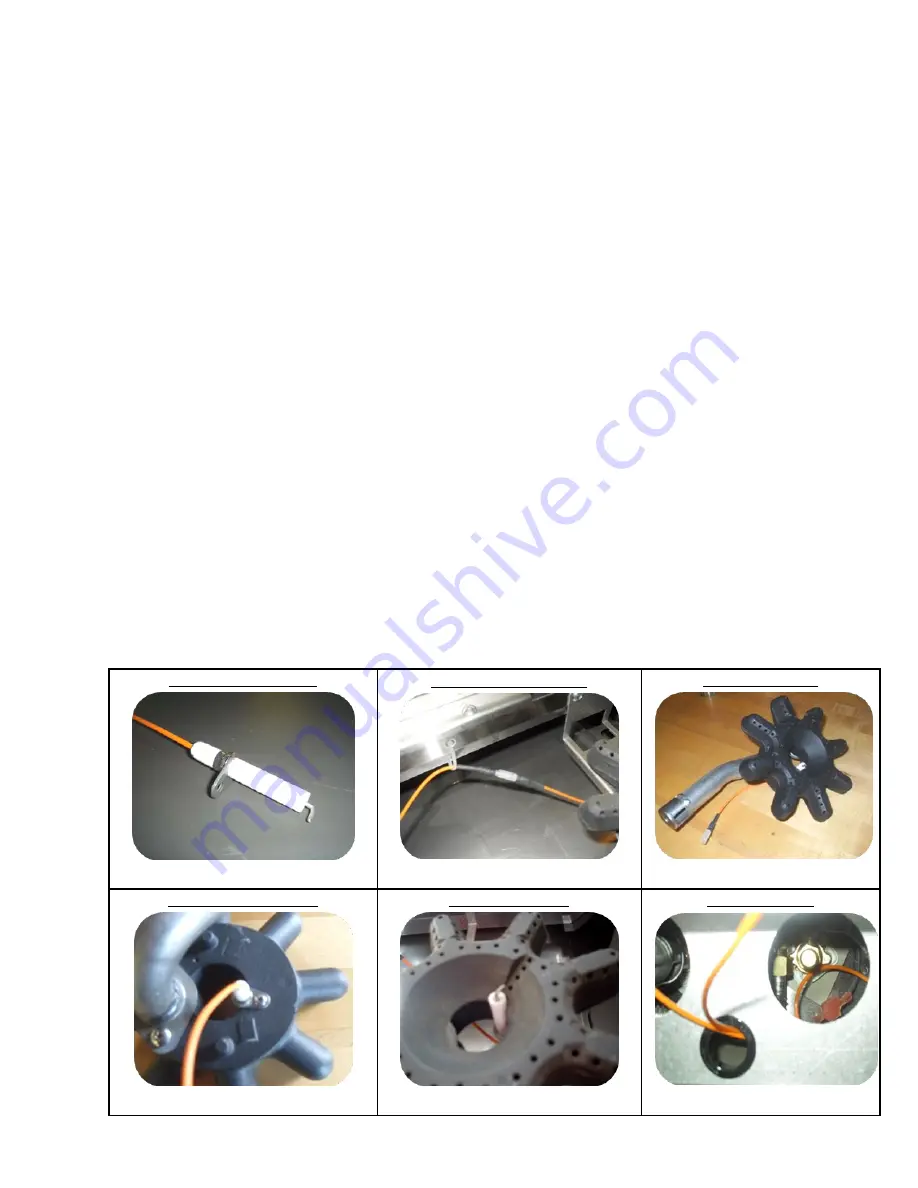
Disconnect the orange lead wires (picture 2)
4.
Remove the burner assembly (burner head & connected venturi tube, picture 3) by pulling upward
then back to free the assembly from its position.
5.
Remove the igniter by removing the screw that holds the igniter to the burner head with a Phillips
head screwdriver (picture 4).
6.
Install the new igniter securely to the burner head in proper alignment (picture 5).
7.
Reinstall the burner assembly.
a. Lean over and look inside to locate the round brass orifice, which is where the gas enters.
b. Be sure when reinstalling venturi (burner tube connected to burner head) that the end fits
over the brass orifice. (picture 6)
c. Make sure burner head sits level with the two prongs on the bottom of the burner head
through the holes on the burner support.
8.
Connect the lead wires. Wires should be under the burner supports, not pinched between burner
head and the support. Make sure the wires are not resting on drip pan.
9. Test the unit for proper operation.
Igniter – Part # 741801
Picture 1
Lead Wires Connection
Picture 2
Burner Assembly
Picture 3
Igniter Screw Location
Picture 4
Igniter Alignment
Picture 5
Orifice Location
Picture 6


