- 11 -
POSITIONING
POSITIONING
A rolling lift jack, air sled, or pallet jack should be used for positioning the unit. Do not push against the edges or sides of the unit in
an attempt to slide it into position. Although all metal parts are deburred during manufacture, serious injury could occur if the unit
were to move suddenly while being positioned by hand. We recommend you use gloves during installation process. Do not use the
oven door handle as a “pull.” Pushing or pulling the unit increases the possibility of damage to the legs and floor.
LEVELING
For optimum performance, (particularly in baking), the range must be leveled by the leveling bullet legs installed in the range by
screwing the bullet in or out.
A carpenter-type level should be placed on the oven rack, and the unit should be leveled side-to-side, front-to-back, and diagonally.
NOTE:
Installing this range on a combustible surface without legs will void UL/cUL classification.
GAS CONNECTION
The gas supply line must be the same size or larger than the gas inlet on the unit. This unit has a ½” or ¾” NPT inlet accessed from the
back of the unit. We recommend the gas inlet should be approximately ¼ “ larger than the NPT inlet (see page 12 for more
information). Sealants used on all pipe joints must be resistant to LP gas. Any openings in the wall behind the unit, or the floor
beneath must be sealed.
1. An installer-provided manual shut-off valve must be installed in the gas service line ahead of the appliance. The shut-off valve must
be in a position where it can be accessed quickly in the event of an emergency.
2. All heavy-duty cooking equipment must have a pressure regulator on the incoming service line for safe and efficient operation.
Service pressure may fluctuate due to local demand. An external regulator is not required on the unit, as a regulator is built in to each
unit at the factory. Under no condition should the factory-installed regulator be by-passed.
This unit was constructed for use with either natural or propane (LP) gas. Verify that the unit and the incoming gas supply are
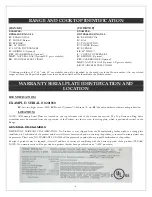
compatible by checking the rating plate label, located on the left side of the unit under the burner grate. The correct regulator, valves,
and orifices are installed at the factory for natural/LP gas. See the following section, titled "GAS CONVERSION," for detailed
conversion instructions, if required.
Incoming line pressure should be checked with a manometer. The correct operating manifold pressure for natural gas is 5.0" WC; for
Propane (LP) gas, 10.0" WC. Incoming line pressure upstream of the regulator should be 1" WC higher than the correct operating
manifold pressure. The regulator used on this unit will withstand a maximum input pressure of 1/2 psi, (12" WC). If the incoming line
pressure is higher than this maximum rating, a step-down regulator is required upstream of the unit's factory-installed regulator.
The appliance and its individual shut-off valve must be disconnected from the gas supply piping system during any pressure testing of
the homes’ gas line system at pressures in excess of 1/2 psig, (3.5kPa).
The appliance must be isolated from the gas supply piping system by closing its individual shut-off valve during any testing of the
homes’ gas system at pressures equal to or less than 1/2 psig, (3.5kPa).
3. Rigid connections: Incoming gas is brought from the inlet pipe at the rear of the unit to the pressure regulator, then through the
upper manifold for distribution. The only connection necessary is from the service line, through the installer-supplied shut-off valve, to
this inlet pipe.
Be sure to double check any installer-supplied pipes and fittings, and/or blow compressed air through them to clean out dirt particles,
threading chips, or other foreign matter before connecting the unit to the service line. Such particles will clog orifices when gas pressure
is applied.
Service to clean such clogs is not covered by the warranty.
Check all gas connections for leaks using a soapy solution before lighting any pilots.
DO NOT USE AN OPEN FLAME TO
CHECK FOR LEAKS!
Using an open flame to check a new connection is not only dangerous, but it will also miss small leaks that a
soapy solution would detect.
4. Flexible connections: If the unit is to be installed with flexible couplings and/or a "quick-disconnect," the installer must use a
commercially approved AGA Design Certified flexible connector of at least 1/2" NPT, in compliance with ANSI Z21.41.
In Canada, a connector complying with CAN 16.10 - 88, and a quick disconnect device complying with CAN 16.19M - 79 must be
installed with a strain relief device to guard against the transmission of strain to the connector.
5. Air shutter adjustments are the responsibility of the installer, not service.

