background image

CCT/COLOR CONTROLLER SERIES

TN-5050A-120-24-RG

B

+

5050W

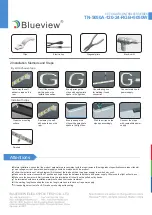
2.Installation Methods and Steps

By self adhesive tape

Install with clips

Peel away the self 

adhesive tape on the 

rear. 

Clean the mounting 

surface

Finished

Peel away the self 

adhesive tape on the 

rear.

Evenly arrange the 

strips with appropriate 

space in the light box.

Stick the strips on the 

signage accordingly

Connect the strips 

with compatible power 

supply

Cut off the excess 

part based on the 

installation position.

Connect main line to 

power supply.

Evenly arrange the 

strips with appropriate 

space in the light box

Use soldering iron 

for welding if need 

connection.

Attentions

Clips

Electric iron

Diagonal pliers

Electric drill

Before installation, check that the product parameters are consistent with the requirements (Seeing product specificationsor product labels) 

Load voltage, current, power and power supply should be matched with the product.

Follow the instructions of wiring diagram (first connect the load and then the power supply) to avoid short circuit.

Make sure the correct connection of positive and negative poles between led module and power supply. Otherwise, the light will not be on.

Make sure the power cord firmly screwed into the terminal and it should not be pulled out by hands.

The terminal should have insulation,waterproof and anti-corrosive treatment.

If the working length exceeded the max run length, make sure to have extra power supply.

If it needs higher current of a LED, make sure having extra cooling.

Summary of Contents for TN-5050A-120-24-RGB+5050W

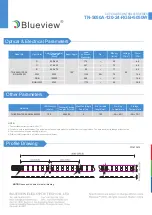
Page 1: ... cuttable every 10cm 3 94 for great flexibility 3 Create rich color changing effect via controller 4 Long lifespan with great lumen maintenance 5 Multiple specifications available and customer settings can be achieved decorative lighting cove lighting etc IP22 120 4yrs 24V Installation Fix by 3M self adhesive tape 5050 ...

Page 2: ...20 172 72 36 17 41 59 341 80 1136 590 1712 620 625 515 520 460 470 3000 100000 5363 R G B WW RGB RGB WW Beam Angle 20 60 20 70 Working Temperature Storage Temperature NOTE 1 Test environment temperature 25 2 C 2 The above data is typical values The actual data of each single product may differ from the typical values The data is subject to change without notice 3 The luminous flux is tested with s...

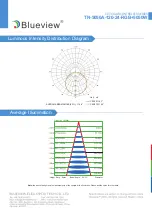
Page 3: ...istribution Diagram AVERAGE BEAM ANGLE 50 114 6 C0 180 114 1 Unit cd C90 270 115 2 Average Illumination Flux Out 1214lm Height Eavg Emax Beam Angle 114 15 Diameter Note the above two figures are measurements of the sample with all colors on Please ask the sales for other data ...

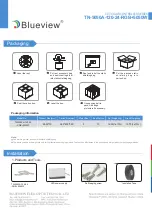
Page 4: ... 4 5 6 7 2 3 Model No 5000 10 550 400 340 5 10 12 45 1 10 13 75 1 10 Product Size mm Carton Size mm Meter Reel Reel Carton Net Weight kg Gross Weight kg Packaging information Five meters per reel packed in the static shielding bag The above quantity and weight are only for the illustrated packaging method There will be differences in the quantity and weight with other packaging methods Note 1 Prod...

Page 5: ...Electric iron Diagonal pliers Electric drill Before installation check that the product parameters are consistent with the requirements Seeing product specificationsor product labels Load voltage current power and power supply should be matched with the product Follow the instructions of wiring diagram first connect the load and then the power supply to avoid short circuit Make sure the correct co...

Page 6: ... Remove bad connection point Replace a new power supply Please follow the instructions Power supply circuit excessive consumption Excessive quantities in series connection Switching power supply failure Wrong Installation or use of products Reasons No electric supply Solutions Do not disassemble or retrofit the light Do not touch the surface of the light with a sharp object Do not do live line wor...

Reviews: