8
9
EN
EN
Placing Drip Tray into Unit
1. Insert Drip Tray into bottom of Unit
2. Cook with the Drip Pan in place for easy clean-up.
Placing Mesh Basket (Crisper Trays) into unit
1. Place Crisper Trays into Unit by sliding through the side grooves and onto the back lip.
2. Place Crisper Trays closer to the top heating element for faster cooking and added crisp.
3. Inserting Crisper Trays (always use oven mitts when oven is hot).
Removing Round Basket (Baking Cage)
& Rotisserie Spit from Unit
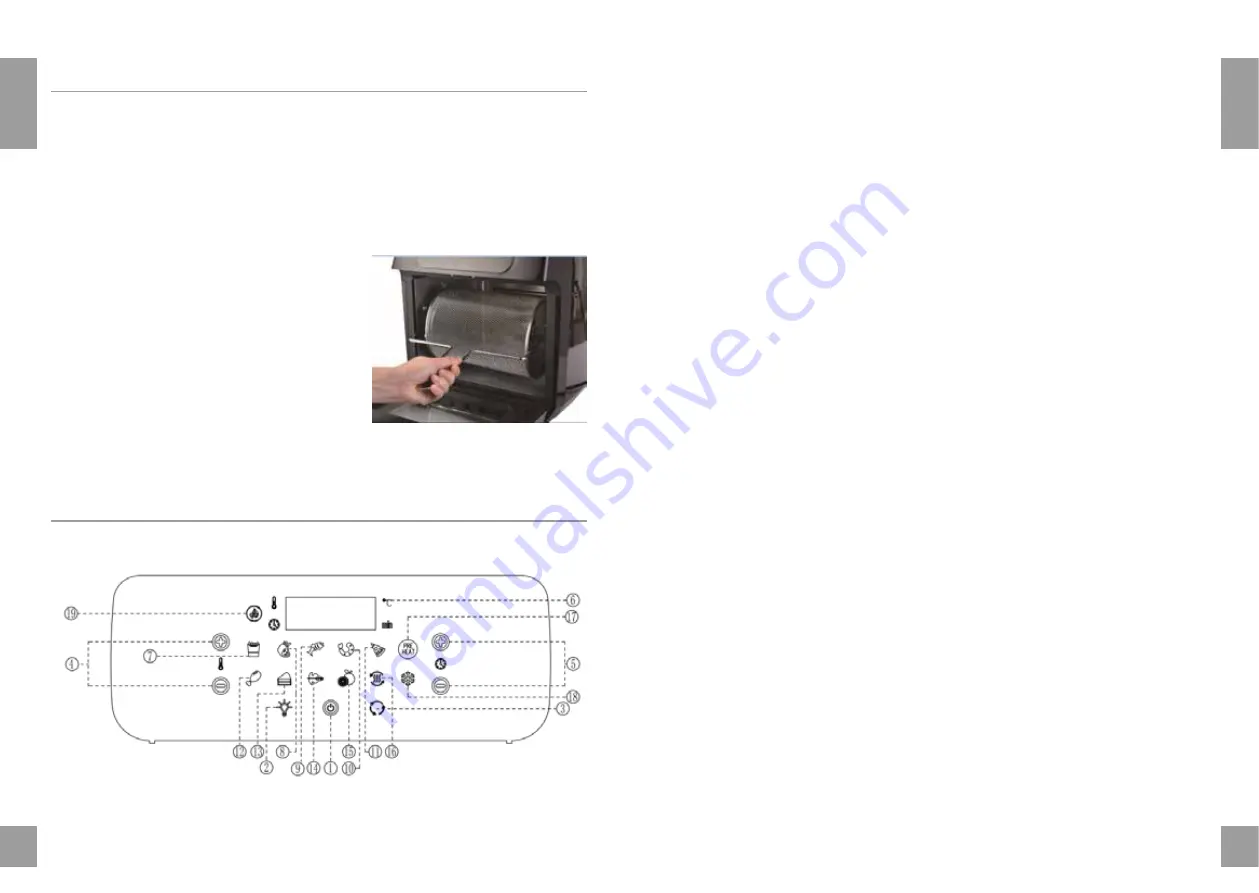
1. Open the door of the Unit to pause cooking cycle or
turn unit off by pressing the power button.
2. Insert Rotisserie Fetch Tool (handle tool) beneath
the rotisserie shaft.
3. Lift the right side of the rotisserie Fetch Tool at a
slight angle to clear the bracket, then shift to the
right until the left side of the shaft slides out of the
rotisserie shaft socket.
4. Carefully remove the Round Basket or Rotisserie
Spit from the Unit.
1. Power/Start-Stop Button
Once the Unit is plugged in,the Power Button will light up.
Selecting the Power Button once will cause the full panel to be illuminated. Selecting the Power Button
a second time will activate the cooking process at the default temperature of 185ºC and time of 15
mins..
Selecting the Power Button at any time during the cooking process will shut down the Unit, causing the
display to go dark immediately the running light to go dark within 30 secs.
The fan will continue running for 30 secs.to cool down the Unit.
2. Internal Light
Selecting this button will help you check cooking progress while Unit is in operation.
NOTE
: Opening the door during the cooking process will pause the Unit. Internal light will illuminate if
doors open.
3. Rotation Button
Select this button when cooking anything using the Rotisserie Mode. Function can be used with any
preset. The icon will blink while in use.
4. Temperature Control Buttons
5. Time Control Buttons
These buttons enable you to select exact cooking time to the minute, from 1 min.to 90 mins. in all
modes except below:
Dehydrating time 30-min.intervals and ranging from 2-24 hrs.
6. LED Digital Display
The Digital Numeric Display will switch between Temperature and Time Remaining during the cooking
process.
7-18. Cooking Presets
Selecting any Preset Button sets the Time and Temperature to the Preset’s default value.
The cooking process starts automatically five secs. after the preset has been selected, or the Power
Button can be pressed after the Preset Button to start the Oven immediately.
You may override these presets with Time and Temperature Buttons.
8.Fan icon
This icon will blink in sequence while cooking is in progress and continue blinking up to 30 secs.once
you shut Unit down.
Using the Accessories
Using the Digital Control Panel
Summary of Contents for GLA-1006A
Page 62: ...122 123 Notes Notes ...


